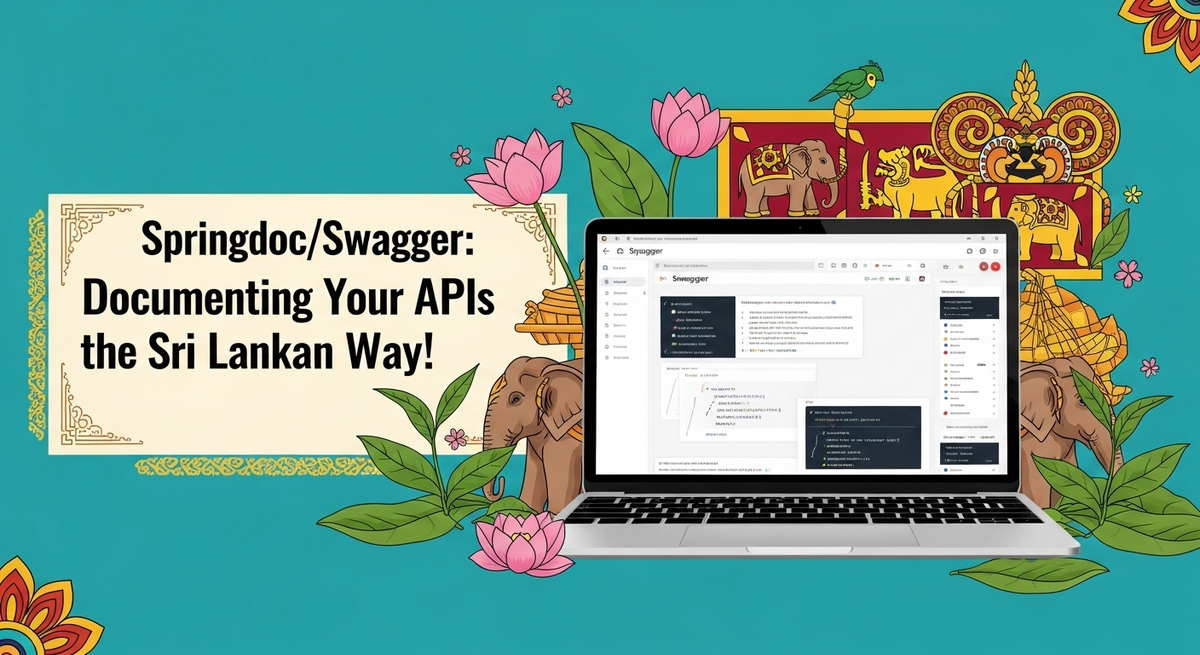
Springdoc/Swagger - API Documentation Sinhala Guide | Spring Boot | SC Guide
කෝහොමද කට්ටියට? ඉතින්, Software Engineering ලෝකේ අපි හැමෝම දන්නවා නේද, හොඳට දුවන Code එකක් විතරක් තිබිලා මදි කියලා. ඒක අනිවාර්යයෙන්ම තව කෙනෙක්ට, නැත්තම් අපිටම පස්සේ කාලෙකදි තේරුම් ගන්න පුළුවන් වෙන්න ඕනේ. විශේෂයෙන්ම API develop කරනකොට මේක හරිම වැදගත්. මොකද API කියන්නේ එක Application එකක් තව Application එකක් එක්ක කතා කරන පාලම වගේනේ.
හැබැයි ඉතින්, මේ API ටික හරියට document කරලා නැත්තම්, වැඩේ හරියටම පාරේ යන බස් එකක් වගේ, එතකොට තේරෙන්නේ නැති ඒවා පාරේ ගිහින් අන්තිමට විනාසයි. ඒ නිසයි හොඳ API documentation එකක් කියන්නේ අපි develop කරන system එකක හදවත වගේ වෙන්නේ. අද අපි කතා කරන්නේ Spring Boot project වලට API documentation add කරන්න පුළුවන් පට්ටම tool එකක් ගැන: ඒ තමයි Springdoc/Swagger.
මේකෙන් වෙන්නේ මොකක්ද? අපි ලියන API ටිකට පොඩි පොඩි annotations ටිකක් එකතු කරලා, ඒ ටික automatically ලස්සන, interactive documentation එකක් විදිහට generate කරගන්න පුළුවන් වෙන එක. ඒ කියන්නේ වැඩේ ගොඩක්ම ලේසි වෙනවා. එහෙනම්, අපි බලමු මේක හරියටම කොහොමද කරන්නේ කියලා, අපේම Sri Lankan accent එකට!
ඇයි API Documentation වැදගත් වෙන්නේ?
හිතන්න, ඔයා අලුත් project එකකට set වුණා කියලා. එතන already APIs ගොඩක් develop කරලා තියෙනවා. ඒත් ඒවා මොකුත් document කරලා නැහැ. එතකොට මොකද වෙන්නේ? අපිට හැම API එකකම code එක ඇතුළට ගිහින් බලන්න වෙනවා, "මේකෙන් මොකක්ද වෙන්නේ? මේකට මොන වගේ data එකක්ද යවන්න ඕනේ? මොන වගේ response එකක්ද එන්නේ?" වගේ ප්රශ්නවලට උත්තර හොයාගන්න. මේක හරියට පාරේ යනකොට Google Maps නැතුව යනවා වගේ වැඩක්. කොච්චර වෙලාවක් නාස්ති වෙනවද නේද?
API documentation වැදගත් වෙන්න තියෙන ප්රධානම හේතු ටිකක් බලමු:
- හොඳ Collaboration එකක්: Team එකේ ඉන්න හැමෝටම API එකක් ගැන එකම අවබෝධයක් තියෙනවා. Frontend develop කරන කෙනාට, Mobile app develop කරන කෙනාට, QA team එකට හැමෝටම වැඩේ ලේසි වෙනවා.
- අලුත් කට්ටියට ලේසියි: Project එකට අලුතින් එන developer කෙනෙක්ට ඉක්මනින්ම system එක ගැන අදහසක් ගන්න පුළුවන්. Onboarding time එක ගොඩක් අඩු වෙනවා.
- Debugging වලට: API එකක issue එකක් ආවොත්, documentation එක බලලා ඉක්මනින්ම ගැටලුව identify කරගන්න පුළුවන්.
- Clientsලට: සමහර වෙලාවට අපේ APIs clientලාට දෙන්න වෙනවා. එතකොට, ලස්සනට documentation එකක් තිබ්බොත්, එයාලට අපේ API use කරන්න ගොඩක් ලේසියි. ඒක අපේ system එකේ professionalism එකත් පෙන්නනවා.
- Future Proofing: අද අපි develop කරන API එකක්, හෙට තව කෙනෙක් use කරන්න පුළුවන්. හරියට document කරලා තිබ්බොත්, පස්සේ කාලෙකදී ඒක maintain කරන එකත් ලේසියි.
ඉතින්, මේ හැම දේටම විසඳුමක් විදිහට තමයි Springdoc/Swagger වගේ tools එන්නේ.
Springdoc/Swagger කියන්නේ මොකක්ද?
මුලින්ම බලමු මේ Swagger කියන්නේ මොකක්ද කියලා. Swagger කියන්නේ API design කරන්න, build කරන්න, document කරන්න, consume කරන්න support කරන tools set එකක්. ඒක OpenAPI Specification (OAS) එක මත තමයි ගොඩනැගිලා තියෙන්නේ. OAS කියන්නේ RESTful APIs describe කරන්න තියෙන standard format එකක්.
එතකොට Springdoc කියන්නේ මොකක්ද? Springdoc කියන්නේ Spring Boot project වල OpenAPI 3 specification එක automatically generate කරන්න උදව් කරන library එකක්. මේකෙන් වෙන්නේ, අපි Spring Boot project එකේ ලියන API Controllers, Models වලට අදාල information ටික read කරලා, ඒ ටික OpenAPI format එකට හදලා, ඒක interactive Swagger UI එකකින් පෙන්නන එක. ඒ කියන්නේ අපි අතින් කිසිම YAML file එකක් ලියන්න ඕනේ නැහැ. වැඩේ auto!
මේකේ තියෙන පට්ටම ගතිය තමයි, අපි API එක update කරනකොට documentation එකත් automatically update වෙන එක. ඒ කියන්නේ manual work එකක් නැහැ, වැරදීම් වෙන්න තියෙන ඉඩත් අඩුයි.
Spring Boot එකට Springdoc/Swagger එකතු කරගමු!
දැන් අපි බලමු මේ වැඩේ කොහොමද practical විදිහට කරන්නේ කියලා. අපි හිතමු අපිට තියෙනවා Spring Boot REST API project එකක් කියලා. මුලින්ම අපිට Springdoc dependency එක project එකට add කරගන්න වෙනවා.
Maven Project එකක් නම්:
<dependency>
    <groupId>org.springdoc</groupId>
    <artifactId>springdoc-openapi-starter-webmvc-ui</artifactId>
    <version>2.5.0</version> <!-- Latest stable version එක බලලා දාන්න -->
</dependency>
Gradle Project එකක් නම්:
implementation 'org.springdoc:springdoc-openapi-starter-webmvc-ui:2.5.0' // Latest stable version එක බලලා දාන්න
මේ dependency එක එකතු කරලා project එක build කරාම, Springdoc library එක auto configure වෙනවා. වැඩේ ගොඩක් ලේසියි නේද? වෙනම config file එකක්වත් ඕනේ නැහැ. දැන් ඔයාට පුළුවන් project එක run කරලා, browser එකේ මේ URL එකට යන්න:
http://localhost:8080/swagger-ui.html
(ඔයාගේ application එක run වෙන්නේ default port 8080 එකේ නම්)
එතකොට ඔයාට ලස්සන Swagger UI එකක් පෙනෙයි, ඔයාගේ project එකේ තියෙන හැම API එකක්ම ඒකේ list වෙලා තියෙයි. එතනින් ඔයාට පුළුවන් API එක test කරන්නත්. පට්ටම නේද?
Configuration ටිකක්
අපිට පුළුවන් application.properties හෝ application.yml file එකේ පොඩි changes ටිකක් කරලා documentation එක තව personalise කරන්න. උදාහරණයක් විදිහට:
# application.yml
springdoc:
  swagger-ui:
    path: /swagger-ui.html # Default path එක වෙනස් කරන්න පුළුවන්
    operationsSorter: method # Operations sort කරන විදිහ
    tagsSorter: alpha # Tags sort කරන විදිහ
  api-docs:
    path: /api-docs # OpenAPI JSON/YAML path එක
  info:
    title: My Awesome API
    description: This is a sample API for demonstrating Springdoc.
    version: 1.0.0
    contact:
      name: SC Dev Team
      url: https://example.com/sc-dev-team
      email: [email protected]
    license:
      name: Apache 2.0
      url: https://www.apache.org/licenses/LICENSE-2.0.html
මේකෙන් වෙන්නේ ඔයාගේ documentation එකට පොඩි නමක්, description එකක්, version එකක් වගේ information ටිකක් එකතු වෙන එක. ඒ වගේම contact details, license details වගේ දේවල් add කරන්නත් පුළුවන්.
API ටික ලස්සනට ලියමු! (Annotations)
Springdoc auto generate කරන documentation එක ගොඩක් වෙලාවට අපිට ඇති. හැබැයි තව detail විදිහට documentation එක හදන්න ඕනේ නම්, අපිට OpenAPI annotations ටිකක් use කරන්න පුළුවන්. මේවා io.swagger.v3.oas.annotations package එකේ තියෙන්නේ.
උදාහරණයක් විදිහට, අපි සාමාන්යයෙන් Spring Boot REST Controller එකක් ලියන විදිහක් බලමු. ඊට පස්සේ ඒකට annotations එකතු කරන්නේ කොහොමද කියලා බලමු.
// Simple Controller Without Annotations
@RestController
@RequestMapping("/api/products")
public class ProductController {

    @GetMapping("/{id}")
    public String getProductById(@PathVariable Long id) {
        return "Product " + id;
    }

    @PostMapping
    public String createProduct(@RequestBody String productDetails) {
        return "Product created: " + productDetails;
    }
}
දැන් අපි මේකට Swagger annotations එකතු කරමු:
import io.swagger.v3.oas.annotations.Operation;
import io.swagger.v3.oas.annotations.Parameter;
import io.swagger.v3.oas.annotations.media.Content;
import io.swagger.v3.oas.annotations.media.Schema;
import io.swagger.v3.oas.annotations.responses.ApiResponse;
import io.swagger.v3.oas.annotations.responses.ApiResponses;
import io.swagger.v3.oas.annotations.tags.Tag;
import org.springframework.web.bind.annotation.*;

@RestController
@RequestMapping("/api/products")
@Tag(name = "Product Management", description = "Operations related to product resources")
public class ProductController {

    @Operation(summary = "Get a product by its ID", description = "Retrieves details of a single product based on its unique identifier.")
    @ApiResponses(value = {
            @ApiResponse(responseCode = "200", description = "Product found successfully",
                    content = @Content(mediaType = "application/json",
                            schema = @Schema(implementation = Product.class))), // Product කියන්නේ ඔයාගේ Model class එක
            @ApiResponse(responseCode = "404", description = "Product not found"),
            @ApiResponse(responseCode = "500", description = "Internal server error")
    })
    @GetMapping("/{id}")
    public String getProductById(
            @Parameter(description = "ID of the product to be retrieved", required = true, example = "123")
            @PathVariable Long id) {
        return "Product " + id;
    }

    @Operation(summary = "Create a new product", description = "Adds a new product to the system.")
    @ApiResponses(value = {
            @ApiResponse(responseCode = "201", description = "Product created successfully",
                    content = @Content(mediaType = "application/json",
                            schema = @Schema(implementation = Product.class))),
            @ApiResponse(responseCode = "400", description = "Invalid input data"),
            @ApiResponse(responseCode = "500", description = "Internal server error")
    })
    @PostMapping
    public String createProduct(
            @io.swagger.v3.oas.annotations.parameters.RequestBody(description = "Details of the product to be created", required = true,
                    content = @Content(mediaType = "application/json",
                            schema = @Schema(implementation = Product.class)))
            @RequestBody String productDetails) {
        return "Product created: " + productDetails;
    }
}

// Sample Product Model (You would have your actual Product class)
// This is just for demonstration purposes related to @Schema
class Product {
    private Long id;
    private String name;
    private double price;

    // Getters and Setters
    public Long getId() { return id; }
    public void setId(Long id) { this.id = id; }
    public String getName() { return name; }
    public void setName(String name) { this.name = name; }
    public double getPrice() { return price; }
    public void setPrice(double price) { this.price = price; }
}
මේකේ තියෙන annotations ටික පොඩ්ඩක් බලමු:
- `@Tag`: Controller එකේ තියෙන operations ටික category කරන්න use කරනවා. උදාහරණයක් විදිහට "User Management", "Product Management" වගේ.
- `@Operation`: එක් එක් API endpoint එකේ description එක දෙන්න use කරනවා.
summaryඑකෙන් කෙටි විස්තරයක් දෙන්න පුළුවන්,descriptionඑකෙන් තව විස්තරාත්මකව දෙන්න පුළුවන්. - `@ApiResponses`: API එකකින් එන්න පුළුවන් different HTTP responses (200 OK, 404 Not Found, 500 Internal Server Error වගේ) document කරන්න මේක use කරනවා. එක් එක් response එකට අදාල
descriptionඑකක්,responseCodeඑකක්, එන data structure එක (schema) වගේ දේවල් සඳහන් කරන්න පුළුවන්. - `@Parameter`: Path variables, Query parameters, Header parameters වගේ දේවල් document කරන්න use කරනවා. ඒකේ
descriptionඑකක්, ඒකrequiredද නැද්ද,examplevalues වගේ දේවල් දෙන්න පුළුවන්. - `@RequestBody`: Request body එක document කරන්න use කරනවා. මෙතනත්
description,required,schemaවගේ දේවල් දෙන්න පුළුවන්. - `@Schema`: Models (POJOs) වල properties document කරන්න use කරනවා. මේක class එකටත්, ඒකේ fields වලටත් දාන්න පුළුවන්.
මේ annotations ටික හරියට use කරාම ඔයාගේ API documentation එක ගොඩක්ම clear වෙනවා. අනිත් developer කට්ටියටත් වැඩේ ගොඩක් ලේසි වෙනවා.
Tips & Tricks: වැඩේ තව ලේසි කරගන්න!
1. Security Configuration එකතු කිරීම:
අපේ API වලට security එකතු කරද්දි (JWT, OAuth2 වගේ), ඒකත් documentation එකේ පෙන්නන්න පුළුවන්. මේක Springdoc එක්ක ලේසියෙන් කරන්න පුළුවන්. @SecurityScheme annotation එක use කරලා globally define කරන්න පුළුවන්, ඊට පස්සේ @SecurityRequirement එකෙන් individual operations වලට apply කරන්න පුළුවන්.
import io.swagger.v3.oas.annotations.enums.SecuritySchemeType;
import io.swagger.v3.oas.annotations.security.SecurityRequirement;
import io.swagger.v3.oas.annotations.security.SecurityScheme;
// ... other imports

@Configuration
@SecurityScheme(
    name = "bearerAuth",
    type = SecuritySchemeType.HTTP,
    bearerFormat = "JWT",
    scheme = "bearer"
)
public class OpenApiConfig {
    // You can also define an OpenAPI bean here for more complex configurations
}

// In your controller:
@RestController
@RequestMapping("/api/secure")
@SecurityRequirement(name = "bearerAuth") // This applies security globally to this controller's operations
public class SecureController {

    @Operation(summary = "Get secure data")
    @GetMapping
    public String getSecureData() {
        return "This is secured data!";
    }
}
2. Multiple OpenAPI Definitions:
සමහර වෙලාවට අපිට Project එක ඇතුලේ different contexts වලට different API groups තියෙන්න පුළුවන්. උදාහරණයක් විදිහට Admin APIs ටිකයි, Public APIs ටිකයි වෙන් කරන්න ඕනේ නම්. Springdoc මේකටත් support කරනවා. @GroupedOpenApi bean එකක් define කරලා මේක කරන්න පුළුවන්.
import org.springdoc.core.models.GroupedOpenApi;
import org.springframework.context.annotation.Bean;
import org.springframework.context.annotation.Configuration;

@Configuration
public class MultipleApiGroupsConfig {

    @Bean
    public GroupedOpenApi publicApi() {
        return GroupedOpenApi.builder()
                .group("public")
                .pathsToMatch("/api/public/**")
                .build();
    }

    @Bean
    public GroupedOpenApi adminApi() {
        return GroupedOpenApi.builder()
                .group("admin")
                .pathsToMatch("/api/admin/**")
                .build();
    }
}
දැන් ඔයාට /v3/api-docs/public සහ /v3/api-docs/admin වගේ URLs වලින් separate documentation generate කරගන්න පුළුවන්. Swagger UI එකේ dropdown එකකින් group එක select කරන්නත් පුළුවන්.
3. Generating Static Documentation:
Production එකට deploy කරද්දි සමහර වෙලාවට interactive Swagger UI එක disable කරන්න ඕනේ වෙන්න පුළුවන්. ඒ වගේ වෙලාවට අපිට පුළුවන් OpenAPI JSON/YAML file එක generate කරලා, ඒක Postman වගේ tool එකකට import කරලා use කරන්න, නැත්තම් Redoc වගේ tool එකකින් static HTML documentation එකක් හදන්න.
මේ සඳහා, springdoc.swagger-ui.enabled=false සහ springdoc.api-docs.enabled=true වගේ settings දාලා, CI/CD pipeline එකේදී /v3/api-docs endpoint එකට request එකක් දාලා JSON file එක save කරගන්න පුළුවන්.
4. Versioning Your APIs:
ඔයාගේ API එකේ versions තියෙනවා නම් (v1, v2 වගේ), ඒක documentation එකේ පෙන්නන්නත් Springdoc support කරනවා. Versioning strategy එක අනුව මේක වෙනස් වෙනවා (Path versioning, Header versioning). Springdoc ඒ හැම එකටම හොඳට integrate වෙනවා.
අවසන් වචනය
ඉතින් කට්ටිය, දැක්කනේ Springdoc/Swagger කියන්නේ API documentation වලට කොච්චර පට්ට solution එකක්ද කියලා. Manual document කරන එකේ කරදරෙන් මිදිලා, automatic, interactive documentation එකක් හදාගන්න එකෙන් අපිට ගොඩක් වෙලාව ඉතුරු කරගන්න පුළුවන්. ඒ වගේම team එකේ productivity එක වැඩි වෙනවා, system එකේ maintainability එක වැඩි වෙනවා. හරියටම අපේ ගමේ පාරවල් දැන් develop වෙලා තියෙනවා වගේ, වැඩේ smooth!
මේක අදම ඔයාගේ project වලට try කරලා බලන්න. පොඩි ගැටලුවක් ආවොත්, එහෙම නැත්තම් මේ ගැන ඔයාට මොනවා හරි අදහසක් තියෙනවා නම්, පහලින් comment එකක් දාගෙන යන්න. අපි උදව් කරන්න ලෑස්තියි. තවත් මේ වගේ පට්ටම article එකකින් හම්බෙමු! එහෙනම්, හැමෝටම ජය වේවා!


