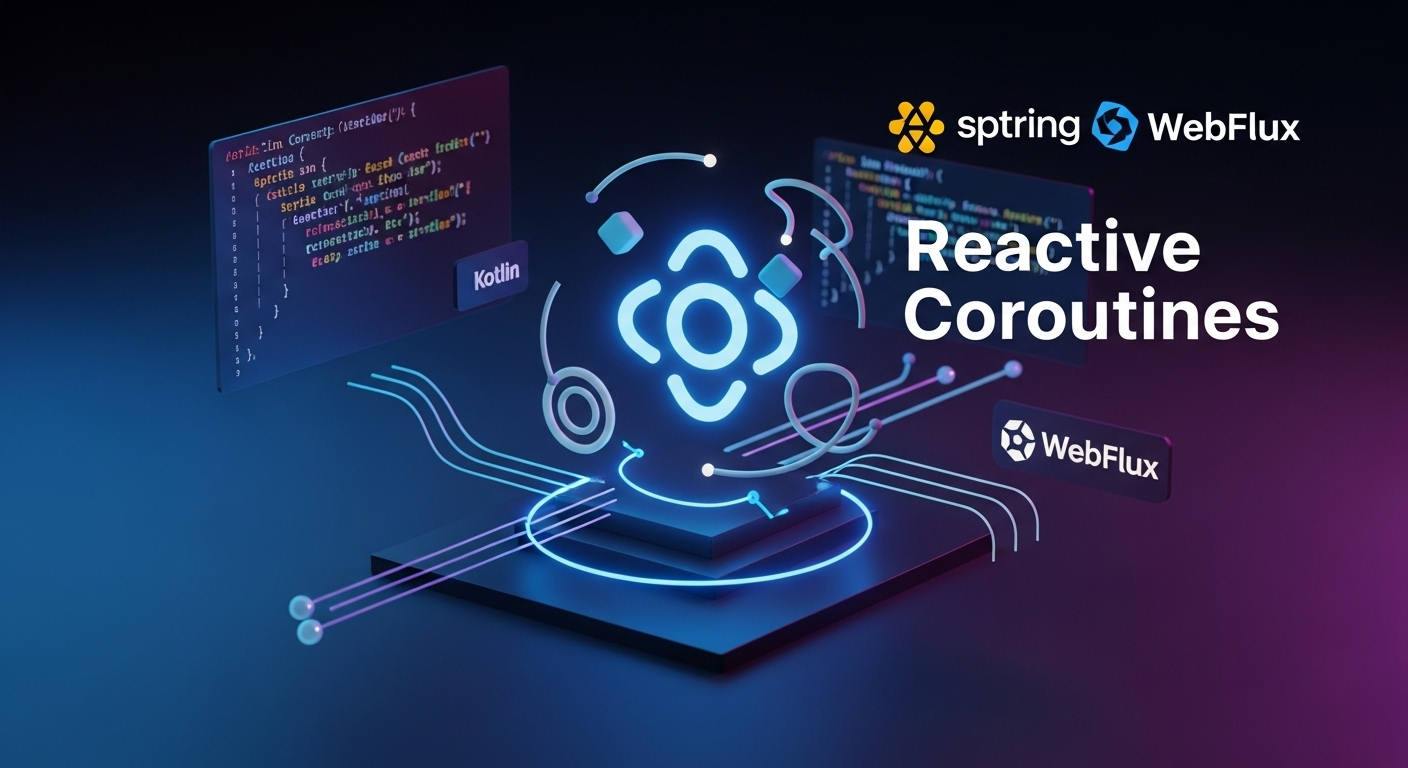
Spring Boot WebFlux හා Kotlin Coroutines: වේගවත් API හදමු! SC Guide
ආයුබෝවන් යාලුවනේ! කොහොමද ඔක්කොටම? ඔයාලා දන්නවනේ අද කාලේ, අපේ ඇප්ලිකේෂන්ස් වලින් අපි බලාපොරොත්තු වෙනවා සුපිරි වේගයක්. පොඩි ඩිලේ එකක් තිබුණත් කස්ටමර්ලා අකමැතියි. ඒකට තමයි Reactive Programming කියන සීන් එක එන්නේ.
Spring Boot කියන්නේ Backend Development වල රජ්ජුරුවෝ වගේනේ. මේ රජ්ජුරුවෝ Kotlin Coroutines එක්ක අත්වැල් බැඳගත්තම මොන වගේ මැජික් එකක්ද වෙන්නේ කියලා බලන්න තමයි අද අපි මේ කතා කරන්න යන්නේ. විශේෂයෙන්ම, Kotlin වල තියෙන Coroutines සහ Spring WebFlux කියන සුපිරි කොම්බිනේෂන් එකෙන් non-blocking APIs කොහොමද නියමෙටම හදාගන්නේ කියලා තමයි අපි මේ SC Guide එකෙන් කියලා දෙන්නේ.
සාමාන්යයෙන්, Traditional Blocking APIs වලදී, එක Thread එකක් HTTP Request එකක් එන හැම වෙලාවකම අලුතෙන් හදලා, ඒක ඩේටාබේස් එකකින් ඩේටා ගන්නකල් හරි, වෙන API එකකට කෝල් කරලා ඒ Response එක එනකල් හරි බ්ලොක් වෙලා (අඩපන වෙලා) තියෙනවා. මේකෙන් Resources ගොඩක් අපතේ යනවා වගේම, Application එකේ Scalability එකත් අඩු වෙනවා. ඒකට විසඳුමක් තමයි Coroutines එක්ක WebFlux කියන්නේ. එහෙනම් අපි බලමු මේක හරියටම වැඩ කරන්නේ කොහොමද කියලා.
කොරූටීන්ස් (Coroutines) කියන්නේ මොනවද?
සරලවම කියනවා නම්, Coroutines කියන්නේ Threads වලට වඩා ගොඩක් සැහැල්ලු (lightweight) ක්රමයක් Asynchronous Programming කරන්න. Thread එකක් කියන්නේ ඔපරේටින් සිස්ටම් එකකින් (Operating System) හසුරුවන දෙයක්. ඒක හදන්න, Context Switch කරන්න (එක Thread එකකින් තව Thread එකකට මාරු වෙන්න) CPU Resources ගොඩක් යනවා. ඒ වගේම Threads ගණනකට සීමාවක් තියෙනවා.
ඒත් Coroutines කියන්නේ Application Level එකේ හසුරුවන Concurrency Mechanism එකක්. ඒක හැසිරවීම ගොඩක් ලේසියි. එක OS Thread එකක් උඩ Coroutines දහස් ගණනක් වුණත් වැඩ කරන්න පුළුවන්. ඒක තමයි මේකේ තියෙන ලොකුම වාසිය. Coroutines Non-blocking විදියට වැඩ කරනවා කියන්නේ, ඔපරේෂන් එකක් ඉවර වෙනකල් බලාගෙන ඉන්නේ නැතුව, තව වැඩක් කරන්න CPU එක නිදහස් කරන එක.
Kotlin Coroutines වලදී, suspend කියන keyword එක තමයි මේ වැඩේට පාවිච්චි කරන්නේ. suspend function එකක් කියන්නේ blocking නොවී ටික වෙලාවකට වැඩේ නවත්වලා, ඒ operation එක ඉවර වුණාම ආයේ පටන් ගන්න පුළුවන් function එකක්. මේකෙන් අපිට Asynchronous කෝඩ් Sequential කෝඩ් වගේ ලියන්න පුළුවන්. ඒ කියන්නේ Callback Hell එකකින් නැත්නම් Future එකකින් එන සංකීර්ණ කෝඩ් වලින් මිදෙන්න පුළුවන්.
// සාමාන්ය blocking function එකක්
fun fetchDataBlocking(): String {
Thread.sleep(2000) // Thread එක block වෙනවා
return "Data"
}
// Coroutine suspend function එකක්
suspend fun fetchDataNonBlocking(): String {
kotlinx.coroutines.delay(2000) // Thread එක block වෙන්නේ නෑ, Coroutine එක suspend වෙනවා
return "Data"
}
ස්ප්රින් බූට් එක්ක කොරූටීන්ස්: ඇයි මේ කෝම්බිනේෂන් එක?
Spring Boot කියන්නේ Backend Development වලට නැතිවම බැරි Framework එකක්. ඒකේ Reactive Programming වලට ආපු අලුත්ම Framework එක තමයි Spring WebFlux. Spring WebFlux හදලා තියෙන්නේ Non-blocking Architectures වලට. ඒ කියන්නේ ඒක Requests ගොඩකට එක පාර හසුරුවන්න පුළුවන් විදියට තමයි නිර්මාණය කරලා තියෙන්නේ. ඒකේ Core Abstractions තමයි Mono (තනි item එකක්) සහ Flux (items ගොඩක්) කියන්නේ.
ඉතින්, Spring WebFlux එක්ක Kotlin Coroutines එකතු වෙද්දී තමයි නියම මැජික් එක වෙන්නේ. WebFlux වල තියෙන Mono සහ Flux කියන Reactive Types එක්ක Coroutines ඉතාම හොඳින් වැඩ කරනවා. Spring එකේ Reactive Stack එක Kotlin Coroutines වලට Seamlessly Integrate වෙන විදියට හදලා තියෙනවා. ඒ කියන්නේ ඔයාලට suspend function එකක් Controller එකකින් return කරන්න පුළුවන්, Spring එක ඒක ඉබේම Mono එකකට Convert කරනවා.
මේ Combination එකෙන් අපිට ලැබෙන වාසි තමයි:
- සරල Async Code:
Callback HellනැතිවAsynchronousකෝඩ්Synchronousකෝඩ් වගේම කියවන්න පහසු විදියට ලියන්න පුළුවන්. - කාර්ය සාධනය (Performance) සහ Scalability:
Threadsඅඩු ප්රමාණයක් පාවිච්චි කරලාRequestsගොඩකටHandleකරන්න පුළුවන් නිසා,Resource Utilizationඑක වැඩි වෙනවා වගේම,ApplicationඑකේScalabilityඑකත් වැඩි වෙනවා. - Reactive Programming වල වාසි:
Backpressure,Error Handling,CompositionවගේReactive Programmingවල තියෙන හැම වාසියක්මCoroutinesඑක්කම පාවිච්චි කරන්න පුළුවන්.
ප්රැක්ටිකල්: රිඇක්ටිව් එන්ඩ්පොයින්ට් එකක් කොරූටීන්ස් වලින් හදමු!
දැන් අපි බලමු කොහොමද Spring Boot WebFlux එක්ක Kotlin Coroutines පාවිච්චි කරලා Reactive REST API එකක් හදන්නේ කියලා. මේක කරන්න අපිට ඕනේ Kotlin, Spring Boot සහ Gradle නැත්නම් Maven.
Dependencies
මුලින්ම ඔයාලගේ build.gradle.kts (Gradle) නැත්නම් pom.xml (Maven) ෆයිල් එකට මේ Dependencies ටික add කරගන්න ඕනේ.
Gradle (build.gradle.kts):
dependencies {
    implementation("org.springframework.boot:spring-boot-starter-webflux")
    implementation("org.jetbrains.kotlinx:kotlinx-coroutines-reactor")
    implementation("org.jetbrains.kotlinx:kotlinx-coroutines-core")
    implementation("com.fasterxml.jackson.module:jackson-module-kotlin")
    implementation("org.jetbrains.kotlin:kotlin-reflect")
    implementation("org.jetbrains.kotlin:kotlin-stdlib-jdk8")
    testImplementation("org.springframework.boot:spring-boot-starter-test") {
        exclude(group = "org.junit.vintage", module = "junit-vintage-engine")
    }
    testImplementation("io.projectreactor:reactor-test")
}
Maven (pom.xml):
<dependencies>
    <dependency>
        <groupId>org.springframework.boot</groupId>
        <artifactId>spring-boot-starter-webflux</artifactId>
    </dependency>
    <dependency>
        <groupId>org.jetbrains.kotlinx</groupId>
        <artifactId>kotlinx-coroutines-reactor</artifactId>
        <version>1.7.3</version> <!-- නවතම Version එකක් පාවිච්චි කරන්න -->
    </dependency>
    <dependency>
        <groupId>org.jetbrains.kotlinx</groupId>
        <artifactId>kotlinx-coroutines-core</artifactId>
        <version>1.7.3</version> <!-- නවතම Version එකක් පාවිච්චි කරන්න -->
    </dependency>
    <dependency>
        <groupId>com.fasterxml.jackson.module</groupId>
        <artifactId>jackson-module-kotlin</artifactId>
    </dependency>
    <dependency>
        <groupId>org.jetbrains.kotlin</groupId>
        <artifactId>kotlin-reflect</artifactId>
    </dependency>
    <dependency>
        <groupId>org.jetbrains.kotlin</groupId>
        <artifactId>kotlin-stdlib-jdk8</artifactId>
    </dependency>
    <dependency>
        <groupId>org.springframework.boot</groupId>
        <artifactId>spring-boot-starter-test</artifactId>
        <scope>test</scope>
        <exclusions>
            <exclusion>
                <groupId>org.junit.vintage</groupId>
                <artifactId>junit-vintage-engine</artifactId>
            </exclusion>
        </exclusions>
    </dependency>
    <dependency>
        <groupId>io.projectreactor</groupId>
        <artifactId>reactor-test</artifactId>
        <scope>test</scope>
    </dependency>
</dependencies>
Data Models
දැන් අපි පොඩි Data Models ටිකක් හදමු. අපි හදන්නේ Product සහ Inventory විස්තර ගන්න API එකක්.
// Product.kt
data class Product(val id: String, val name: String, val price: Double)

// Inventory.kt
data class Inventory(val productId: String, val stock: Int)

// ProductDetail.kt (මේක අපි Product එකේ සහ Inventory එකේ data එකතු කරලා හදන DTO එක)
data class ProductDetail(val id: String, val name: String, val price: Double, val stock: Int)
Services
දැන් අපි ProductService සහ InventoryService කියලා Service ක්ලාස් දෙකක් හදමු. මේවා ඇතුලේ අපි suspend function පාවිච්චි කරනවා වගේම, kotlinx.coroutines.delay() එකෙන් පොඩි delay එකක් සිමියුලේට් කරනවා. සාමාන්ය Application එකක නම් මේවා ඩේටාබේස් කෝල් එකක් නැත්නම් වෙන Microservice එකකට යන API Call එකක් වෙන්න පුළුවන්. ඒ වගේ Network Calls වලදී Thread එක බ්ලොක් නොවී වැඩේ කරන්න Coroutines උදව් වෙනවා.
// ProductService.kt
package com.example.coroutinewebfluxguide.service

import com.example.coroutinewebfluxguide.model.Product
import kotlinx.coroutines.delay
import org.springframework.stereotype.Service

@Service
class ProductService {
    private val products = mapOf(
        "P001" to Product("P001", "Laptop", 1200.00),
        "P002" to Product("P002", "Mouse", 25.00),
        "P003" to Product("P003", "Keyboard", 75.00)
    )

    suspend fun getProductById(id: String): Product? {
        println("Fetching product by ID: $id on thread: ${Thread.currentThread().name}")
        delay(1000) // Simulate network/DB delay
        return products[id]
    }

    suspend fun getAllProducts(): List<Product> {
        println("Fetching all products on thread: ${Thread.currentThread().name}")
        delay(500) // Simulate network/DB delay
        return products.values.toList()
    }
}
// InventoryService.kt
package com.example.coroutinewebfluxguide.service

import com.example.coroutinewebfluxguide.model.Inventory
import kotlinx.coroutines.delay
import org.springframework.stereotype.Service

@Service
class InventoryService {
    private val inventory = mapOf(
        "P001" to Inventory("P001", 10),
        "P002" to Inventory("P002", 50),
        "P003" to Inventory("P003", 25)
    )

    suspend fun getInventoryByProductId(productId: String): Inventory? {
        println("Fetching inventory for product ID: $productId on thread: ${Thread.currentThread().name}")
        delay(700) // Simulate network/DB delay
        return inventory[productId]
    }
}
Controller
දැන් අපි Controller එක හදමු. මේක තමයි HTTP Requests Handle කරන්නේ. මෙතනදී අපි suspend function පාවිච්චි කරලා API Endpoints හදන හැටි බලමු.
// ProductController.kt
package com.example.coroutinewebfluxguide.controller
import com.example.coroutinewebfluxguide.model.Product
import com.example.coroutinewebfluxguide.model.ProductDetail
import com.example.coroutinewebfluxguide.service.InventoryService
import com.example.coroutinewebfluxguide.service.ProductService
import kotlinx.coroutines.async
import kotlinx.coroutines.coroutineScope
import org.springframework.http.HttpStatus
import org.springframework.web.bind.annotation.*
import org.springframework.web.server.ResponseStatusException
@RestController
@RequestMapping("/api/products")
class ProductController(
private val productService: ProductService,
private val inventoryService: InventoryService
) {
@GetMapping
suspend fun getAllProducts(): List<Product> {
println("Request received for all products on thread: ${Thread.currentThread().name}")
return productService.getAllProducts()
}
@GetMapping("/{id}")
suspend fun getProductDetails(@PathVariable id: String): ProductDetail {
println("Request received for product $id on thread: ${Thread.currentThread().name}")
val product = productService.getProductById(id) ?: throw ResponseStatusException(HttpStatus.NOT_FOUND, "Product not found")
val inventory = inventoryService.getInventoryByProductId(product.id) ?: throw ResponseStatusException(HttpStatus.NOT_FOUND, "Inventory not found")
return ProductDetail(product.id, product.name, product.price, inventory.stock)
}
@GetMapping("/combined/{id}")
suspend fun getProductDetailsCombined(@PathVariable id: String): ProductDetail = coroutineScope {
println("Request received for combined product $id on thread: ${Thread.currentThread().name}")
// async block දෙක එකිනෙකට ස්වාධීනව (independently) එකම වෙලාවේ ක්රියාත්මක වෙනවා
val productDeferred = async { productService.getProductById(id) }
val inventoryDeferred = async { inventoryService.getInventoryByProductId(id) }
val product = productDeferred.await() ?: throw ResponseStatusException(HttpStatus.NOT_FOUND, "Product not found")
val inventory = inventoryDeferred.await() ?: throw ResponseStatusException(HttpStatus.NOT_FOUND, "Inventory not found")
return@coroutineScope ProductDetail(product.id, product.name, product.price, inventory.stock)
}
}
වැඩ කරන හැටි
උඩ තියෙන Controller එකේ Endpoint තුනක් තියෙනවා:
GET /api/products: මේකෙන් හැමProductඑකක්ම ගන්නවා.productService.getAllProducts()suspendfunctionඑකcallකරනවා.GET /api/products/{id}: මේකෙන් එකProductඑකකDetailsගන්නවා. මෙතනදීproductService.getProductById()සහinventoryService.getInventoryByProductId()කියනsuspend functionදෙකSequentialවිදියටcallකරනවා. ඒ කියන්නේProductඑක ආවට පස්සේ තමයිInventoryඑකටCallකරන්නේ.GET /api/products/combined/{id}: මේක තමයිCoroutinesවල තියෙන සුපිරිම වාසිය පෙන්නන තැන. මෙතනදී අපිcoroutineScope {}සහasync {}පාවිච්චි කරනවා.productService.getProductById()සහinventoryService.getInventoryByProductId()කියනfunctionදෙකParallel(සමාන්තරව)executeවෙනවා. ඒ කියන්නේ දෙකම එකම වෙලාවෙදී පටන් ගන්නවා. මේකෙන්API Response Timeඑක ගොඩක් අඩු කරගන්න පුළුවන්.await()functionඑකෙන් තමයිasyncඔපරේෂන් එකේresultඑක එනකල් බලාගෙන ඉන්නේ.
දැන් ඔයාලට මේ Application එක run කරලා API Call කරලා බලන්න පුළුවන්. උදාහරණයක් විදියට, Postman වගේ tool එකකින් http://localhost:8080/api/products/combined/P001 කියලා GET Request එකක් යැව්වොත්, Product එකේ ඩේටා සහ Inventory ඩේටා එකතු වෙලා Response එකක් එනවා. Thread එක Blocking නැතුව Request එක Handle වෙන හැටි Console Output එකෙන් බලාගන්න පුළුවන්.
අවධානය යොමු කළ යුතු දේවල් සහ ටිප්ස්
Kotlin Coroutines සහ Spring WebFlux පාවිච්චි කරද්දී, මතක තියාගන්න ඕන වැදගත් දේවල් කිහිපයක් තියෙනවා.
Error Handling
Coroutines වල Error Handling කරන්න පුළුවන් සාමාන්ය try-catch block එකක් පාවිච්චි කරලා. coroutineScope එකක් ඇතුලේ async block එකක Exception එකක් ආවොත්, await() call කරන වෙලාවේදී ඒ Exception එක throw කරනවා. ඒක අපිට සාමාන්ය විදියට catch කරන්න පුළුවන්.
suspend fun getDataSafely(): String {
    return try {
        val result = coroutineScope {
            val data1 = async { someFailingSuspendCall() }
            data1.await() // මෙතනදී exception එක throw වෙයි
        }
        "Success: $result"
    } catch (e: Exception) {
        "Error: ${e.message}"
    }
}
Dispatchers
Coroutines execute වෙන්නේ Dispatchers කියන දේවල් උඩ. Spring WebFlux එක්ක වැඩ කරද්දී, සාමාන්යයෙන් Spring එකේ Default Dispatcher එක තමයි පාවිච්චි වෙන්නේ. ඒක Non-blocking operations වලට හොඳයි. ඒත් ඔයාලට Blocking operation එකක් කරන්න ඕන වුණොත්, Dispatchers.IO පාවිච්චි කරන්න පුළුවන්. මේකෙන් Coroutines IO-intensive tasks (File operations, External API calls) වෙනම Thread Pool එකක execute කරනවා. මේකෙන් Main Thread එක බ්ලොක් වීම වළක්වනවා.
import kotlinx.coroutines.Dispatchers
import kotlinx.coroutines.withContext

suspend fun doBlockingTask(): String = withContext(Dispatchers.IO) {
    // මෙතන blocking code එක ලියන්න
    Thread.sleep(3000)
    "Blocking task finished"
}
Mixing Reactive (Mono/Flux) and Coroutine APIs
සමහර වෙලාවට ඔයාලට Reactive API එකකින් එන Mono නැත්නම් Flux එකක් Coroutines එක්ක පාවිච්චි කරන්න වෙන්න පුළුවන්. kotlinx-coroutines-reactor library එකෙන් මේකට පහසුකම් සලසනවා. උදාහරණයක් විදියට, Mono.awaitSingle(), Flux.awaitFirst(), Flux.asFlow() වගේ extension functions පාවිච්චි කරන්න පුළුවන්.
import reactor.core.publisher.Mono
import kotlinx.coroutines.reactor.awaitSingle

suspend fun fetchFromMono(): String {
    val monoResult = Mono.just("Data from Mono").delayElement(java.time.Duration.ofSeconds(1))
    return monoResult.awaitSingle()
}
Testing Suspend Functions
suspend functions test කරද්දී kotlinx-coroutines-test library එකේ තියෙන runTest function එක පාවිච්චි කරන්න පුළුවන්. මේකෙන් Coroutines වලට Testing Environment එකක් සපයනවා.
අවසාන වචනය
ඉතින් යාලුවනේ, ඔයාලට දැන් තේරෙනවා ඇති Spring Boot WebFlux එක්ක Kotlin Coroutines කියන්නේ High-performance, Scalable APIs හදන්න පුළුවන් සුපිරි Combination එකක් කියලා. මේකෙන් අපේ කෝඩ් එක Readability අතින් ගොඩක් දියුණු වෙනවා වගේම, Application එකේ Resource Utilization එකත් වැඩි වෙනවා.
විශේෂයෙන්ම Network Calls, Database Operations වගේ IO-bound tasks වලදී Coroutines වලට පුළුවන් Thread එක බ්ලොක් නොවී වැඩේ කරන්න. මේකෙන් Application එකේ Throughput එක ගොඩක් වැඩි වෙනවා.
මේ SC Guide එකේ තිබුණු Practical Example එක ඔයාලගේ Local Machine එකේම Try කරලා බලන්න. API Call කරලා Response Times බැලුවම වෙනස ඔයාලටම තේරෙයි. Console Output එක දිහා බැලුවොත් Thread Names එහෙම වෙනස් වෙන හැටි, Non-blocking විදියට වැඩ කරන හැටි පැහැදිලිව පේයි.
ඔයාලගේ අදහස්, ප්රශ්න, මොනවා හරි තියෙනවා නම් කමෙන්ට් සෙක්ෂන් එකේ දාන්න. මේ Technology එක ගැන තව දැනගන්න ඕන නම් ඒවත් කියන්න. මේ Article එක ඔයාලට ප්රයෝජනවත් වෙන්න ඇති කියලා හිතනවා. ආයෙත් මේ වගේම තවත් වැදගත් Topic එකකින් හමුවෙමු! ගිහින් එන්නම්!