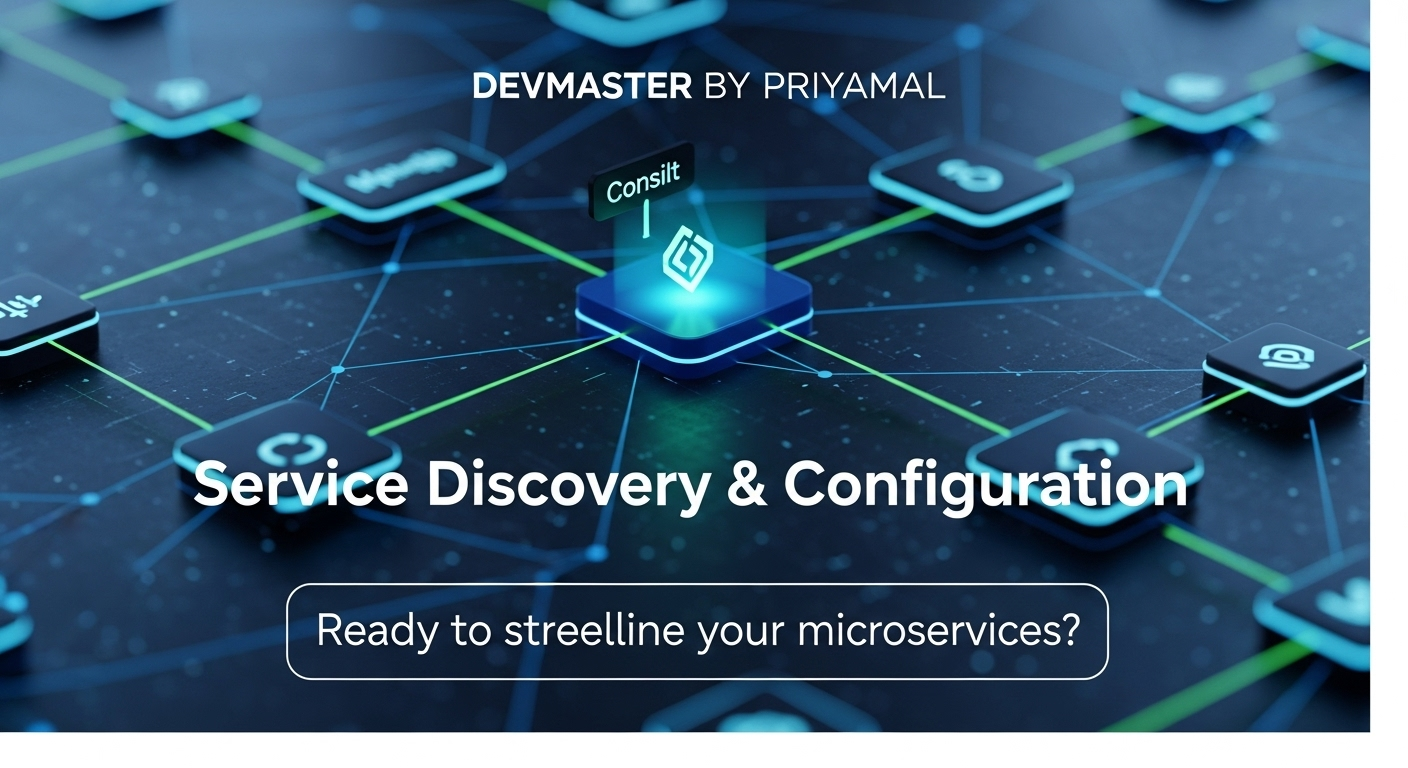
Spring Boot සහ Consul: Service Discovery සහ Config - සම්පූර්ණ Sinhala Guide

Spring Boot සහ Consul: Service Discovery සහ Config - සම්පූර්ණ Sinhala Guide

කොහොමද යාලුවනේ! Spring Boot එක්ක Consul පාවිච්චි කරන්නේ කොහොමද?

අද කාලේ software development වලදී Microservices කියන්නේ හරිම ජනප්‍රිය සංකල්පයක්. ඒත්, Microservices පද්ධති හදනකොට එන ප්‍රධාන ගැටලු කීපයක් තියෙනවා. ඒ වගේම, අපේ සර්වර් වලට, ඒ කියන්නේ අපේ Microservices වලට, එකිනෙකා හොයාගන්න පුළුවන් වෙන්න ඕනේ. ඒ වගේම, ඒවායේ configuration centralized විදිහට manage කරන්න පුළුවන් වෙන්නත් ඕනේ. ඔන්න ඔය වගේ ගැටලු වලට නියම විසඳුමක් තමයි Consul කියන්නේ. අද මේ article එකෙන් අපි බලමු Spring Boot Application එකක් Consul එක්ක කොහොමද integrate කරන්නේ කියලා, ඒ කියන්නේ Service Discovery සහ Configuration වලට Consul පාවිච්චි කරන්නේ කොහොමද කියලා.

මේ Tutorial එකෙන් ඔයා මොනවද ඉගෙන ගන්නේ?

  • Service Discovery කියන්නේ මොකක්ද? ඇයි ඒක වැදගත් වෙන්නේ?
  • Consul කියන්නේ මොකක්ද? ඒකෙන් කරන සේවාවන් මොනවද?
  • ඔයාගේ Spring Boot Application එක Consul වල register කරන්නේ කොහොමද?
  • Consul එකේ Key-Value Store එක භාවිත කරලා Spring Boot Configuration Manage කරන්නේ කොහොමද?
  • ප්‍රායෝගික උදාහරණ සහ Code snippets.

හරි, එහෙනම් අපි පටන් ගමු!

1. Service Discovery සහ Consul කියන්නේ මොකක්ද?

Service Discovery කියන්නේ මොකක්ද?

අපි හිතමු ඔයා Microservices ගොඩක් එක්ක වැඩ කරනවා කියලා. උදාහරණයක් විදිහට, Order Service එකට Product Service එකෙන් තොරතුරු ගන්න ඕනේ. හැබැයි, Product Service එක වෙනස් සර්වර් එකක, වෙනස් port එකක දුවන්න පුළුවන්. ඒ වගේම, අවශ්‍යතාවය අනුව Product Service එකේ instances ගණන වැඩි වෙන්නත් අඩු වෙන්නත් පුළුවන්. එතකොට Order Service එක Product Service එක හොයාගන්නේ කොහොමද? අන්න ඕකට තමයි Service Discovery ඕනේ වෙන්නේ.

Service Discovery කියන්නේ, අපේ Microservices වලට එකිනෙකාගේ network locations (IP address, port) dynamically හොයාගන්න උදව් කරන ක්‍රමයක්. ඒ කියන්නේ, ඔයාගේ Application එකට hardcode කරලා Product Service එකේ IP address එක දෙන්න ඕනේ නැහැ. Service Discovery tool එකක් හරහා ඒක හොයාගන්න පුළුවන්.

Consul කියන්නේ මොකක්ද?

Consul කියන්නේ HashiCorp සමාගමෙන් හදපු, distribute වුණු, highly available tool එකක්. මේක ප්‍රධාන වශයෙන්ම Service Discovery, Configuration සහ Health Checking වලට පාවිච්චි කරනවා.

Consul වල ප්‍රධාන feature ටිකක් බලමු:

  • Service Discovery: Services වලට Consul වල register වෙන්න පුළුවන්. අනිත් services වලට Consul query කරලා අවශ්‍ය service එක හොයාගන්න පුළුවන්.
  • Health Checking: Consul එක continuously register කරපු services වල Health check කරනවා. ඒ කියන්නේ service එක හරියට වැඩ කරනවද කියලා බලනවා. වැඩ නොකරන service එකක් නම් discover වෙන්නේ නැහැ.
  • Key/Value Store (KV Store): Consul වලට configuration data හෝ ඕනෑම dynamic data එකක් store කරන්න පුළුවන්. මේක centralized config server එකක් විදිහට පාවිච්චි කරන්න පුළුවන්.
  • Multi Datacenter: Consul වලට data centers කිහිපයක් හරහා distribute වෙන්න පුළුවන්.

දැන් ඔයාලට Service Discovery සහ Consul ගැන පොඩි අවබෝධයක් තියෙනවා නේද? එහෙනම් අපි බලමු Consul අපේ Spring Boot Application එකට integrate කරන්නේ කොහොමද කියලා.

2. Consul Locally Set Up කරගමු

Consul පාවිච්චි කරන්න කලින්, අපිට ඒක අපේ local machine එකේ run කරගන්න ඕනේ. මේකට පහසුම විදිය තමයි Docker පාවිච්චි කරන එක.

ඔයාගේ machine එකේ Docker install කරලා නැත්නම්, Docker Desktop download කරලා install කරගන්න.

Docker install කරගත්තට පස්සේ, Command Prompt (CMD) එකක් හෝ Terminal එකක් open කරලා පහත command එක run කරන්න:

docker run -d --name=dev-consul -p 8500:8500 -p 8600:8600/udp consul

මේ command එකෙන් වෙන්නේ:

  • -d: Docker container එක background එකේ run කරනවා.
  • --name=dev-consul: container එකට dev-consul කියලා නමක් දෙනවා.
  • -p 8500:8500: Consul HTTP API Port එක expose කරනවා. Consul UI එකටත් මේ port එක තමයි පාවිච්චි කරන්නේ.
  • -p 8600:8600/udp: Consul DNS Port එක expose කරනවා.
  • consul: පාවිච්චි කරන Docker image එක.

දැන් ඔයාට http://localhost:8500 කියන URL එකට ගිහින් Consul UI එක බලන්න පුළුවන්. එතන ඔයාට services, nodes, KV store එක වගේ දේවල් බලන්න පුළුවන්.

3. Spring Boot Application එක Consul වල Register කරමු

දැන් අපි Spring Boot Application එකක් හදලා ඒක Consul වලට register කරමු. අපි මේකට Spring Initializr පාවිච්චි කරමු.

Steps:

  1. https://start.spring.io/ එකට යන්න.
  2. Project එකට Maven Project, Java, Spring Boot version එකක් (stable version එකක්) තෝරන්න.
  3. Group: com.example, Artifact: consul-demo කියලා දෙන්න.
  4. Dependencies විදිහට Spring Web, Spring Boot Actuator, සහ Spring Cloud Consul Discovery add කරන්න. Spring Boot Actuator add කරන්නේ Health checks වලට උදව් වෙන්න.
  5. Generate button එක click කරලා project එක download කරගෙන, ඔයාගේ IDE (IntelliJ IDEA, VS Code) එකේ open කරගන්න.

pom.xml එකට Dependencies එකතු කිරීම

ඔයා Spring Initializr පාවිච්චි කරා නම් මේ dependencies ටික add වෙලා තියේවි. නැත්නම්, pom.xml එකේ dependencies section එකට මේ ටික add කරන්න:

<dependencies>
    <dependency>
        <groupId>org.springframework.boot</groupId>
        <attr>artifactId</attr><value>spring-boot-starter-web</value>
    </dependency>
    <dependency>
        <groupId>org.springframework.boot</groupId>
        <artifactId>spring-boot-starter-actuator</artifactId>
    </dependency>
    <dependency>
        <groupId>org.springframework.cloud</groupId>
        <artifactId>spring-cloud-starter-consul-discovery</artifactId>
    </dependency>
    
    <!-- Spring Cloud Bom for Dependency Management -->
    <dependencyManagement>
        <dependencies>
            <dependency>
                <groupId>org.springframework.cloud</groupId>
                <artifactId>spring-cloud-dependencies</artifactId>
                <version>2023.0.0</version> <!-- Replace with your Spring Cloud version -->
                <type>pom</type>
                <scope>import</scope>
            </dependency>
        </dependencies>
    </dependencyManagement>
</dependencies>

නෝට්: spring-cloud-dependencies version එක ඔයාගේ Spring Boot version එකට ගැලපෙන එකක් තෝරන්න. Spring Cloud Project Page එකේ compatibility matrix එක බලන්න.

application.yml Configuration

දැන් අපේ Application එක Consul එක්ක connect වෙන්න අවශ්‍ය configuration ටික src/main/resources/application.yml file එකට add කරමු.

spring:
  application:
    name: my-consul-service # ඔයාගේ service එකට කැමති නමක් දෙන්න
  cloud:
    consul:
      host: localhost
      port: 8500
      discovery:
        register: true # Consul වල register වෙනවාද?
        instance-id: ${spring.application.name}:${random.value} # unique instance id එකක්
        health-check-path: /actuator/health # Health check endpoint එක
        health-check-interval: 10s # කොච්චර වෙලාවකට සැරයක්ද health check කරන්නේ
      config:
        enabled: false # දැනට configuration disabled කරමු, ඊළඟ section එකේ enabled කරමු
server:
  port: 8080 # Application එක run වෙන port එක

මෙහිදී, spring.application.name එක තමයි Consul එකේ service එකේ නම විදිහට register වෙන්නේ. ${random.value} එකෙන් වෙන්නේ multiple instances run කරනකොට unique instance id එකක් හැදෙන එක.

Application එක Run කරමු

දැන් ඔයාගේ Spring Boot Application එක Run කරන්න (main class එක run කිරීමෙන් හෝ mvn spring-boot:run command එකෙන්).

Application එක start වුනාට පස්සේ, Consul UI එකට (http://localhost:8500) ගිහින් බලන්න. Services tab එක යටතේ ඔයාගේ my-consul-service එක register වෙලා තියෙන්න ඕනේ. ඒ වගේම, Health Status එක passing කියලා පෙන්නන්නත් ඕනේ. හරියටම වුනා නම්, වැඩේ සාර්ථකයි!

මේ වෙලාවේදී ඔයාට පුළුවන් http://localhost:8080/actuator/health කියන URL එකට ගිහින් ඔයාගේ Application එකේ Health Status එක බලන්න.

4. Consul වල Key/Value Store එකෙන් Configuration Manage කරමු

Consul වල තියෙන තවත් නියම feature එකක් තමයි Key/Value (KV) Store එක. මේක පාවිච්චි කරලා අපිට අපේ Application වල Configuration centralized විදිහට manage කරන්න පුළුවන්. ඒ කියන්නේ, config changes කරනකොට Application එක redeploy කරන්න ඕනේ නැහැ, Consul එකේ config වෙනස් කරලා refresh කරගන්න පුළුවන්.

pom.xml එකට Dependency එකතු කිරීම

මුලින්ම, pom.xml එකට spring-cloud-starter-consul-config dependency එක add කරන්න.

<dependency>
    <groupId>org.springframework.cloud</groupId>
    <artifactId>spring-cloud-starter-consul-config</artifactId>
</dependency>

spring-cloud-starter-consul-discovery වගේම spring-cloud-starter-consul-config එකත් spring-cloud-dependencies Bom එකෙන් version එක manage කරනවා.

bootstrap.yml Configuration

Configuration load කරද්දී, application.yml එකට කලින් load වෙන file එකක් තමයි bootstrap.yml (හෝ bootstrap.properties). Consul වලින් config load කරන්න නම්, අපිට මේ file එකේ settings ටිකක් කරන්න වෙනවා. src/main/resources/bootstrap.yml කියලා අලුත් file එකක් හදලා මේ ටික copy කරන්න:

spring:
  application:
    name: my-consul-service
  cloud:
    consul:
      host: localhost
      port: 8500
      config:
        enabled: true # Consul config enabled කරනවා
        prefix: config # Consul KV store එකේ key prefix එක
        defaultContext: application # default context (e.g., config/application)
        data-key: data # Consul එකේ value store කරන key එක
        format: YAML # Consul එකේ config format එක

ඒ වගේම application.yml file එකේ spring.cloud.consul.config.enabled එක true කරන්න අමතක කරන්න එපා, නැත්නම් ඒක delete කරන්න පුpළුවන්.

Consul KV Store එකට Data Add කරමු

දැන් අපි Consul UI එකට (http://localhost:8500) ගිහින් KV tab එකට යමු. එතන 'Create' button එක click කරලා අලුත් key-value entry එකක් හදමු.

  • Key: config/my-consul-service/data (config/ + spring.application.name + /data)
  • Value: පහත YAML content එක add කරන්න:
my:
  greeting: Hello from Consul!

ඔයාට වෙනස් profile එකකට config එකක් දෙන්න ඕනේ නම්, Key එක config/my-consul-service,development/data වගේ දෙන්න පුළුවන්.

Application එකේ Consul Configuration පාවිච්චි කරමු

දැන් අපි Consul එකෙන් load කරපු config property එක අපේ Spring Boot Application එකේ පාවිච්චි කරමු. අපි Simple REST Controller එකක් හදමු.

ConsulDemoApplication.java file එකට පහත Controller එක add කරන්න, නැත්නම් අලුත් Controller class එකක් හදන්න:

package com.example.consuldemo;

import org.springframework.beans.factory.annotation.Value;
import org.springframework.boot.SpringApplication;
import org.springframework.boot.autoconfigure.SpringBootApplication;
import org.springframework.web.bind.annotation.GetMapping;
import org.springframework.web.bind.annotation.RestController;

@SpringBootApplication
@RestController
public class ConsulDemoApplication {

	@Value("${my.greeting}")
	private String greeting;

	public static void main(String[] args) {
		SpringApplication.run(ConsulDemoApplication.class, args);
	}

	@GetMapping("/hello")
	public String hello() {
		return greeting;
	}
}

මෙහිදී @Value("${my.greeting}") annotation එකෙන් වෙන්නේ Consul එකෙන් load කරපු my.greeting property එක greeting variable එකට assign කරන එක.

Application එක Run කරලා බලමු

Application එක නැවත Run කරන්න. දැන් Browser එකේ හෝ Postman එකෙන් http://localhost:8080/hello කියන URL එකට Request එකක් දාන්න. ඔයාට Hello from Consul! කියලා Output එක ලැබෙන්න ඕනේ.

දැන් Consul UI එකේ KV Store එකට ගිහින් config/my-consul-service/data කියන key එකේ value එක වෙනස් කරන්න. උදාහරණයක් විදිහට Hello Spring Boot with Consul! කියලා දෙන්න.

Spring Boot Application එකේ කිසිම වෙනසක් කරන්නේ නැතුව, http://localhost:8080/hello URL එකට නැවත Request එකක් දාන්න. ඔයාට අලුත් message එක (Hello Spring Boot with Consul!) ලැබෙන්න ඕනේ! මේක තමයි Consul Config වල තියෙන ලොකුම වාසිය. Runtime එකේදී Config වෙනස් කරන්න පුළුවන්.

නෝට්: සමහර වෙලාවට Spring Boot Application එකට config update වෙන්න පොඩ්ඩක් වෙලා යන්න පුළුවන් (default refresh-interval එක අනුව). @RefreshScope වගේ දේවල් පාවිච්චි කරලා මේක customize කරන්න පුළුවන්.

5. Health Checks සහ Best Practices

Spring Cloud Consul integration එකේදී අපිට වෙනම Health check logic ලියන්න ඕනේ නැහැ. spring-boot-starter-actuator එකේ තියෙන Health endpoint (/actuator/health) එක Consul automatically පාවිච්චි කරනවා. ඒකෙන් Consul එකට අපේ service එක up ද, down ද කියලා දැනගන්න පුළුවන්.

Best Practices:

  • Consul High Availability (HA): Production environment එකක Consul Single Server එකක් පාවිච්චි කරන්නේ නැතුව Cluster එකක් විදිහට set up කරන්න.
  • Security: Consul API එකට Access Control Lists (ACLs) පාවිච්චි කරන්න.
  • Separate Configs: Development, Staging, Production වගේ environments වලට වෙන වෙනම config files Consul KV store එකේ maintain කරන්න.
  • Dynamic Configuration Refresh: @RefreshScope වගේ Spring Cloud annotations පාවිච්චි කරලා runtime එකේදී config refresh වෙන්න සලස්වන්න.

අවසන් වචන

ඉතින් යාලුවනේ, ඔන්න ඔහොමයි Spring Boot Application එකක් Consul එක්ක integrate කරන්නේ Service Discovery සහ Configuration manage කරන්න. මේක Microservices architectures වලට අත්‍යවශ්‍ය tool එකක්. Consul වලින් අපිට පුළුවන් Microservices වල scalability, reliability, සහ maintainability වැඩි කරගන්න.

අද අපි,

  • Service Discovery කියන්නේ මොකක්ද කියලා තේරුම් ගත්තා.
  • Consul locally run කරගත්තා.
  • Spring Boot Application එක Consul වලට register කරලා, Health check කරගන්න හැටි ඉගෙන ගත්තා.
  • Consul KV Store එකෙන් configuration load කරලා runtime එකේදී update කරන හැටි දැක්කා.

මේ tutorial එකෙන් ඔයාට Consul සහ Spring Boot අතර සම්බන්ධය ගැන හොඳ අවබෝධයක් ලැබෙන්න ඇති කියලා හිතනවා. දැන් ඔයාට පුළුවන් මේ දැනුම ඔයාගේ ඊළඟ Microservices project එකේදී පාවිච්චි කරන්න.

මේ ගැන ඔයාට තව ප්‍රශ්න තියෙනවා නම්, නැත්නම් ඔයාගේ අත්දැකීම් කොහොමද කියලා කියන්න කැමති නම්, පහලින් Comment එකක් දාගෙන යන්න. ඒක අනිත් අයටත් ගොඩක් වටිනවා! Good luck!