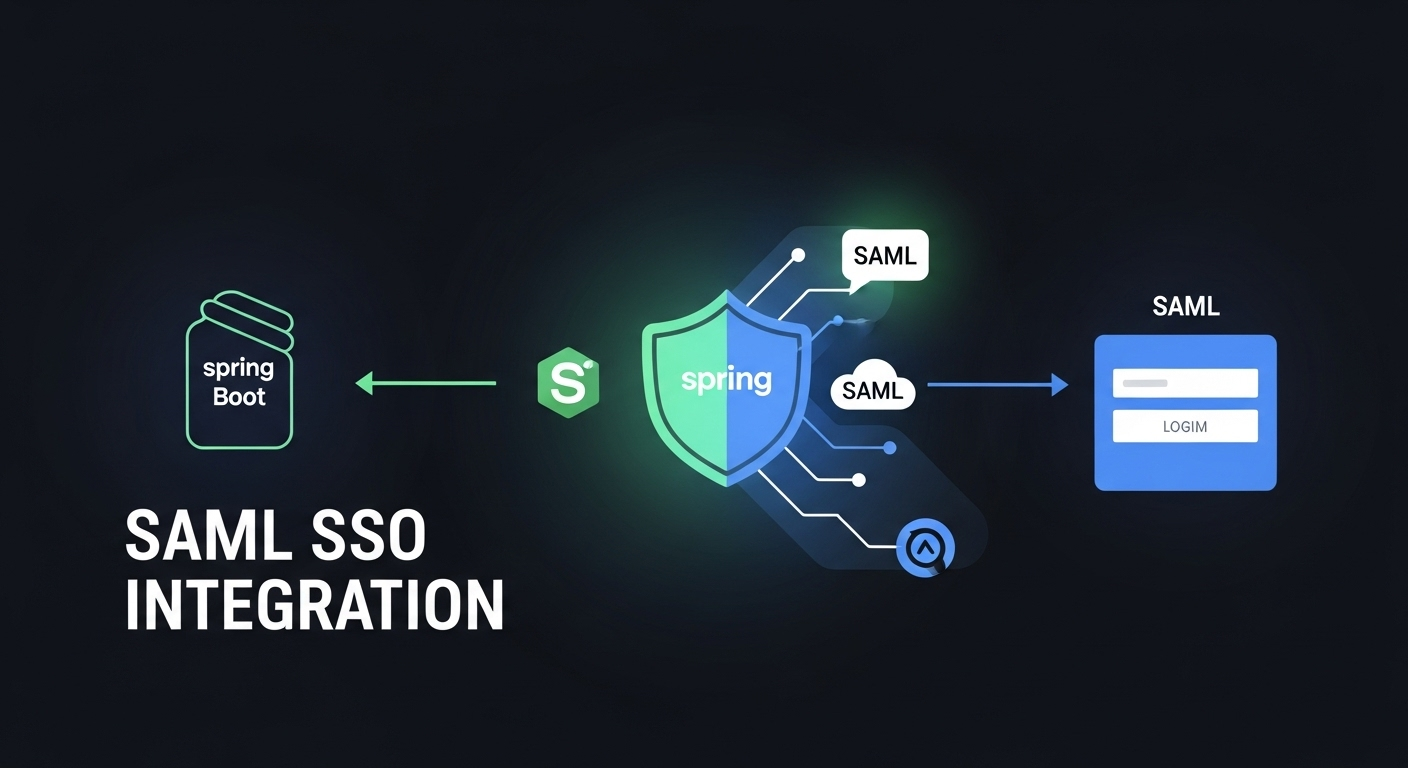
Spring Boot SAML SSO: ආරක්ෂිත පිවිසුම් විසඳුම් | SC Guide
අහ්, කොහොමද යාලුවනේ!
අද අපි කතා කරන්න යන්නේ ගොඩක් වැදගත්, ඒ වගේම ටිකක් "නූල් බෝලයක් වගේ" වෙන්න පුළුවන් මාතෘකාවක් ගැන – ඒ තමයි Spring Boot එක්ක SAML-based Single Sign-On (SSO) විසඳුමක් හදන්නේ කොහොමද කියන එක. මේක අහද්දිම සමහරුන්ට මතක් වෙන්න ඇති ලොකු ලොකු Enterprise Systems, බැංකු පද්ධති වගේ සංකීර්ණ දේවල්. ඒත් බය වෙන්න එපා! අපි මේක කට්ටියටම තේරෙන්න, පියවරෙන් පියවර ලේසියෙන් පැහැදිලි කරමු. මේක තේරුම් ගත්තාම ඔයාලට ඔයාලගේ applications වලට ආරක්ෂිත පිවිසුමක් (secure access) ලබා දෙන එක ඊට පස්සේ බය වෙන්න දෙයක් නෙමෙයි.
දැන් හිතන්නකෝ ඔයාලා සමාගමක වැඩ කරනවා කියලා. ඔයාලට වෙන වෙනම applications කිහිපයකට log වෙන්න වෙනවා, හැම එකටම වෙන වෙනම username, password ගහන්න වෙනවා. දවසට කී පාරක් මේක කරන්න වෙනවද? ඒක ටිකක් කච්චල් වැඩක් නේද? Single Sign-On (SSO) කියන්නේ මෙන්න මේ වගේ වෙලාවට අපේ ජීවිතේ ලේසි කරන දෙයක්. එක පාරක් log වුනාම, අනිත් හැම application එකකටම ඔටෝමැටිකලි access ලැබෙනවා. පට්ටම වැඩක් නේද?
මේ SSO ක්රම කිහිපයක් තියෙනවා, ඒ අතරින් SAML (Security Assertion Markup Language) කියන්නේ ගොඩක් දුරට Industry standard එකක් වගේ. මේකේ ප්රධානම වාසි තියෙන්නේ user experience එක වැඩි දියුණු කරන එක, ආරක්ෂාව ශක්තිමත් කරන එක සහ administrative overhead අඩු කරන එක. නිතරම password මතක තියාගන්න වෙන එකේ, reset කරන්න වෙන එකේ, phishing attacks වලට අහුවෙන එකේ ප්රශ්න අඩු කරගන්න පුළුවන්. ඒ වගේම Auditing, Compliance වගේ දේවලටත් මේක ලොකු උදව්වක්. අද අපි බලමු Spring Boot Application එකකට මේ SAML SSO එකක් implement කරගන්නේ කොහොමද කියලා.
SAML කියන්නේ මොකද්ද? (What is SAML?)
හරියටම කියනවා නම්, SAML කියන්නේ XML-based standard එකක්. මේකෙන් වෙන්නේ Identity Providers (IdP) සහ Service Providers (SP) අතර ආරක්ෂිතව authentication සහ authorization data හුවමාරු කරගන්න එක. පොඩ්ඩක් සරලව තේරුම් ගනිමු:
- Identity Provider (IdP): මේක තමයි ඔයාලා කවුද කියලා තහවුරු කරන තැන. හරියට අපේ ජාතික හැඳුනුම්පත් කාර්යාලය වගේ. ඔයාලගේ username, password මේක ගාව තියෙනවා. Okta, Auth0, PingOne, Azure Active Directory වගේ දේවල් මේ IdP වලට උදාහරණ.
- Service Provider (SP): මේක තමයි ඔයාලා access කරන්න හදන Application එක. අපේ Spring Boot Application එක මේ SP එක තමයි.
දැන් හිතන්නකෝ, ඔයාලා Online Banking කරන්න යනවා කියලා. Online Banking Application එක (SP) ඔයාලට කියනවා, "ඔයාව මම දන්නේ නෑ, ඔයා අහවලා කියලා ඔප්පු කරලා එන්න." ඊට පස්සේ ඔයාලාගේ බැංකුව (IdP) ඔයාව authenticate කරලා, ඔයාගේ විස්තර ටිකක් (assertion) SP එකට දෙනවා. ඒක දැක්කාම SP එක ඔයාව විශ්වාස කරනවා. නියමයි නේද? SAML වලදී මේ "විස්තර ටික" යවන්නේ Cryptographically signed XML message එකක් විදිහට.
මේ Assertion එක කියන්නේ user කෙනෙක් ගැන තොරතුරු තියෙන XML document එකක්. උදාහරණයක් විදිහට, user ගේ නම, email එක, IdP එකේදී authentic වෙච්ච වෙලාව වගේ දේවල් මේකේ තියෙන්න පුළුවන්. මේ XML message එක IdP එකෙන් Digital Signature එකකින් sign කරලා තමයි SP එකට එවන්නේ. ඒක නිසා මේක manipulate කරන්න අමාරුයි, ආරක්ෂාව අතින් ඉතා ඉහළයි.
Spring Boot එකට SAML ගේමු! (Let's bring SAML to Spring Boot!)
මේක කරන්න අපිට Spring Security project එකේ SAML support එක භාවිතා කරන්න පුළුවන්. විශේෂයෙන්ම, Spring Security SAML2 Service Provider කියන module එක තමයි අපිට මේකට උදව් කරන්නේ. දැනට Spring Boot එකේ SAML support එක `spring-security-saml2-service-provider` module එක හරහා තමයි එන්නේ. කලින් `spring-security-saml` කියන project එක තිබ්බා, ඒක දැන් deprecated වෙලා තියෙන්නේ. අලුත් project එක SAML 2.0 standard එකට අනුකූලව හදලා තියෙන්නේ. ඒක නිසා මේක පාවිච්චි කරන එක තමයි සුදුසුම දේ.
අවශ්ය දේවල් (Prerequisites):
- Java Development Kit (JDK): 11 හෝ ඊට ඉහළ සංස්කරණයක්.
- Maven or Gradle: Dependency Management වලට.
- IDE: IntelliJ IDEA, Eclipse, VS Code වගේ එකක්.
- A SAML Identity Provider (IdP): මේක අපිට test කරන්න අනිවාර්යයෙන්ම ඕන වෙනවා. අපි මේකට Okta වගේ එකක් පාවිච්චි කරමු. (ඔයාලට free developer account එකක් හදාගන්න පුළුවන්).
Project Setup එක (Setting up the Project):
අපි මුලින්ම Spring Initializr (start.spring.io) එකට ගිහින් අලුත් Spring Boot project එකක් හදාගමු. මේ dependencies ටික add කරන්න අමතක කරන්න එපා:
- Spring Web
- Spring Security
- Spring Security SAML2 Service Provider
- Thymeleaf (optional, for simple HTML views and showing attributes)
ඔයාලා Maven පාවිච්චි කරනවා නම්, `pom.xml` එකේ මේ වගේ dependencies තියෙන්න ඕනේ:
<dependencies>
    <dependency>
        <groupId>org.springframework.boot</groupId>
        <artifactId>spring-boot-starter-web</artifactId>
    </dependency>
    <dependency>
        <groupId>org.springframework.boot</groupId>
        <artifactId>spring-boot-starter-security</artifactId>
    </dependency>
    <dependency>
        <groupId>org.springframework.security</groupId>
        <artifactId>spring-security-saml2-service-provider</artifactId>
    </dependency>
    <!-- Optional: For Thymeleaf for rendering HTML views and showing user attributes -->
    <dependency>
        <groupId>org.springframework.boot</groupId>
        <artifactId>spring-boot-starter-thymeleaf</artifactId>
    </dependency>
    <dependency>
        <groupId>org.thymeleaf.extras</groupId>
        <artifactId>thymeleaf-extras-springsecurity6</artifactId>
    </dependency>
    <dependency>
        <groupId>org.springframework.boot</groupId>
        <artifactId>spring-boot-devtools</artifactId>
        <scope>runtime</scope>
        <optional>true</optional>
    </dependency>
    <dependency>
        <groupId>org.springframework.boot</groupId>
        <artifactId>spring-boot-starter-test</artifactId>
        <scope>test</scope>
    </dependency>
    <dependency>
        <groupId>org.springframework.security</groupId>
        <artifactId>spring-security-test</artifactId>
        <scope>test</scope>
    </dependency>
</dependencies>
IdP එක්ක සම්බන්ධ වෙමු! (Let's connect with an IdP!)
දැන් අපේ Spring Boot Application එක SP එක විදිහට වැඩ කරන්න ලෑස්තියි. හැබැයි මේ SP එකට කතා කරන්න IdP කෙනෙක් ඕනේ. අපි මේකට Okta Developer Account එකක් පාවිච්චි කරමු. (ඔයාලට free account එකක් හදාගන්න පුළුවන්).
Okta Configuration එක (Okta Configuration):
- Okta Developer Dashboard එකට Login වෙන්න.
- Applications -> Applications වලට ගිහින් Create App Integration කියන එක Click කරන්න.
- SAML 2.0 කියන එක තෝරලා Next දෙන්න.
- App Name එකක් දෙන්න (උදා: `MySpringBootSAMLApp`).
- ඊළඟට SAML Settings කියන තැනට එනවා. මෙතන තමයි වැදගත්ම ටික තියෙන්නේ.
- Single sign on URL: මේක තමයි අපේ Spring Boot App එකේ ACS (Assertion Consumer Service) URL එක. සාමාන්යයෙන් මේක `http://localhost:8080/saml2/authenticate/your-registration-id` වගේ එකක්. අපි මේ `your-registration-id` එක පස්සේ හදාගන්නවා. දැනට, `http://localhost:8080/saml2/authenticate/okta` කියලා දෙමු.
- Audience URI (SP Entity ID): මේක තමයි අපේ SP එකේ Unique Identifier එක. මේකත් අපිට ඕන නමක් දෙන්න පුලුවන්, හැබැයි ඒක Unique වෙන්න ඕනේ. උදා: `http://localhost:8080/saml2/service-provider-metadata/okta` නැත්නම් `urn:spring-boot:saml:okta`.
- Default Relay State (Optional): Login වුනාට පස්සේ යන URL එක (උදා: `/`).
- Attribute Statements (Optional): IdP එකෙන් SP එකට යවන්න ඕන user attributes (e.g., `firstName`, `lastName`, `email`) මෙතන define කරන්න පුළුවන්. මේවා තමයි SAML Assertion එකේ ඇවිත් අපේ App එකට user ගැන විස්තර දෙන්නේ. ඔබට username, email, firstName, lastName වගේ දේවල් මෙතන add කරන්න පුළුවන්.
- ඊළඟට, Feedback section එකේ I'm an Okta customer adding an internal app කියන එක තෝරලා Finish කරන්න.
- දැන් ඔයාලට Sign On tab එකේ View SAML setup instructions කියන ලින්ක් එකක් පේනවා ඇති. ඒක Click කලාම SAML IdP Metadata, IdP Single Sign-On URL, IdP Issuer URI වගේ විස්තර ටිකක් දකින්න පුළුවන්. මේ IdP Metadata XML එක download කරගන්න. නැත්නම් "Identity Provider Metadata" කියන URL එක copy කරගන්න. මේක අපිට අපේ Spring Boot App එකේ configure කරන්න ඕන වෙනවා.
ඔයාලා දැන් Okta එකේ app එකක් හැදුවා. ඒ වගේම ඒ app එකට යම්කිසි user කෙනෙක් assign කරන්නත් අමතක කරන්න එපා (Directory -> People වලට ගිහින් user කෙනෙක් add කරලා, Applications -> MySpringBootSAMLApp -> Assignments වලට ගිහින් ඒ user ව assign කරන්න). නැත්නම් ඒ user ට log වෙන්න බෑ.
මේ IdP Metadata එක කියන්නේ මොකද්ද? මේකත් XML file එකක්. මේකේ තියෙන්නේ IdP එකේ Public Key Certificate එක, Single Sign-On URL (SSO endpoint), Single Logout URL (SLO endpoint) වගේ අපේ SP එකට IdP එක්ක කතා කරන්න අවශ්ය හැම විස්තරයක්ම. හරියටම කිව්වොත් මේක IdP එකේ 'හැඳුනුම්පත' වගේ. අපේ Spring Boot App එකට මේ Metadata එක ලැබුනාම තමයි IdP එකත් එක්ක trust relationship එකක් හදාගන්නේ.
Spring Boot Configuration ටික (Spring Boot Configuration Details)
දැන් අපි අපේ Spring Boot Project එක configure කරමු. මේකට ගොඩක් දුරට `application.yml` එක සහ `SecurityConfig` class එක වැදගත් වෙනවා.
application.yml Configuration:
ඔබ Okta වෙතින් download කරගත් IdP metadata file එක ඔබේ project එකේ `src/main/resources` folder එකට දාන්න. (උදා: `okta-saml-metadata.xml`). නැත්නම් ඔබට metadata URL එක කෙලින්ම භාවිතා කරන්න පුළුවන්.
spring:
  security:
    saml2:
      service-provider:
        registration:
          okta: # This is the 'registration-id' we used in the ACS URL (http://localhost:8080/saml2/authenticate/okta)
            entity-id: http://localhost:8080/saml2/service-provider-metadata/okta # Our SP Entity ID (needs to match what you configured in Okta)
            acs:
              location: http://localhost:8080/saml2/authenticate/{registrationId} # Standard placeholder
              # Optional: You can specify an explicit URL if needed:
              # location: http://localhost:8080/saml2/authenticate/okta
            signing:
              credentials:
                - private-key-location: classpath:saml/saml-private.key # Path to your private key
                  certificate-location: classpath:saml/saml-certificate.crt # Path to your certificate
            identity-providers:
              - metadata-uri: classpath:okta-saml-metadata.xml # Path to the downloaded IdP metadata file
                # OR if using URL:
                # metadata-uri: https://dev-xxxxxx.okta.com/app/exkxxxxxxxxx/sso/saml/metadata
`entity-id`: මේක අපේ SP එකේ unique identifier එක. මේක තමයි IdP එකට අපි කවුද කියලා කියන්නේ. මේක IdP එකේ register කරපු Entity ID එකටම ගැලපෙන්න ඕනේ.
`acs.location`: ACS කියන්නේ Assertion Consumer Service. IdP එකෙන් SAML Assertion එක POST කරන URL එක මේකයි. සාමාන්යයෙන් Spring Security SAML2 එකේ default URL එක `/saml2/authenticate/{registrationId}`. මෙතන `{registrationId}` කියන්නේ `okta` වගේ අපි `registration` යටතේ දෙන නම. IdP එකෙන් එන SAML response එක මේ URL එකට තමයි එවන්නේ.
`signing.credentials`: අපේ SP එකෙන් යවන SAML AuthnRequest එක IdP එකට විශ්වාසදායකයි කියලා තහවුරු කරන්න මේ credentials ඕන වෙනවා. ඒ වගේම සමහර SAML implementations වලදී IdP එකෙන් එන assertion decrypt කරන්නත් මේ certificate එක පාවිච්චි කරන්න පුළුවන්. Private Key එකෙන් තමයි request එක sign කරන්නේ, Certificate එකෙන් තමයි IdP එකට අපේ Public Key එක දෙන්නේ. මේවා Self-signed certificates වෙන්න පුළුවන් development වලදී. Production වලදී නම් proper certificates ඕන වෙනවා. මේවා හදාගන්න OpenSSL වගේ tools පාවිච්චි කරන්න පුළුවන්. උදාහරණයක් විදිහට:
# Generate a private key
openssl genrsa -out saml-private.key 2048

# Generate a certificate signing request (CSR)
openssl req -new -key saml-private.key -out saml-certificate.csr -subj "/CN=localhost"

# Generate a self-signed certificate (valid for 365 days)
openssl x509 -req -days 365 -in saml-certificate.csr -signkey saml-private.key -out saml-certificate.crt
මේ files ටික `src/main/resources/saml/` කියන folder එක ඇතුළට දාන්න.
SecurityConfig Class එක (SecurityConfig Class):
දැන් අපි Spring Security configurations ටික හදාගමු. `SecurityConfig.java` කියලා class එකක් හදලා මේ වගේ code ටික add කරන්න:
package com.example.samlspringboot;

import org.springframework.context.annotation.Bean;
import org.springframework.context.annotation.Configuration;
import org.springframework.security.config.annotation.web.builders.HttpSecurity;
import org.springframework.security.config.annotation.web.configuration.EnableWebSecurity;
import org.springframework.security.web.SecurityFilterChain;
import org.springframework.security.web.authentication.logout.LogoutSuccessHandler;
import org.springframework.security.web.authentication.logout.SimpleUrlLogoutSuccessHandler;

@Configuration
@EnableWebSecurity
public class SecurityConfig {

    @Bean
    SecurityFilterChain appSecurityFilterChain(HttpSecurity http) throws Exception {
        http
            .authorizeHttpRequests(authorize -> authorize
                .requestMatchers("/", "/error", "/images/**", "/css/**", "/js/**").permitAll() // Allow access to static resources and home page without authentication
                .anyRequest().authenticated() // All other requests require authentication
            )
            .saml2Login(saml2 -> saml2
                .loginPage("/saml2/authenticate/okta") // Optional: If you want to explicitly define the login page URL
                .defaultSuccessUrl("/home", true) // Redirect to /home after successful login
            )
            .saml2Logout(saml2 -> saml2
                .logoutSuccessHandler(samlLogoutSuccessHandler())
            );
        return http.build();
    }

    private LogoutSuccessHandler samlLogoutSuccessHandler() {
        SimpleUrlLogoutSuccessHandler handler = new SimpleUrlLogoutSuccessHandler();
        handler.setDefaultTargetUrl("/"); // Redirect to home page after logout
        return handler;
    }
}
මේ code එකෙන් වෙන්නේ අපේ application එකේ හැම request එකක්ම authenticate කරන්න ඕනේ කියන එකයි, ඒ වගේම `saml2Login()` method එකෙන් SAML authentication flow එක enable කරන එකයි. `authorizeHttpRequests` එකෙන් අපි root path එකට (/) සහ static resources වලට (/images/**, /css/**, etc.) authentication නැතුව access කරන්න අවසර දෙනවා. අනිත් හැම request එකකටම `authenticated()` වෙන්න ඕනේ කියලා කියනවා.
saml2Login(): මේ method එක තමයි Spring Security SAML2 support එක enable කරන්නේ. මේකෙන් වෙන්නේ එන request එකක් authenticate වෙලා නැත්නම්, ඒක SAML authentication flow එකට redirect කරන එක. `defaultSuccessUrl()` එකෙන් successful login එකකින් පස්සේ redirect වෙන්න ඕන URL එක specify කරන්න පුළුවන්.
saml2Logout(): මේකෙන් SAML Logout flow එක support කරනවා. SAML Logout කියන්නේ Single Log-Out. එක application එකකින් log out වුනාම IdP එකට කියලා අනිත් හැම application එකකින්ම log out කරන mechanism එක.
Controllers සහ Views (Controllers and Views):
දැන් අපි සරලම `HomeController` එකක් සහ Thymeleaf view එකක් හදාගමු. මේකෙන් අපිට successful login එකකින් පස්සේ user ගේ attribute ටික කොහොමද access කරන්නේ කියලා බලාගන්න පුළුවන්.
`HomeController.java`:
package com.example.samlspringboot;

import org.springframework.security.core.annotation.AuthenticationPrincipal;
import org.springframework.security.saml2.provider.service.authentication.Saml2AuthenticatedPrincipal;
import org.springframework.stereotype.Controller;
import org.springframework.ui.Model;
import org.springframework.web.bind.annotation.GetMapping;

import java.util.Map;

@Controller
public class HomeController {

    @GetMapping("/")
    public String landing() {
        return "redirect:/home"; // Redirect to home page, which requires authentication
    }

    @GetMapping("/home")
    public String home(@AuthenticationPrincipal Saml2AuthenticatedPrincipal principal, Model model) {
        // Saml2AuthenticatedPrincipal contains the attributes from the SAML Assertion
        if (principal != null) {
            model.addAttribute("name", principal.getName());
            model.addAttribute("email", principal.getFirstAttribute("email"));
            model.addAttribute("attributes", principal.getAttributes());
            model.addAttribute("idp", principal.getRelyingPartyRegistrationId());
        }
        return "home"; // Render home.html
    }
}
මේ Controller එකෙන් `Saml2AuthenticatedPrincipal` object එකෙන් SAML assertion එකෙන් ලැබෙන user attributes ටික access කරලා Thymeleaf template එකට යවනවා.
`src/main/resources/templates/home.html`:
<!DOCTYPE html>
<html lang="en" xmlns:th="http://www.thymeleaf.org">
<head>
    <meta charset="UTF-8">
    <meta name="viewport" content="width=device-width, initial-scale=1.0">
    <title>SAML Spring Boot App Home</title>
    <style>
        body { font-family: Arial, sans-serif; margin: 20px; }
        .container { max-width: 800px; margin: auto; padding: 20px; border: 1px solid #ddd; border-radius: 8px; box-shadow: 0 0 10px rgba(0,0,0,0.1); }
        h1 { color: #333; }
        h2 { color: #555; border-bottom: 1px solid #eee; padding-bottom: 10px; margin-top: 20px; }
        ul { list-style-type: none; padding: 0; }
        li { margin-bottom: 8px; }
        a { color: #007bff; text-decoration: none; }
        a:hover { text-decoration: underline; }
        pre { background-color: #f4f4f4; padding: 10px; border-radius: 5px; overflow-x: auto; }
    </style>
</head>
<body>
    <div class="container">
        <h1>Welcome to SAML Spring Boot App!</h1>
        <p>You are successfully authenticated via SAML SSO.</p>

        <h2>User Information:</h2>
        <ul>
            <li><strong>Principal Name:</strong> <span th:text="${name}"></span></li>
            <li><strong>Email:</strong> <span th:text="${email}"></span></li>
            <li><strong>Authenticated by IdP:</strong> <span th:text="${idp}"></span></li>
        </ul>

        <h2>All Attributes from SAML Assertion:</h2>
        <pre><code><span th:text="${attributes}"></span></code></pre>

        <p><a href="/logout">Logout</a></p>
    </div>
</body>
</html>
SAML Flow එක (The SAML Flow)
දැන් අපි හදපු Application එක run කරමු. (Port 8080 එකෙන් run වෙයි). දැන් `http://localhost:8080/` කියන URL එකට යන්න හදද්දි, Spring Security එකෙන් ඔටෝමැටිකලි IdP එකට redirect කරනවා. මේක තමයි SAML flow එකේ වෙන්නේ:
- පරිශීලකයා (User) SP (අපේ Spring Boot App) එකට පිවිසෙන්න උත්සාහ කරනවා.
- SP එකට මේ පරිශීලකයා authenticate වෙලා නැති නිසා, SP එක විසින් පරිශීලකයා IdP වෙත redirect කරනවා. මේ redirect එකේ SP metadata (SP Entity ID, ACS URL) අඩංගු AuthnRequest එකක් තියෙනවා.
- IdP එක පරිශීලකයාගෙන් credentials ඉල්ලනවා (username/password).
- පරිශීලකයා successfuly authenticate වුනාට පස්සේ, IdP එක විසින් SAML Assertion (සත්යාපන ප්රකාශය) එකක් SP එකේ ACS URL එකට POST කරනවා. මේ Assertion එකේ පරිශීලකයාගේ විස්තර සහ authentication status එක තියෙනවා. මේ Assertion එක IdP එකේ Private Key එකෙන් sign කරලා තියෙන්නේ.
- SP එක මේ SAML Assertion එක validate කරනවා (digital signature, timestamps, audience, etc.). මේ validate කිරීම සඳහා SP එක IdP Metadata එකේ තියෙන IdP Public Key එක භාවිතා කරනවා.
- Assertion එක සාර්ථකව validate වුනාට පස්සේ, SP එක විසින් පරිශීලකයාට requested resource එකට access ලබා දෙනවා.
දැන් `http://localhost:8080/` කියන URL එකට යද්දි Okta Login page එකට redirect වෙන්න ඕනේ. Okta credentials දීලා login වුනාට පස්සේ, ඔයාලා අපේ Spring Boot App එකේ Home page එකට redirect වෙන්න ඕනේ. ඒ වගේම `/logout` URL එකෙන් logout කරන්නත් පුළුවන්.
Troubleshooting Tips:
- Configuration Mismatch: `application.yml` එකේ තියෙන IdP metadata URL/Path එක සහ SP Entity ID එක IdP එකේ configure කරපු ඒවා එක්ක හරියට match වෙනවාද කියලා බලන්න. පොඩි වැරැද්දක් උනත් වැඩ කරන්නේ නෑ.
- Logs, Logs, Logs: Spring Boot application එකේ logs බලන්න. `application.yml` එකේ `logging.level.org.springframework.security.saml2=DEBUG` කියලා දාලා debug level එකට දාලා තව විස්තර බලාගන්න පුළුවන්.
- Browser Developer Tools: Browser developer tools (Network tab) පාවිච්චි කරලා HTTP redirects සහ SAML requests/responses examine කරන්න. SAML Tracer, SAML Chrome Panel වගේ browser extensions මේකට ගොඩක් උදව් වෙනවා. මේවායින් SAML messages decode කරලා බලන්න පුළුවන්.
- Certificate Errors: `saml-private.key` සහ `saml-certificate.crt` files හරියට generate කරලා, `src/main/resources/saml/` folder එකට දාලා තියෙනවද කියලා බලන්න. ඒ වගේම certificate එක expired වෙලා නැති බවටත් වග බලාගන්න.
- IdP User Assignment: ඔබ Okta වැනි IdP එකක user කෙනෙක්ට ඔබගේ SAML Application එක assign කර ඇති බවට වග බලාගන්න. නැත්නම් user ට login වෙන්න බැහැ.
- Network Accessibility: ඔබේ Spring Boot App එක (SP) IdP එකට සහ IdP එක ඔබේ App එකට (ACS URL) network එකෙන් access කරන්න පුළුවන් බවට වග බලාගන්න. Localhost එකේදී ප්රශ්නයක් නැති වුනත්, deployment එකකදී firewall rules බලපාන්න පුළුවන්.
ඉතින් කොහොමද, වැඩේ ලේසිද?
අද අපි Spring Boot Application එකකට SAML-based Single Sign-On (SSO) එකක් implement කරන්නේ කොහොමද කියලා කතා කලා. මේක පොඩ්ඩක් සංකීර්ණ වගේ පෙනුනත්, පියවරෙන් පියවර කරද්දි එච්චරම අමාරු නෑ කියලා තේරෙන්න ඇති. Enterprise level applications වලදී මේ වගේ SSO solutions පාවිච්චි කරන එක ආරක්ෂාවට වගේම user experience එකටත් ගොඩක් වැදගත්. ඒ වගේම අපිට ගොඩක් කච්චල් නැතුව වැඩේ කරගන්නත් පුළුවන්.
මේ ගැන ඔයාලට මොනවා හරි ප්රශ්න තියෙනවා නම්, නැත්නම් ඔයාලගේ අත්දැකීම් කොහොමද කියලා කියන්න ඕන නම්, අනිවාර්යයෙන්ම පහළින් comment එකක් දාලා යන්න. ඔයාලට මේ article එකෙන් ප්රයෝජනයක් වුනා නම්, ඒකත් කියන්න අමතක කරන්න එපා. මේ වගේ තවත් technical guides එක්ක ඊළඟ පෝස්ට් එකෙන් හම්බවෙමු! ජය වේවා!