Spring Boot & Redis Cache: වේගවත් Backend එකක් හදමු | SC Guide
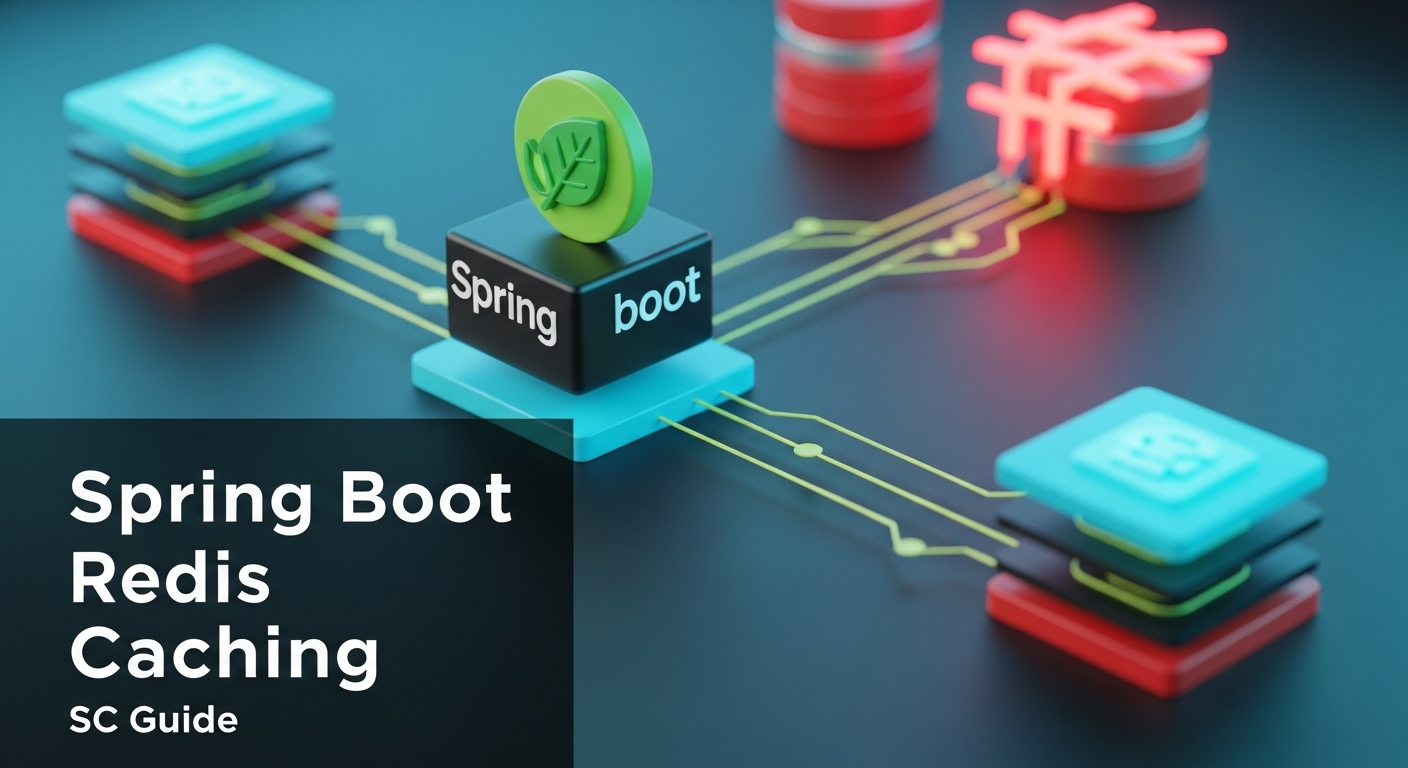
Spring Boot & Redis Cache: ඔබේ Application එකට Turbo එකක් දාමු!
ආයුබෝවන්, ටෙක් ලෝකයේ අපේ යාලුවනේ! කොහොමද ඉතින්? අද අපි කතා කරන්න යන්නේ ඔයාලගේ Spring Boot Application එකේ Performance එක අහස උසට වැඩි කරගන්න පුළුවන් සුපිරිම ටිප් එකක් ගැන – ඒ තමයි Redis එක්ක Caching.
හිතල බලන්න, ඔයා අලුත් Project එකක් කරගෙන යනවා. Backend එක Spring Boot වලින් හදලා තියෙන්නේ. හැබැයි මේක හෙනම slow. User කෙනෙක් Request එකක් දැම්මම Response එක එන්න විනාඩි ගණන් යනවා. මේක ඇත්තටම කම්මැලි වැඩක් නේද? Customer ලටත් එපා වෙනවා. මොකද වෙන්නේ කියලා හොයල බලද්දි පේන්නේ හැම Request එකකදීම Database එකට යනවා. Database එකෙන් Data ටික ගන්න කාලය යනවා. ඉතින් මේකට මොකද කරන්නේ?
අන්න එතනදී තමයි Caching කියන Concept එක අපිට ගොඩක් වැදගත් වෙන්නේ. Caching කියන්නේ නිතර නිතර පාවිච්චි වෙන Data ටික, Database එකට නොගිහින්, ඉක්මනටම ගන්න පුළුවන් විදිහට, තාවකාලිකව Memory එකක Store කරලා තියාගන්න එක. අද අපි මේ Caching වලට පාවිච්චි කරන, ලෝකයේම ජනප්රිය In-Memory Data Store එකක් වන Redis, Spring Boot එක්ක Integration කරන හැටි step-by-step ඉගෙන ගමු.
Caching කියන්නේ මොකක්ද? (Caching 101)
සරලවම කිව්වොත් Caching කියන්නේ, නිතර Request වෙන Data ටිකක් ඉක්මනට Access කරන්න පුළුවන් තැනක තියාගැනීම. හිතන්නකෝ, ඔයාගේ ගෙදර පොත් රාක්කයක් තියෙනවා කියලා. ඔයා නිතර කියවන පොත් ටික අතට ගන්න පුළුවන් විදිහට ඉස්සරහින්ම තියනවා. අනිත් පොත් ටික ටිකක් ඈතින් තියනවා. එතකොට ඔයාට ඕන පොත් ටික ඉක්මනටම ගන්න පුළුවන් නේද? Database එකත් එහෙමයි. හැම පාරම Database එකට ගිහින් Data Load කරනවට වඩා, නිතර Load වෙන Data ටික Memory එකක තියාගත්තම, Performance එක ගොඩක් වැඩි වෙනවා.
Caching වලින් ලැබෙන වාසි:
- Speed (වේගය): Data Request වලට Response එක එන වේගය වැඩි වෙනවා.
- Reduced Database Load (Database එකේ බර අඩු වීම): Database එකට නිතර නිතර Request එන එක අඩු වෙනවා, ඒ නිසා Database එකට විවේකයක් ලැබෙනවා.
- Scalability (පුළුල් කිරීමේ හැකියාව): වැඩි User ප්රමාණයක් ආවත් System එකට Handles කරන්න පුළුවන්.
- Cost Efficiency (පිරිවැය කාර්යක්ෂමතාව): Database Calls අඩු වෙන නිසා Database Resource Consumption එක අඩු වෙනවා, ඒ නිසා Cloud Bills අඩු කරගන්නත් පුළුවන්.
ඇයි Redis? (Why Redis is the Boss)
ලෝකයේ Cache කරන්න ගොඩක් Tools තියෙනවා. ඒ අතරින් Redis මෙච්චර ජනප්රිය වුණේ ඇයි? Redis කියන්නේ open-source, in-memory data structure store එකක්. Data Base එකක් කිව්වොත් වැරදි නෑ. හැබැයි මේක සාමාන්ය Database එකක් වගේ Hard Disk එකේ Data Store කරන්නේ නෑ, RAM එකේ Store කරන්නේ. ඒක නිසා තමයි වේගය මෙච්චර වැඩියි කියන්නේ.
Redis වල විශේෂාංග:
- Super Fast (මහා වේගවත්): Data RAM එකේ තියෙන නිසා Milliseconds වලින් Data ගන්න පුළුවන්.
- Versatile Data Structures (විවිධ Data Structures): Strings, Hashes, Lists, Sets, Sorted Sets වගේ Data Types ගොඩක් Support කරනවා. ඒ නිසා අපිට ඕන විදිහට Data Store කරන්න පුළුවන්.
- Persistence (ස්ථාවරත්වය): Redis වලට Data Disk එකේ Store කරන්නත් පුළුවන් (snapshots or AOF). ඒ නිසා Server එක restart වුනත් Data නැති වෙන්නේ නෑ.
- Pub/Sub (Publish/Subscribe): Real-time applications වලට ගොඩක් වැදගත් වන Messaging Pattern එකක් Support කරනවා.
- Clustering (Clusters): ලොකු Applications වලට Scale කරන්න පුළුවන්.
මේ හැම විශේෂාංගයක්ම නිසා තමයි Redis, Caching වලට විතරක් නෙවෙයි, Session Management, Real-time Analytics, Message Queues වගේ දේවලටත් ගොඩක් ජනප්රිය වෙලා තියෙන්නේ.
Spring Boot එක්ක Redis Integrate කරමු (Let's Integrate!)
හරි, දැන් අපි බලමු step-by-step Spring Boot project එකකට Redis cache එකක් add කරන්නේ කොහොමද කියලා. මේක ඇත්තටම හිතන තරම් අමාරු නෑ, Spring Boot නිසා වැඩේ ගොඩක්ම ලේසියි.
Step 1: Dependencies Add කරමු (Add Dependencies)
ඔයාගේ `pom.xml` (Maven) හෝ `build.gradle` (Gradle) file එකට මේ Dependencies ටික add කරන්න.
Maven (pom.xml):
<dependency>
    <groupId>org.springframework.boot</groupId>
    <artifactId>spring-boot-starter-data-redis</artifactId>
</dependency>
<dependency>
    <groupId>org.springframework.boot</groupId>
    <artifactId>spring-boot-starter-cache</artifactId>
</dependency>
<dependency>
    <groupId>org.springframework.boot</groupId>
    <artifactId>spring-boot-starter-web</artifactId>
</dependency>
<dependency>
    <groupId>org.projectlombok</groupId>
    <artifactId>lombok</artifactId>
    <optional>true</optional>
</dependency>
Gradle (build.gradle):
implementation 'org.springframework.boot:spring-boot-starter-data-redis'
implementation 'org.springframework.boot:spring-boot-starter-cache'
implementation 'org.springframework.boot:spring-boot-starter-web'
compileOnly 'org.projectlombok:lombok'
annotationProcessor 'org.projectlombok:lombok'
Step 2: Redis Server එක Set Up කරමු (Set Up Your Redis Server)
Redis server එකක් නැත්නම්, Docker පාවිච්චි කරන එක ලේසියි. Command Line එකේ මේක Run කරන්න:
docker run --name my-redis -p 6379:6379 -d redis
නැත්නම්, ඔයාගේ OS එකට අනුව Redis Install කරගන්න පුළුවන්. (Windows වලට WSL2 හෝ Docker Desktop recommend කරනවා.)
Step 3: application.properties වල Configure කරමු (Configure in application.properties)
ඔයාගේ `src/main/resources/application.properties` file එකට මේ ටික add කරන්න. (හෝ `application.yml` නම් ඒකට අනුව)
spring.redis.host=localhost
spring.redis.port=6379
spring.cache.type=redis
මේකෙන් වෙන්නේ Spring Boot එකට කියනවා Redis server එක තියෙන්නේ කොහෙද කියලා. ඒ වගේම Caching වලට Redis පාවිච්චි කරන්න කියලාත් කියනවා.
Step 4: Caching Enable කරමු (Enable Caching)
ඔයාගේ Spring Boot Application එකේ Main Class එකට `@EnableCaching` Annotation එක add කරන්න.
import org.springframework.boot.SpringApplication;
import org.springframework.boot.autoconfigure.SpringBootApplication;
import org.springframework.cache.annotation.EnableCaching;

@SpringBootApplication
@EnableCaching
public class RedisCacheDemoApplication {

    public static void main(String[] args) {
        SpringApplication.run(RedisCacheDemoApplication.class, args);
    }
}
මේකෙන් වෙන්නේ, අපේ Application එකට කියනවා 'හරි, මම දැන් Caching කරන්න ලෑස්තියි' කියලා.
Step 5: @Cacheable, @CachePut, @CacheEvict භාවිතය (Using Caching Annotations)
Spring Framework එක Caching වලට ගොඩක් පහසු Annotations ටිකක් දීලා තියෙනවා. අපි මේවා එකින් එක බලමු.
- පළමුව Cache එකේ Data තියෙනවද බලනවා.
- තියෙනවා නම්, Cache එකෙන් Data අරගෙන Return කරනවා. Method එක Execute වෙන්නේ නෑ.
- නැතිනම්, Method එක Execute කරලා, ඒකෙන් එන Result එක Cache එකේ Store කරලා, Return කරනවා.
`@CacheEvict`
Cache එකක තියෙන Data Remove කරන්න මේක පාවිච්චි කරනවා. මොකද, සමහර වෙලාවට Data Delete වුනහම Cache එකෙන් අයින් කරන්න ඕනනේ.උදාහරණයක්:
import org.springframework.cache.annotation.CacheEvict;

@Service
public class ProductService {

    // ... (previous methods)

    @CacheEvict(value = "products", key = "#id")
    public void deleteProduct(Long id) {
        System.out.println("Deleting product from database and cache for ID: " + id);
        // Simulate database delete
        try {
            Thread.sleep(500);
        } catch (InterruptedException e) {
            Thread.currentThread().interrupt();
        }
    }

    @CacheEvict(value = "products", allEntries = true)
    public void deleteAllProducts() {
        System.out.println("Deleting all products from cache");
    }
}
`allEntries = true` කියන්නේ අදාළ Cache එකේ (මේ වෙලාවේ `products`) තියෙන හැම Entry එකක්ම Delete කරන්න කියන එකයි.
`@CachePut`
මේක පාවිච්චි කරන්නේ Cache එකක තියෙන Data Update කරන්න. `Cacheable` වගේ නෙවෙයි, මේක හැමවෙලේම Method එක Execute කරනවා. ඒකෙන් එන Result එක Cache එකේ Update කරනවා.උදාහරණයක්:
import org.springframework.cache.annotation.CachePut;

@Service
public class ProductService {

    // ... (previous methods)

    @CachePut(value = "products", key = "#product.id")
    public Product updateProduct(Product product) {
        System.out.println("Updating product in database and cache for ID: " + product.getId());
        // Simulate database update
        try {
            Thread.sleep(1000);
        } catch (InterruptedException e) {
            Thread.currentThread().interrupt();
        }
        return product; // Return updated product
    }
}
`@Cacheable`
මේක තමයි Caching වල ප්රධානම Annotation එක. Method එකක් ඉස්සරහින් මේක දැම්මම වෙන්නේ:උදාහරණයක්:
import org.springframework.cache.annotation.Cacheable;
import org.springframework.stereotype.Service;

@Service
public class ProductService {

    // Assume this fetches data from a database or external API
    public Product findProductById(Long id) {
        System.out.println("Fetching product from database for ID: " + id);
        // Simulate a delay for database fetch
        try {
            Thread.sleep(2000);
        } catch (InterruptedException e) {
            Thread.currentThread().interrupt();
        }
        return new Product(id, "Product " + id, 100.0 * id);
    }

    @Cacheable(value = "products", key = "#id")
    public Product getProductByIdWithCache(Long id) {
        System.out.println("Fetching product from database for ID: " + id + " (via cacheable)");
        // Simulate a delay for database fetch
        try {
            Thread.sleep(2000);
        } catch (InterruptedException e) {
            Thread.currentThread().interrupt();
        }
        return new Product(id, "Product " + id, 100.0 * id);
    }
}
මෙතන `value = "products"` කියන්නේ Cache එකේ නම. `key = "#id"` කියන්නේ Cache එකේ Key එක විදිහට method එකට එන `id` parameter එක පාවිච්චි කරනවා කියන එකයි.
ප්රායෝගික උදාහරණයක් (A Practical Example)
අපි දැන් Product එකක් Manage කරන Simple REST API එකක් හදමු. මේකේදී අපි Spring Boot, Redis, Lombok පාවිච්චි කරනවා.
1. Product.java (Entity/Model)
import lombok.AllArgsConstructor;
import lombok.Data;
import lombok.NoArgsConstructor;

import java.io.Serializable;

@Data
@AllArgsConstructor
@NoArgsConstructor
public class Product implements Serializable {
    private Long id;
    private String name;
    private double price;
}
Note: Caching වලට Object එකක් Redis වල Store කරන්න නම් `Serializable` වෙන්න ඕනේ.
2. ProductService.java (Service Layer)
import com.example.rediscachedemo.model.Product;
import org.springframework.cache.annotation.CacheEvict;
import org.springframework.cache.annotation.CachePut;
import org.springframework.cache.annotation.Cacheable;
import org.springframework.stereotype.Service;

import java.util.HashMap;
import java.util.Map;

@Service
public class ProductService {

    private final Map<Long, Product> productRepository = new HashMap<>();

    public ProductService() {
        // Simulate some initial data
        productRepository.put(1L, new Product(1L, "Laptop", 1200.00));
        productRepository.put(2L, new Product(2L, "Mouse", 25.00));
        productRepository.put(3L, new Product(3L, "Keyboard", 75.00));
    }

    @Cacheable(value = "products", key = "#id")
    public Product getProductById(Long id) {
        System.out.println("Fetching product from 'database' for ID: " + id);
        // Simulate a delay
        try {
            Thread.sleep(2000);
        } catch (InterruptedException e) {
            Thread.currentThread().interrupt();
        }
        return productRepository.get(id);
    }

    @CachePut(value = "products", key = "#product.id")
    public Product updateProduct(Product product) {
        System.out.println("Updating product in 'database' and cache for ID: " + product.getId());
        productRepository.put(product.getId(), product);
        return product;
    }

    @CacheEvict(value = "products", key = "#id")
    public void deleteProduct(Long id) {
        System.out.println("Deleting product from 'database' and cache for ID: " + id);
        productRepository.remove(id);
    }

    @CacheEvict(value = "products", allEntries = true)
    public void clearAllProductsCache() {
        System.out.println("Clearing all product cache entries.");
        // In a real app, you might also clear the actual data store
    }
}
3. ProductController.java (REST Controller)
import com.example.rediscachedemo.model.Product;
import com.example.rediscachedemo.service.ProductService;
import org.springframework.beans.factory.annotation.Autowired;
import org.springframework.http.ResponseEntity;
import org.springframework.web.bind.annotation.*;

@RestController
@RequestMapping("/api/products")
public class ProductController {

    @Autowired
    private ProductService productService;

    @GetMapping("/{id}")
    public ResponseEntity<Product> getProduct(@PathVariable Long id) {
        Product product = productService.getProductById(id);
        if (product != null) {
            return ResponseEntity.ok(product);
        } else {
            return ResponseEntity.notFound().build();
        }
    }

    @PutMapping
    public ResponseEntity<Product> updateProduct(@RequestBody Product product) {
        Product updatedProduct = productService.updateProduct(product);
        return ResponseEntity.ok(updatedProduct);
    }

    @DeleteMapping("/{id}")
    public ResponseEntity<Void> deleteProduct(@PathVariable Long id) {
        productService.deleteProduct(id);
        return ResponseEntity.noContent().build();
    }

    @DeleteMapping("/cache/clear")
    public ResponseEntity<Void> clearCache() {
        productService.clearAllProductsCache();
        return ResponseEntity.noContent().build();
    }
}
Test කරලා බලමු (Let's Test It Out!)
- Spring Boot Application එක Run කරන්න.
- පළමුවෙන්ම `http://localhost:8080/api/products/1` කියන Endpoint එකට Request එකක් දාන්න. (Web Browser එකකින් හෝ Postman වගේ Tool එකකින්). Console එකේ `Fetching product from 'database' for ID: 1` කියලා Message එකක් Print වෙයි, පොඩි Delay එකකුත් තියෙයි.
- දැන් ආයෙත් ඒ Request එකම දාන්න. මේ පාර `Fetching product from 'database' for ID: 1` කියලා Print වෙන්නේ නෑ. මොකද Data එක Redis Cache එකෙන් ආපු නිසා. Response එක එන වේගය ගොඩක් වැඩි වෙලා ඇති.
- දැන් `http://localhost:8080/api/products/cache/clear` කියලා `DELETE` Request එකක් දාන්න. (Postman එකෙන්.)
- ආයෙත් `http://localhost:8080/api/products/1` එකට Request එකක් දාන්න. ආයෙත් Console එකේ `Fetching product from 'database' for ID: 1` කියලා Print වෙයි, මොකද Cache එක Clear කරපු නිසා.
මේ විදිහට ඔයාලට පුළුවන් Product එක Update කරද්දී (`PUT` request) Cache එක Update වෙනවද, Delete කරද්දී (`DELETE` request) Cache එකෙන් අයින් වෙනවද කියලා බලන්න.
අවසාන වශයෙන්... (In Conclusion...)
ඉතින් යාලුවනේ, ඔයාලට දැන් තේරෙනවා ඇති Spring Boot එක්ක Redis Caching Integration කරන එක කොච්චර ලේසිද කියලා. ඒ වගේම මේකෙන් ඔයාලගේ Application එකේ Performance එකට කොච්චර ලොකු Boost එකක් දෙනවද කියලත්. විශේෂයෙන්ම Database එකට නිතර නිතර යන Request ගොඩක් අඩු කරගන්න පුළුවන් වෙනවා.
මේ Redis කියන්නේ Caching වලට විතරක් නෙවෙයි, තව ගොඩක් දේවලට පාවිච්චි කරන්න පුළුවන් Powerful Tool එකක්. Session Management, Distributed Locks, Real-time Leaderboards වගේ දේවලටත් මේක පාවිච්චි කරන්න පුළුවන්. ඔයාලට පුළුවන් මේක තවදුරටත් Explore කරන්න.
ඔයාලත් මේක ඔයාලගේ Projects වලට Try කරලා බලන්න. මොනවා හරි ප්රශ්න තියෙනවා නම්, තේරුණේ නැති තැන් තියෙනවා නම්, පහලින් Comment කරන්න අමතක කරන්න එපා. ඒ වගේම මේ වගේ තව මොනවා ගැනද ඔයාලට දැනගන්න ඕන කියලා කියන්න. අපි ඊළඟ Blog Post එකෙන් හමුවෙමු! Happy Coding!


