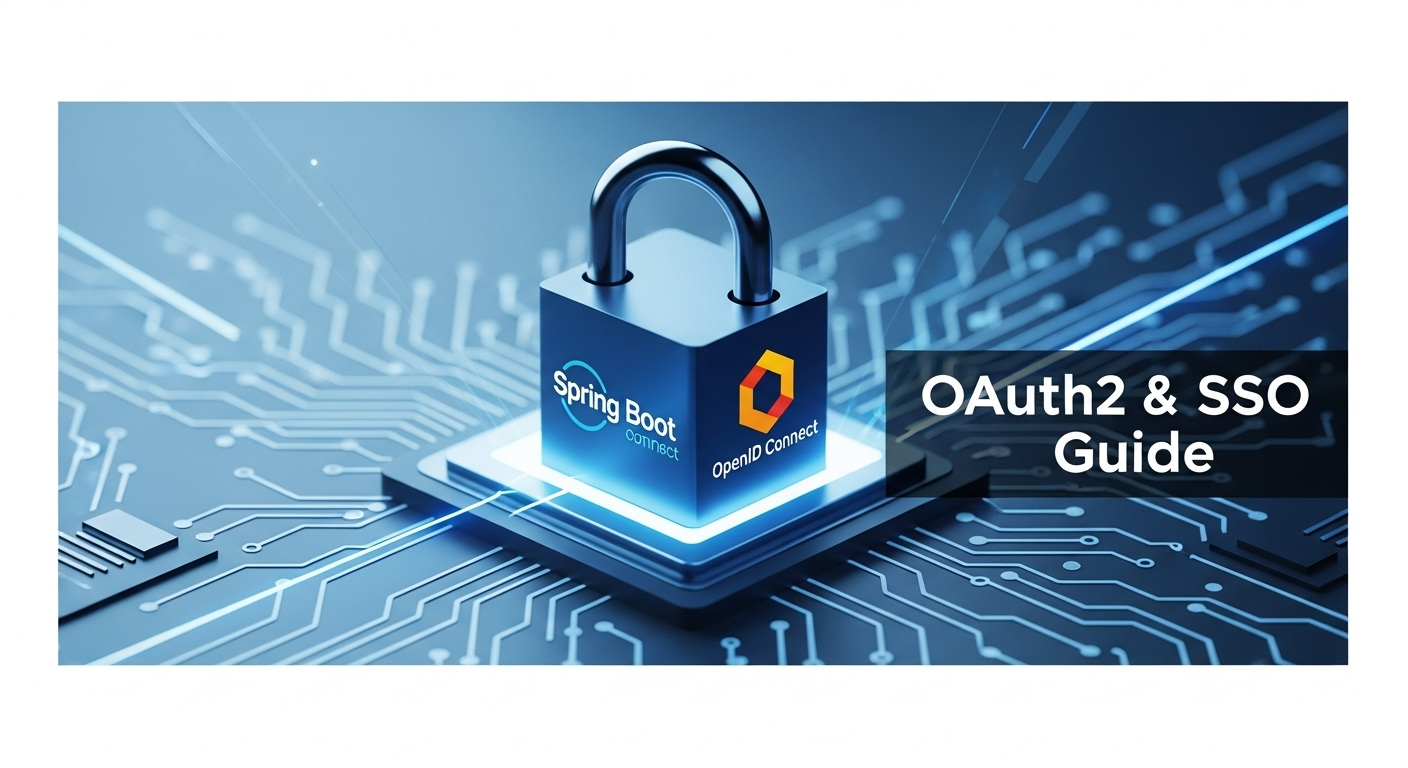
Spring Boot OpenID Connect SSO: සිංහල මාර්ගෝපදේශය - SC Guide
ආයුබෝවන් කට්ටිය! Single Sign-On (SSO) කියන්නේ මොකක්ද?
ඔයාලා කී දෙනෙක්ට තියෙනවද විවිධ applications වලට ලොග් වෙන්න password ගොඩක් මතක තියාගන්න? Email එකට එකක්, Social Media එකට එකක්, Bank application එකට එකක්, office එකේ systems වලට තව එකක්... මාරම headache එකක් නේද? හැම වෙලේම password මතක තියාගන්න එකත්, ඒවා safe තියාගන්න එකත් මාරම අභියෝගයක්.
මේකට තියෙන සුපිරිම විසඳුමක් තමයි Single Sign-On (SSO) කියන්නේ. සරලවම කිව්වොත්, එක වතාවක් ලොග් වුනොත්, ඒකෙන් ඔයාට අදාල වෙන හැම application එකකටම, system එකකටම ලොග් වෙන්න පුළුවන් වෙනවා. නිකන් කඩේට ගියා වගේ වැඩේ කරන්න පුළුවන්. හරිම පහසුයි නේද? අද අපි බලමු කොහොමද මේ වගේ වැඩක් Spring Boot එකක් එක්ක කරන්නේ කියලා, ඒකත් අපේම Identity Provider (IdP) එකක් විදියට Keycloak server එකක් පාවිච්චි කරලා.
මේ guide එකේදි අපි Spring Boot application එකක් Keycloak එකක් එක්ක OpenID Connect (OIDC) හරහා secure කරන හැටි පියවරෙන් පියවර කතා කරමු. ටිකක් ලොකු වැඩක් වගේ පෙනුනත්, ඇත්තටම නිකන් පොල් කඩනවා වගේ ලේසියි, මොකද Spring Security ඒ වැඩේ ගොඩක් සරල කරනවා.
සරලවම SSO සහ OpenID Connect කියන්නේ මොනවද?
Single Sign-On (SSO)
SSO කියන්නේ User authentication process එකක්. ඒකෙන් පුළුවන් user කෙනෙක්ට එක වතාවක් authentication කරලා, ඒ credentials පාවිච්චි කරලා වෙනත් independent applications ගණනාවකට access කරන්න. මේකෙන් වෙන්නේ user experience එක වැඩි වෙන එක, security එක ශක්තිමත් වෙන එක (මොකද password ගොඩක් මතක තියාගන්න ඕනෙ නැති නිසා දුර්වල password පාවිච්චි කරන එක අඩු වෙනවා), ඒ වගේම IT support cost අඩු වෙන එක (password reset requests අඩු වෙන නිසා).
OpenID Connect (OIDC)
OAuth 2.0 කියන්නේ authorization protocol එකක්. ඒකෙන් කියන්නේ user කෙනෙක්ට අදාල resources වලට access කරන්න පුළුවන් කෙනාට විතරයි කියලා. ඒත් OAuth 2.0 වලින් user කවුද කියලා කියන්නේ නැහැ, කියන්නේ access කරන්න පුළුවන්ද බැරිද කියලා විතරයි. එතකොට OpenID Connect (OIDC) කියන්නේ OAuth 2.0 මත හදපු identity layer එකක්. ඒකෙන් පුළුවන් user කවුද කියලා verify කරන්න, ඒ වගේම basic profile information (name, email වගේ) ලබාගන්නත් පුළුවන්.
OIDC වල තියෙන ප්රධානම කොටස තමයි ID Token එක. මේක JSON Web Token (JWT) එකක් විදියට එන්නේ. මේ ID Token එකේ user ගේ identity information (user ID, name, email වගේ) cryptographic signature එකක් එක්ක තියෙනවා. මේකෙන් Client application එකට පුළුවන් user කවුද කියලා විශ්වාසනීයව දැනගන්න.
OIDC flow එක සාමාන්යයෙන් මෙහෙමයි:
- User කෙනෙක් Client Application එකට (අපේ Spring Boot App එක) access කරන්න හදනවා.
- Client Application එක User ව Identity Provider (IdP) එකට (අපේ Keycloak) redirect කරනවා.
- User IdP එකේ ලොග් වෙනවා (username, password දාලා).
- IdP එක User ව validate කරලා, Client Application එකට ID Token එකක් සහ Access Token එකක් (සමහරවිට Refresh Token එකකුත්) එක්ක redirect කරනවා.
- Client Application එක ID Token එක validate කරලා, user ගේ identity එක තහවුරු කරනවා. Access Token එක පාවිච්චි කරලා වෙනත් Protected Resources වලට access කරන්න පුළුවන්.
ඇයි Spring Boot සහ OpenID Connect එකට?
Spring Boot කියන්නේ Java applications ඉක්මනින් සහ පහසුවෙන් හදන්න තියෙන සුපිරි Framework එකක්. ඒ වගේම Spring Security කියන්නේ Spring ecosystem එකේ තියෙන බලගතුම security framework එකක්. මේකේ OAuth2/OpenID Connect වලට විශිෂ්ට support එකක් තියෙනවා. ඒ නිසා Spring Boot application එකක් OpenID Connect හරහා secure කරන එක හරිම ලේසියි.
Spring Security එකේ තියෙන pre-built components නිසා අපිට OAuth2/OIDC flow එකේ ගොඩක් දේවල් manually implement කරන්න ඕනෙ නෑ. Redirects, token exchange, user info fetching, token validation වගේ දේවල් Spring Security විසින්ම manage කරනවා. මේකෙන් අපේ development time එක ගොඩක් අඩු වෙනවා වගේම, security best practices වලට අනුව code එක ලියවෙනවා.
ඉතින් අපි බලමු මේ වැඩේ practical විදියට කරන්නේ කොහොමද කියලා.
Keycloak සකසමු!
අපේ Identity Provider විදියට අපි Keycloak පාවිච්චි කරනවා. Keycloak කියන්නේ Red Hat එකෙන් develop කරපු open-source identity and access management solution එකක්. මේකෙන් පුළුවන් user federation, strong authentication, user management වගේ ගොඩක් දේවල් කරන්න.
Keycloak Docker එකෙන් Run කරමු
Keycloak run කරන්න ලේසිම විදිය තමයි Docker පාවිච්චි කරන එක. ඔයාට Docker install කරලා නැත්නම්, මුලින්ම Docker Desktop install කරගන්න.
docker run -p 8081:8080 -e KEYCLOAK_ADMIN=admin -e KEYCLOAK_ADMIN_PASSWORD=admin --name keycloak quay.io/keycloak/keycloak:23.0.4 start-dev
මේ command එකෙන් වෙන්නේ Keycloak server එක 8081 port එකේ run වෙන එක (Default port එක 8080, ඒත් සමහරවිට ඔයාගේ Spring Boot app එකට 8080 ඕනෙ වෙන්න පුළුවන් නිසා 8081 වල run කරමු), admin user කෙනෙක් හදන එක ('admin' username, 'admin' password), ඒ වගේම develop environment එකට server එක start කරන එක.
server එක run වුනාට පස්සේ, ඔයාට පුළුවන් Browser එකේ http://localhost:8081 වලට ගිහින් Keycloak Welcome page එක බලන්න. එතනින් 'Administration Console' එකට යන්න පුළුවන්.
Keycloak එකේ Realm එකක් සහ Client එකක් හදමු
Keycloak Administration Console එකට ගියාට පස්සේ, 'admin' user එකෙන් ලොග් වෙන්න.
1. Realm එකක් හදමු:
Keycloak වල Realm එකක් කියන්නේ user set එකකට, applications වලට සහ configurations වලට තියෙන separate space එකක්. අපි අලුත් Realm එකක් හදමු.
- වම් පැත්තේ උඩ තියෙන 'Master' කියන dropdown එක click කරලා, 'Create realm' click කරන්න.
- 'Name' එකට
SpringBoot-OIDC-Realmකියලා දෙන්න. - 'Create' click කරන්න.
2. Client එකක් හදමු:
Client එකක් කියන්නේ අපේ Spring Boot application එක Keycloak එකට identify කරන විදිය. අපේ Spring Boot app එක Keycloak එකට කියන්නේ 'මම මේ client එක' කියලා.
- වම් පැත්තේ menu එකෙන් 'Clients' කියන එක click කරන්න.
- 'Create client' click කරන්න.
- Client settings:
- Client ID:
spring-boot-client(මේක තමයි අපේ Spring Boot app එක identify කරන නම) - Name:
Spring Boot OIDC App - Description:
Spring Boot application for OIDC SSO example - 'Next' click කරන්න.
- Client ID:
- Capability config:
- Client authentication: Enable (මේකෙන් client secret එකක් පාවිච්චි කරලා authenticate වෙන්න පුළුවන්)
- Authorization: Disable (අපිට මේකට authorization ඕනෙ නෑ, authentication විතරයි)
- Authentication flow: Standard flow, Direct access grants (දැනට මේ දෙක තියෙමු)
- 'Next' click කරන්න.
- Login settings:
- Valid redirect URIs:
http://localhost:8080/login/oauth2/code/keycloak(මේක හරිම වැදගත්! Spring Security Default Redirect URI එක මේකයි. Keycloak එකට කියන්නේ මේ URI එකට විතරයි authentication response එක එවන්න පුළුවන් කියලා.) - Web origins:
http://localhost:8080 - 'Save' click කරන්න.
- Valid redirect URIs:
Client එක හැදුවට පස්සේ, 'Credentials' tab එකට ගියාම ඔයාට Client Secret එක බලාගන්න පුළුවන්. මේක අපිට Spring Boot app එකේ use කරන්න ඕනෙ වෙනවා.
User කෙනෙක් හදමු
අපේ Spring Boot app එකට ලොග් වෙන්න User කෙනෙක් ඕනෙ වෙනවා.
- වම් පැත්තේ menu එකෙන් 'Users' click කරන්න.
- 'Create new user' click කරන්න.
- Details:
- Username:
john.doe - Email:
[email protected] - First name:
John - Last name:
Doe - 'Create' click කරන්න.
- Username:
- User එක හැදුවට පස්සේ, 'Credentials' tab එකට ගිහින් password එකක් set කරන්න.
- 'Set password' click කරලා, Password එක දෙන්න (උදා:
password). 'Temporary' කියන එක Off කරන්න (එතකොට User පළවෙනි පාරට ලොග් වෙනකොට password වෙනස් කරන්න කියන්නේ නෑ). - 'Save' click කරන්න.
ඔන්න Keycloak setup එක ඉවරයි. දැන් යමු Spring Boot පැත්තට.
Spring Boot සමඟ සම්බන්ධ කරමු
දැන් අපි Spring Boot application එකක් හදලා, ඒක Keycloak එකත් එක්ක connect කරමු.
1. Spring Boot Project එකක් හදමු
Spring Initializr (start.spring.io) පාවිච්චි කරලා අලුත් Maven project එකක් හදමු. Dependencies විදියට මේවා add කරගන්න:
- Spring Web
- Spring Security
- OAuth2 Client
Project එක generate කරලා, IDE එකකට (IntelliJ IDEA, VS Code වගේ) import කරගන්න.
2. pom.xml Dependencies
ඔයාගේ pom.xml file එකේ මේ dependencies තියෙනවද කියලා බලන්න. නැත්නම් add කරගන්න:
<dependencies>
    <dependency>
        <groupId>org.springframework.boot</groupId>
        <artifactId>spring-boot-starter-web</artifactId>
    </dependency>
    <dependency>
        <groupId>org.springframework.boot</groupId>
        <artifactId>spring-boot-starter-security</artifactId>
    </dependency>
    <dependency>
        <groupId>org.springframework.boot</groupId>
        <artifactId>spring-boot-starter-oauth2-client</artifactId>
    </dependency>
    <dependency>
        <groupId>org.springframework.boot</groupId>
        <artifactId>spring-boot-starter-oauth2-resource-server</artifactId>
    </dependency>
    <dependency>
        <groupId>org.springframework.boot</groupId>
        <artifactId>spring-boot-starter-test</artifactId>
        <scope>test</scope>
    </dependency>
    <dependency>
        <groupId>org.springframework.security</groupId>
        <artifactId>spring-security-test</artifactId>
        <scope>test</scope>
    </dependency>
</dependencies>
3. application.properties Configuration
දැන් src/main/resources/application.properties file එක open කරලා, Keycloak configuration එක add කරන්න.
# Server port
server.port=8080

# Keycloak OpenID Connect Configuration
spring.security.oauth2.client.registration.keycloak.client-id=spring-boot-client
spring.security.oauth2.client.registration.keycloak.client-secret=YOUR_KEYCLOAK_CLIENT_SECRET
spring.security.oauth2.client.registration.keycloak.scope=openid,profile,email
spring.security.oauth2.client.registration.keycloak.redirect-uri={baseUrl}/login/oauth2/code/{registrationId}
spring.security.oauth2.client.registration.keycloak.client-authentication-method=client_secret_post
spring.security.oauth2.client.registration.keycloak.authorization-grant-type=authorization_code

# Keycloak Provider Details
spring.security.oauth2.client.provider.keycloak.issuer-uri=http://localhost:8081/realms/SpringBoot-OIDC-Realm
spring.security.oauth2.client.provider.keycloak.user-name-attribute=preferred_username
වැදගත්: YOUR_KEYCLOAK_CLIENT_SECRET කියන තැනට ඔයා Keycloak එකේදී හදාගත්ත client secret එක දාන්න. ඒක client එකේ 'Credentials' tab එකේ තියෙනවා.
client-id: Keycloak එකේ අපි හදපු client ID එක.client-secret: Keycloak එකේ අපි හදපු client secret එක.scope: අපිට user ගෙන් ගන්න ඕනෙ information වර්ග (openidකියන්නේ OIDC වලට අනිවාර්යයි,profileසහemailවලින් user ගේ නම සහ email එක වගේ දේවල් ලැබෙනවා).redirect-uri: Spring Security Default Redirect URI එක. මේක Keycloak එකේදී දුන්න redirect URI එකටම ගැලපෙන්න ඕනේ.issuer-uri: Keycloak realm එකේ URL එක. මේක Spring Security වලට කියනවා Keycloak metadata (authorization endpoint, token endpoint, JWK set URI වගේ) auto-discover කරන්න කියලා.user-name-attribute: JWT එකෙන් user ගේ නම ගන්න ඕනෙ attribute එක. Keycloak වල default එකpreferred_username.
4. Spring Security Configuration
දැන් අපි Spring Security Configure කරමු. Spring Boot 2.7+ සහ 3.x වලට SecurityFilterChain bean එකක් පාවිච්චි කරන එක recommended. අලුත් Java class එකක් හදන්න (උදා: SecurityConfig.java).
package com.example.demo.config;

import org.springframework.context.annotation.Bean;
import org.springframework.context.annotation.Configuration;
import org.springframework.security.config.annotation.web.builders.HttpSecurity;
import org.springframework.security.config.annotation.web.configuration.EnableWebSecurity;
import org.springframework.security.web.SecurityFilterChain;

@Configuration
@EnableWebSecurity
public class SecurityConfig {

    @Bean
    public SecurityFilterChain securityFilterChain(HttpSecurity http) throws Exception {
        http
            .authorizeHttpRequests(authorizeRequests ->
                authorizeRequests
                    .anyRequest().authenticated() // ඕනෑම request එකක් authenticate වෙන්න ඕනෙ
            )
            .oauth2Login(oauth2Login ->
                oauth2Login
                    .defaultSuccessUrl("/") // සාර්ථකව ලොග් වුනාට පස්සේ root URL එකට redirect කරන්න
            );
        return http.build();
    }
}
මේ configuration එකෙන් වෙන්නේ අපේ application එකට එන ඕනෑම request එකක් authenticate වෙන්න ඕනෙ කියලා කියන එක. ඒ වගේම oauth2Login() කියන එකෙන් OIDC flow එක enable වෙනවා. Spring Security විසින්ම Keycloak authentication page එකට redirect කරන එක, token exchange කරන එක වගේ දේවල් manage කරනවා.
5. Simple Controller එකක් හදමු
දැන් අපි user ගේ information display කරන simple controller එකක් හදමු. මේකෙන් user ලොග් වෙලාද කියලා බලන්නත් පුළුවන්.
package com.example.demo.controller;

import org.springframework.security.core.annotation.AuthenticationPrincipal;
import org.springframework.security.oauth2.core.oidc.user.OidcUser;
import org.springframework.stereotype.Controller;
import org.springframework.ui.Model;
import org.springframework.web.bind.annotation.GetMapping;

@Controller
public class HomeController {

    @GetMapping("/")
    public String home(@AuthenticationPrincipal OidcUser oidcUser, Model model) {
        if (oidcUser != null) {
            model.addAttribute("userName", oidcUser.getFullName());
            model.addAttribute("email", oidcUser.getEmail());
            model.addAttribute("oidcUser", oidcUser);
        } else {
            model.addAttribute("userName", "Guest");
            model.addAttribute("email", "N/A");
        }
        return "index"; // index.html කියන template එක render කරන්න
    }
}
@AuthenticationPrincipal OidcUser oidcUser කියන parameter එකෙන් පුළුවන් authenticated user ගේ details ගන්න. OidcUser object එකේ user ගේ full name, email, claims වගේ දේවල් තියෙනවා.
6. HTML Template එකක් හදමු
අපි Thymeleaf template engine එක පාවිච්චි කරමු. src/main/resources/templates/index.html කියලා file එකක් හදලා මේ code එක දාන්න:
<!DOCTYPE html>
<html lang="en" xmlns:th="http://www.thymeleaf.org">
<head>
    <meta charset="UTF-8">
    <meta name="viewport" content="width=device-width, initial-scale=1.0">
    <title>Spring Boot OIDC SSO Demo</title>
    <style>
        body { font-family: Arial, sans-serif; margin: 20px; background-color: #f4f4f4; }
        .container { background-color: #fff; padding: 30px; border-radius: 8px; box-shadow: 0 2px 4px rgba(0,0,0,0.1); max-width: 600px; margin: 50px auto; }
        h1 { color: #333; }
        p { color: #666; }
        .logout-button { background-color: #dc3545; color: white; padding: 10px 15px; border: none; border-radius: 5px; cursor: pointer; text-decoration: none; display: inline-block; margin-top: 20px; }
        .logout-button:hover { background-color: #c82333; }
        pre { background-color: #eee; padding: 10px; border-radius: 5px; overflow-x: auto; }
    </style>
</head>
<body>
    <div class="container">
        <h1>Spring Boot OIDC SSO Demo</h1>

        <p>ආයුබෝවන්, <strong><span th:text="${userName}">Guest</span>!</strong></p>
        <p>ඔබගේ Email: <span th:text="${email}">N/A</span></p>

        <div th:if="${oidcUser != null}">
            <h3>OIDC User Claims:</h3>
            <pre><code><span th:text="${oidcUser.claims}"></span></code></pre>
            <a href="/logout" class="logout-button">Logout</a>
        </div>
        <div th:unless="${oidcUser != null}">
            <p>කරුණාකර <a href="/oauth2/authorization/keycloak">Keycloak හරහා ලොග් වන්න</a>.</p>
        </div>

        <!-- Spring Security Logout Endpoint -->
        <form id="logoutForm" th:action="@{/logout}" method="post" style="display: none;"
              th:if="${oidcUser != null}">
            <input type="hidden" th:name="${_csrf.parameterName}" th:value="${_csrf.token}" />
        </form>
    </div>

    <script>
        // Handle logout button click via JavaScript to submit the form
        document.addEventListener('DOMContentLoaded', function() {
            const logoutButton = document.querySelector('.logout-button');
            if (logoutButton) {
                logoutButton.addEventListener('click', function(event) {
                    event.preventDefault(); // Prevent default link behavior
                    document.getElementById('logoutForm').submit();
                });
            }
        });
    </script>
</body>
</html>
මේ HTML එකෙන් user ගේ නම, email එක සහ OIDC claims ටිකක් පෙන්නනවා. user ලොග් වෙලා නැත්නම්, Keycloak හරහා ලොග් වෙන්න link එකක් පෙන්නනවා. /logout endpoint එක Spring Security විසින් provide කරනවා.
පරීක්ෂා කිරීම සහ පොදු ගැටලු
දැන් සියල්ල සකස් කරලා ඉවරයි. Spring Boot application එක run කරලා බලමු.
ඔයාගේ IDE එකෙන් හෝ Maven command එකෙන් (mvn spring-boot:run) application එක start කරන්න.
පරීක්ෂා කරන හැටි:
- Browser එකේ
http://localhost:8080වලට යන්න. - Spring Security විසින් ඔයාව Keycloak login page එකට redirect කරයි.
- Keycloak login page එකේදී අපි හදාගත්ත user ගේ (john.doe, password) credentials දාලා ලොග් වෙන්න.
- සාර්ථකව ලොග් වුනාට පස්සේ, Spring Boot application එකට redirect වෙලා, ඔයාගේ නම සහ email එක display වෙයි. ඒ වගේම OIDC Claims ටිකත් බලාගන්න පුළුවන්.
- Logout button එක click කරලා logout වෙන්නත් පුළුවන්.
වැඩේ ගොඩද? සුපිරි!
පොදු ගැටලු සහ විසඳුම්:
ගැටලුවක් ආවොත් බය වෙන්න එපා. මේවා තමයි සාමාන්යයෙන් එන issues.
- Redirect URI Mismatch:
- ගැටලුව: Keycloak එකේදී set කරපු Valid Redirect URI එකයි, Spring Boot
application.propertiesඑකේ set කරපු URI එකයි ගැලපෙන්නේ නැති එක. - විසඳුම: මේ දෙකම හරියටම ගැලපෙනවද කියලා බලන්න.
http://localhost:8080/login/oauth2/code/keycloakකියන එක Keycloak Client එකේ Valid Redirect URIs වල හරියටම තියෙන්න ඕනේ.
- ගැටලුව: Keycloak එකේදී set කරපු Valid Redirect URI එකයි, Spring Boot
- Client Secret Wrong:
- ගැටලුව:
application.propertiesඑකේ දාපු client secret එක Keycloak එකේ තියෙන secret එකට ගැලපෙන්නේ නැති එක. - විසඳුම: Keycloak Client එකේ 'Credentials' tab එකට ගිහින් secret එක හරියට copy කරලා
application.propertiesඑකට දාන්න.
- ගැටලුව:
- Keycloak Server Not Running/Wrong Port:
- ගැටලුව: Keycloak server එක run වෙන්නේ නැති එක, නැත්නම් වැරදි port එකක run වෙන එක.
- විසඳුම: Docker command එක හරියට run වෙලාද කියලා බලන්න (
docker ps). Port එකapplication.propertiesඑකේissuer-uriඑකට ගැලපෙනවද බලන්න (අපි 8081 පාවිච්චි කළා).
- Missing Dependencies:
- ගැටලුව:
pom.xmlඑකේ අවශ්ය dependencies නැති එක. - විසඳුම:
spring-boot-starter-securityසහspring-boot-starter-oauth2-clientdependencies හරියට add කරලාද කියලා බලන්න.
- ගැටලුව:
- Scope Issues:
- ගැටලුව:
scopeඑකේopenidනැති එක. - විසඳුම:
spring.security.oauth2.client.registration.keycloak.scope=openid,profile,emailවගේopenidඅනිවාර්යයෙන්ම තියෙන්න ඕනේ.
- ගැටලුව:
Debugging Tips:
- Spring Boot console එකේ logs බලන්න. Error messages ගොඩක් වටිනවා.
- Keycloak console logs බලන්න. Docker logs පාවිච්චි කරන්න:
docker logs keycloak. - Browser Developer Tools (F12) වල 'Network' tab එක බලන්න. Redirects, requests, responses හරියට සිදුවෙනවද කියලා බලන්න.
නිගමනය
ඔන්න ඉතින් අපි සාර්ථකව Spring Boot application එකක් Keycloak Identity Provider එකක් එක්ක OpenID Connect පාවිච්චි කරලා secure කරගත්තා. මේකෙන් පුළුවන් ඔයාගේ applications වලට seamless Single Sign-On experience එකක් දෙන්න. Security එක වැඩි වෙනවා වගේම, user experience එකත් තවත් හොඳ වෙනවා. මේ වගේ SSO solution එකක් implement කරන එක අද වගේ දියුණු software ලෝකයක හරිම වැදගත් දෙයක්.
මේ guide එකෙන් ඔයාලට SSO සහ OIDC ගැන හොඳ අවබෝධයක් ලැබෙන්න ඇති කියලා හිතනවා. ඒ වගේම Spring Boot project එකකට OIDC implement කරන හැටි ගැනත් පැහැදිලි වෙන්න ඇති.
ඔයාලගේ අදහස්, ප්රශ්න පහලින් comment කරන්න. මේ වගේ තවත් guide එකක් ඕනෙ නම් ඒකත් කියන්න! පුළුවන් තරම් practical විදියට, අපේම විදියට තව ගොඩක් දේවල් කතා කරමු. ජය වේවා!