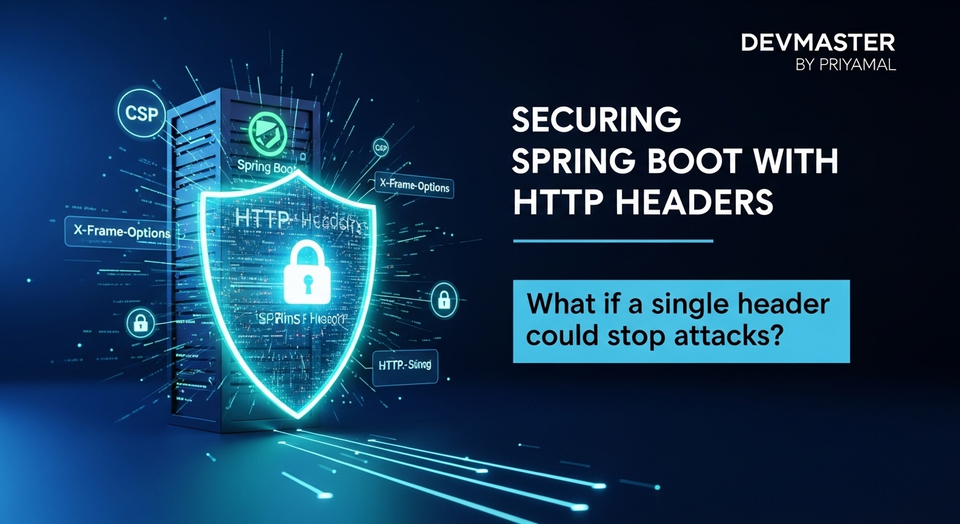
Spring Boot Microservices Authorization Sinhala | IAM Service API Gateway SC Guide

හැඳින්වීම: Microservices වල Security අභියෝගය
ආයුබෝවන් යාළුවනේ! අද අපි කතා කරන්න යන්නේ software engineering වල දැනට තියෙන ලොකුම challenge එකක් ගැන – ඒ තමයි Microservices වල security එක maintain කරන එක. විශේෂයෙන්ම authorization, ඒ කියන්නේ කවුද මොනවද කරන්න පුළුවන් කියන එක decide කරන එක. Monolithic architecture එකකදී මේක සාපේක්ෂව ලේසියි. හැබැයි Microservices වලදී, සේවා ගොඩක්, වෙන වෙනම deploy කරලා තියෙන නිසා, හැම request එකක්ම හරියට authorize වෙනවාද කියලා බලන එක පොඩ්ඩක් සංකීර්ණ වෙන්න පුළුවන්.
අපි අද බලමු කොහොමද Spring Boot microservices ecosystem එකකදී, IAM (Identity and Access Management) Service එකක් සහ API Gateway එකක් පාවිච්චි කරලා centralized authorization system එකක් හදන්නේ කියලා. මේකෙන් ඔයාගේ applications වල security එක ශක්තිමත් කරගන්න පුළුවන් වගේම, authorization logic එක organize කරගන්නත් ලේසි වෙනවා. අපි step-by-step මේක ගැන කතා කරමු, code examples එක්කම.
Microservices වල Authorization ඇයි මෙච්චර වැදගත්?
Monolithic application එකක හැම request එකක්ම එකම code base එකක් හරහා යන නිසා, authorization filters එකක් හෝ interceptors කිහිපයක් දාගෙන මේක handle කරන්න ලේසියි. ඒත් Microservices වලදී situation එක වෙනස්.
- Distributed Nature: Microservices කියන්නේ පොඩි පොඩි, ස්වාධීන සේවාවන් ගොඩක් එකතු වෙලා හදන system එකක්. මේ හැම service එකක්ම වෙන වෙනම deploy කරලා, manage කරන නිසා, user කෙනෙක්ට service ගොඩකට access වෙන්න පුළුවන්.
- Security Concerns: හැම service එකක්ම තමන්ගේ business logic එක තමයි කරන්න ඕනේ. හැම service එකකම user authentication, authorization logic එක දාන්න ගියොත් code duplication වෙනවා, maintenance අමාරු වෙනවා, consistency නැතිවෙන්න පුළුවන්.
- Scalability & Maintainability: Authorization logic එක centralized නොවුනොත්, security policies වෙනස් කරන්න වුනොත් හැම service එකක්ම update කරන්න වෙනවා. මේක ඉතාමත් වෙහෙසකර වැඩක්.
මේ අභියෝග ජය ගන්න තමයි අපි IAM Service එකක් සහ API Gateway එකක් පාවිච්චි කරන්නේ.
IAM Service එකේ කාර්යභාරය (Identity and Access Management Service)
IAM Service එක තමයි ඔයාගේ system එකේ security heart එක. මේකේ ප්රධාන කාර්යයන් කිහිපයක් තියෙනවා:
- User Authentication: Users ලාට login වෙන්න අවස්ථාව දෙන එක (username/password, OAuth2, OpenID Connect වගේ දේවල් පාවිච්චි කරලා).
- Token Generation: Authentication සාර්ථක වුනාට පස්සේ, client ට JWT (JSON Web Token) වගේ secure token එකක් නිකුත් කරන එක. මේ token එකේ user ID, roles, permissions වගේ තොරතුරු තියෙනවා.
- User Management: Users ලා manage කරන එක, roles define කරන එක, permissions assign කරන එක.
අපේ scenario එකේදී, iam-service එකේ ප්රධාන කාර්යය වෙන්නේ user කෙනෙක් login වුනාම JWT එකක් නිකුත් කරන එක. මේ JWT එක තමයි අපේ api-gateway එක authorization වලට පාවිච්චි කරන්නේ.
iam-service - Basic Login සහ JWT Generation Example
පහත දැක්වෙන්නේ Spring Boot iam-service එකක සරල Login Controller එකක් සහ JWT token එකක් generate කරන හැටි.
Dependencies (pom.xml):
<dependency>
    <groupId>org.springframework.boot</groupId>
    <artifactId>spring-boot-starter-web</artifactId>
</dependency>
<dependency>
    <groupId>io.jsonwebtoken</groupId>
    <artifactId>jjwt-api</artifactId>
    <version>0.11.2</version>
</dependency>
<dependency>
    <groupId>io.jsonwebtoken</groupId>
    <artifactId>jjwt-impl</artifactId>
    <version>0.11.2</version>
    <scope>runtime</scope>
</dependency>
<dependency>
    <groupId>io.jsonwebtoken</groupId>
    <artifactId>jjwt-jackson</artifactId>
    <version>0.11.2</version>
    <scope>runtime</scope>
</dependency>
AuthController.java:
package com.example.iam.controller;

import com.example.iam.model.AuthRequest;
import com.example.iam.model.AuthResponse;
import com.example.iam.service.JwtService;
import org.springframework.beans.factory.annotation.Autowired;
import org.springframework.http.ResponseEntity;
import org.springframework.web.bind.annotation.PostMapping;
import org.springframework.web.bind.annotation.RequestBody;
import org.springframework.web.bind.annotation.RequestMapping;
import org.springframework.web.bind.annotation.RestController;

@RestController
@RequestMapping("/auth")
public class AuthController {

    @Autowired
    private JwtService jwtService;

    @PostMapping("/login")
    public ResponseEntity<AuthResponse> authenticateUser(@RequestBody AuthRequest authRequest) {
        // In a real application, you would validate credentials against a database
        // For simplicity, let's assume valid credentials for 'user' and 'password'
        if ("user".equals(authRequest.getUsername()) && "password".equals(authRequest.getPassword())) {
            String token = jwtService.generateToken(authRequest.getUsername(), "USER"); // Assign a role
            return ResponseEntity.ok(new AuthResponse(token));
        }
        return ResponseEntity.status(401).body(new AuthResponse("Invalid Credentials"));
    }
}
JwtService.java (Simplified):
package com.example.iam.service;

import io.jsonwebtoken.Jwts;
import io.jsonwebtoken.SignatureAlgorithm;
import io.jsonwebtoken.io.Decoders;
import io.jsonwebtoken.security.Keys;
import org.springframework.stereotype.Service;

import java.security.Key;
import java.util.Date;
import java.util.HashMap;
import java.util.Map;

@Service
public class JwtService {

    // IMPORTANT: Use a strong, securely generated secret key in a real application
    public static final String SECRET = "5367566B59703373367639792F423F4528482B4D6251655468576D5A71347437"; // Base64 encoded key

    public String generateToken(String userName, String role) {
        Map<String, Object> claims = new HashMap<>();
        claims.put("role", role);
        return createToken(claims, userName);
    }

    private String createToken(Map<String, Object> claims, String userName) {
        return Jwts.builder()
                .setClaims(claims)
                .setSubject(userName)
                .setIssuedAt(new Date(System.currentTimeMillis()))
                .setExpiration(new Date(System.currentTimeMillis() + 1000 * 60 * 30)) // 30 minutes expiration
                .signWith(getSignKey(), SignatureAlgorithm.HS256).compact();
    }

    private Key getSignKey() {
        byte[] keyBytes = Decoders.BASE64.decode(SECRET);
        return Keys.hmacShaKeyFor(keyBytes);
    }

    // This method will be used by the API Gateway to validate tokens locally
    public void validateToken(String token) {
        Jwts.parserBuilder().setSigningKey(getSignKey()).build().parseClaimsJws(token);
    }
}
API Gateway එකේ කාර්යභාරය සහ Authorization (Spring Cloud Gateway)
API Gateway එක කියන්නේ ඔයාගේ Microservices system එකට එන හැම request එකක්ම මුලින්ම ලබන single entry point එක. මේක client ටයි backend services ටයි අතර තියෙන proxy එකක් වගේ ක්රියා කරනවා.
API Gateway එකෙන් authorization වලට ලොකු සහයෝගයක් දෙනවා. ඒකෙදි මේ දේවල් වෙනවා:
- Request Interception: හැම එන request එකක්ම API Gateway එක හරහා යන නිසා, authorization logic එක implement කරන්න පුරළුවන්.
- Token Validation: Client එකෙන් එවපු JWT එක validate කරන්න පුළුවන්. ඒ කියන්නේ token එක authentic ද, expire වෙලා නැද්ද, signature එක හරියට තියෙනවාද වගේ දේවල් check කරනවා.
- Claim Extraction: JWT එකෙන් user ID, roles, permissions වගේ claims extract කරලා, ඒ තොරතුරු downstream services වලට header එකක් විදිහට forward කරන්න පුළුවන්.
- Centralized Policy Enforcement: සියලු authorization rules Gateway එකේ define කරන්න පුළුවන්. Request එක valid නැත්නම්, downstream service එකට යන්න කලින්ම block කරන්න පුළුවන්.
අපි Spring Cloud Gateway පාවිච්චි කරලා මේක කොහොමද කරන්නේ කියලා බලමු. මේකෙදි අපිට Custom Global Filter එකක් හදන්න පුළුවන්, හැම request එකක්ම validate කරන්න.
api-gateway - Configuration සහ Custom Authorization Filter
Dependencies (pom.xml):
<dependency>
    <groupId>org.springframework.cloud</groupId>
    <artifactId>spring-cloud-starter-gateway</artifactId>
</dependency>
<dependency>
    <groupId>org.springframework.cloud</groupId>
    <artifactId>spring-cloud-starter-netflix-eureka-client</artifactId> <!-- If using Eureka -->
</dependency>
<dependency>
    <groupId>io.jsonwebtoken</groupId>
    <artifactId>jjwt-api</artifactId>
    <version>0.11.2</version>
</dependency>
<dependency>
    <groupId>io.jsonwebtoken</groupId>
    <artifactId>jjwt-impl</artifactId>
    <version>0.11.2</version>
    <scope>runtime</scope>
</dependency>
<dependency>
    <groupId>io.jsonwebtoken</groupId>
    <artifactId>jjwt-jackson</artifactId>
    <version>0.11.2</version>
    <scope>runtime</scope>
</dependency>
<dependency>
    <groupId>org.springframework.boot</groupId>
    <artifactId>spring-boot-starter-webflux</artifactId> <!-- Required for Spring Cloud Gateway -->
</dependency>
application.yml:
server:
  port: 8080

spring:
  application:
    name: api-gateway
  cloud:
    gateway:
      routes:
        - id: iam_service_route
          uri: lb://IAM-SERVICE # Load balancing for IAM service
          predicates:
            - Path=/auth/**
        - id: product_service_route
          uri: lb://PRODUCT-SERVICE # Load balancing for Product service
          predicates:
            - Path=/products/**
      globalcors:
        corsConfigurations:
          '[/**]':
            allowedOrigins: "*"
            allowedMethods:
              - GET
              - POST
              - PUT
              - DELETE
              - OPTIONS
            allowedHeaders: "*"
            allowCredentials: true

# Eureka Client Configuration (if you use Eureka Discovery Service)
# eureka:
#   client:
#     serviceUrl:
#       defaultZone: http://localhost:8761/eureka/
#   instance:
#     hostname: localhost
AuthorizationFilter.java (Custom Global Filter):
package com.example.apigateway.filter;

import com.example.apigateway.util.JwtUtil;
import io.jsonwebtoken.Claims;
import io.jsonwebtoken.ExpiredJwtException;
import io.jsonwebtoken.MalformedJwtException;
import io.jsonwebtoken.SignatureException;
import io.jsonwebtoken.UnsupportedJwtException;
import org.springframework.beans.factory.annotation.Autowired;
import org.springframework.cloud.gateway.filter.GatewayFilter;
import org.springframework.cloud.gateway.filter.GatewayFilterChain;
import org.springframework.http.HttpStatus;
import org.springframework.http.server.reactive.ServerHttpRequest;
import org.springframework.http.server.reactive.ServerHttpResponse;
import org.springframework.stereotype.Component;
import org.springframework.web.server.ServerWebExchange;
import reactor.core.publisher.Mono;

@Component
public class AuthorizationFilter implements GatewayFilter {

    @Autowired
    private JwtUtil jwtUtil; // We'll create this utility class

    @Override
    public Mono<Void> filter(ServerWebExchange exchange, GatewayFilterChain chain) {
        ServerHttpRequest request = exchange.getRequest();

        // Public paths that don't require authentication
        if (request.getURI().getPath().startsWith("/auth")) {
            return chain.filter(exchange);
        }

        if (!request.getHeaders().containsKey("Authorization")) {
            return onError(exchange, "Missing Authorization header", HttpStatus.UNAUTHORIZED);
        }

        String authHeader = request.getHeaders().get("Authorization").get(0);
        if (authHeader != null && authHeader.startsWith("Bearer ")) {
            String token = authHeader.substring(7);
            try {
                // Validate token locally using the same secret key from IAM service
                jwtUtil.validateToken(token);
                Claims claims = jwtUtil.extractAllClaims(token);

                // Add user info (e.g., username, roles) to request headers for downstream services
                ServerHttpRequest modifiedRequest = request.mutate()
                        .header("X-User-Name", claims.getSubject())
                        .header("X-User-Role", (String) claims.get("role"))
                        .build();

                return chain.filter(exchange.mutate().request(modifiedRequest).build());

            } catch (ExpiredJwtException e) {
                return onError(exchange, "Token expired", HttpStatus.UNAUTHORIZED);
            } catch (SignatureException | MalformedJwtException | UnsupportedJwtException | IllegalArgumentException e) {
                return onError(exchange, "Invalid Token: " + e.getMessage(), HttpStatus.UNAUTHORIZED);
            }
        }
        return onError(exchange, "Invalid Authorization header format", HttpStatus.UNAUTHORIZED);
    }

    private Mono<Void> onError(ServerWebExchange exchange, String err, HttpStatus httpStatus) {
        ServerHttpResponse response = exchange.getResponse();
        response.setStatusCode(httpStatus);
        return response.setComplete();
    }
}
JwtUtil.java (Copied from IAM Service - Shared Secret/Logic):
package com.example.apigateway.util;

import io.jsonwebtoken.Claims;
import io.jsonwebtoken.Jwts;
import io.jsonwebtoken.io.Decoders;
import io.jsonwebtoken.security.Keys;
import org.springframework.stereotype.Component;

import java.security.Key;

@Component
public class JwtUtil {

    // IMPORTANT: This SECRET key MUST be the same as in the IAM service
    public static final String SECRET = "5367566B59703373367639792F423F4528482B4D6251655468576D5A71347437";

    public void validateToken(final String token) {
        Jwts.parserBuilder().setSigningKey(getSignKey()).build().parseClaimsJws(token);
    }

    private Key getSignKey() {
        byte[] keyBytes = Decoders.BASE64.decode(SECRET);
        return Keys.hmacShaKeyFor(keyBytes);
    }

    public Claims extractAllClaims(String token) {
        return Jwts.parserBuilder().setSigningKey(getSignKey()).build().parseClaimsJws(token).getBody();
    }
}
Global Filter එක apply කරන හැටි (ApiGatewayApplication.java):
package com.example.apigateway;

import com.example.apigateway.filter.AuthorizationFilter;
import org.springframework.beans.factory.annotation.Autowired;
import org.springframework.boot.SpringApplication;
import org.springframework.boot.autoconfigure.SpringBootApplication;
import org.springframework.cloud.client.discovery.EnableDiscoveryClient;
import org.springframework.cloud.gateway.route.RouteLocator;
import org.springframework.cloud.gateway.route.builder.RouteLocatorBuilder;
import org.springframework.context.annotation.Bean;

@SpringBootApplication
@EnableDiscoveryClient // If using Eureka or other discovery service
public class ApiGatewayApplication {

    @Autowired
    private AuthorizationFilter authorizationFilter;

    public static void main(String[] args) {
        SpringApplication.run(ApiGatewayApplication.class, args);
    }

    @Bean
    public RouteLocator customRouteLocator(RouteLocatorBuilder builder) {
        return builder.routes()
                .route(r -> r.path("/auth/**")
                        .uri("lb://IAM-SERVICE")) // Route to IAM Service
                .route(r -> r.path("/products/**")
                        .filters(f -> f.filter(authorizationFilter))
                        .uri("lb://PRODUCT-SERVICE")) // Apply filter to Product Service
                .build();
    }
}
Downstream Services (උදාහරණයක් ලෙස product-service)
API Gateway එකෙන් request එක validate කරලා, අවශ්ය user information (username, role) headers වලට දාලා downstream service එකට යවනවා. ඒ නිසා downstream service එකට authentication හෝ basic authorization කරන්න අවශ්ය නැහැ. ඒකෙන් පුළුවන් තමන්ගේ business logic එක focus කරන්න.
product-service එකකදී මේ information access කරන හැටි බලමු.
package com.example.product.controller;

import org.springframework.web.bind.annotation.GetMapping;
import org.springframework.web.bind.annotation.RequestHeader;
import org.springframework.web.bind.annotation.RequestMapping;
import org.springframework.web.bind.annotation.RestController;

@RestController
@RequestMapping("/products")
public class ProductController {

    @GetMapping("/list")
    public String getProducts(@RequestHeader(name = "X-User-Name", required = false) String userName,
                              @RequestHeader(name = "X-User-Role", required = false) String userRole) {
        if (userName != null && userRole != null) {
            // Here you can use userName and userRole for fine-grained authorization if needed
            return "Hello " + userName + " (" + userRole + ")! Here are product listings.";
        }
        return "Welcome! Here are public product listings.";
    }
}
මේ product-service එකේ @RequestHeader annotations වලින් Gateway එකෙන් එවන headers ටික retrieve කරන හැටි බලාගන්න පුළුවන්. මේ තොරතුරු පාවිච්චි කරලා, product-service එකට තමන්ගේ specific authorization rules (උදාහරණයක් ලෙස, 'ADMIN' role එකට විතරක් products add කරන්න පුළුවන්) implement කරන්න පුළුවන්.
අවසාන වශයෙන් (Conclusion)
අද අපි කතා කළා Spring Boot Microservices වල centralized authorization එකක් implement කරන හැටි IAM Service එකක් සහ API Gateway එකක් පාවිච්චි කරලා. මේ method එකෙන් ඔයාට ලැබෙන ප්රධාන වාසි ටිකක් තමයි:
- Centralized Control: සියලුම authorization logic එක API Gateway එකේ තියෙන නිසා, control කරන්න ලේසියි.
- Separation of Concerns: IAM Service එක authentication සහ token management කරනවා. Gateway එක authorization check කරනවා. Downstream services තමන්ගේ core business logic එක focus කරනවා.
- Improved Security: Unauthorized requests downstream services වලට එන්න කලින්ම block කරන්න පුළුවන්.
- Scalability and Maintainability: Security policies වෙනස් කරන්න අවශ්ය වුනොත්, Gateway එකේ update කරපු ගමන් මුළු system එකටම apply වෙනවා.
මේක බොහොම practical approach එකක්. මේ code snippets ඔයාගේ project එකට implement කරලා බලන්න. JWT secret key එක production environment එකකදී environment variables වලින් හෝ secure vault එකකින් ගන්න අමතක කරන්න එපා!
මේ ගැන ඔයාට මොනවා හරි ප්රශ්න තියෙනවා නම්, නැත්නම් ඔයාගේ අත්දැකීම් කොහොමද කියලා comment section එකේ share කරන්න. අපි ඊළඟ ලිපියකින් හමුවෙමු!