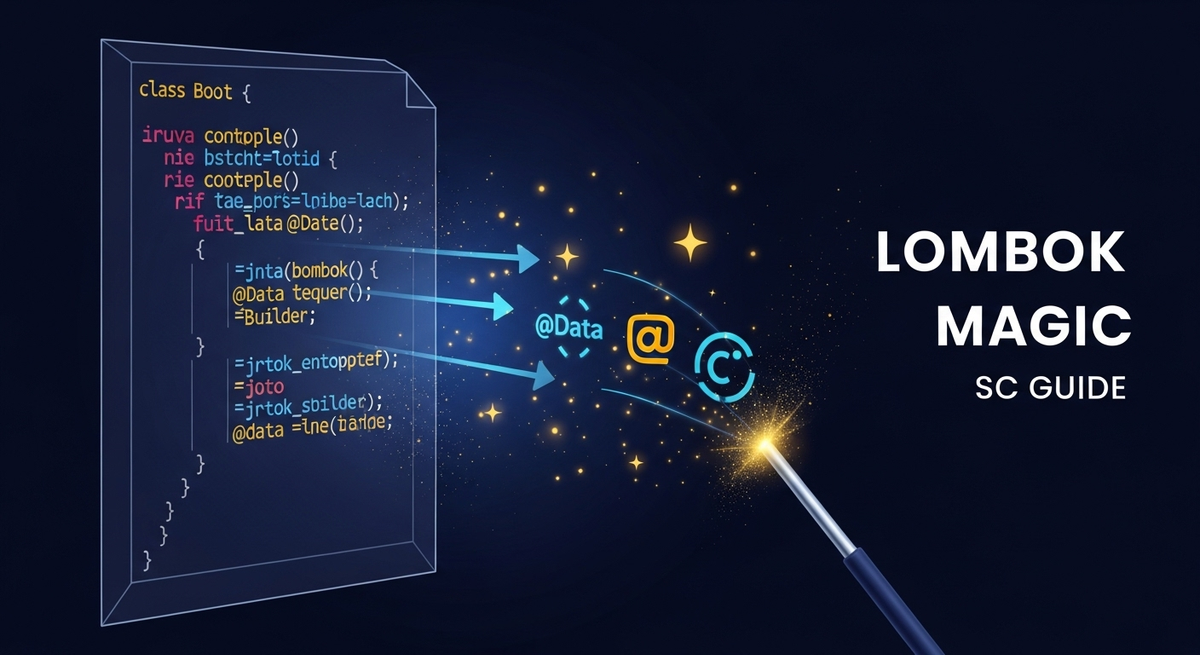
Spring Boot Lombok මැජික්: කෝඩ් ලිවීම අඩු කරමු
ආයුබෝවන් කට්ටිය! 💻
අද අපි කතා කරන්නේ, Spring Boot Project වලදී අපේ ජීවිතේ ලේසි කරන, කෝඩ් ලිවීම ආතල් කරන, ඒ වගේම අපේ කෝඩ්බේස් එක (codebase) පිරිසිදු කරන සුපිරි ටූල් එකක් ගැන. ඒ තමයි Project Lombok! 🚀
ලොකු project එකක් කරද්දි, පොඩි entity එකක් හැදුවත්, get, set, constructor, toString වගේ දේවල් ලිය ලියා අපිට මහන්සි වෙන්න වෙනවා නේ? මේවා අපි හැමෝටම හුරු පුරුදු boilerplate code තමයි. හැබැයි මේවා ලියන්න අපිට ටයිම් එකක් යනවා වගේම, කෝඩ් එකේ පෙනුම විනාශ වෙනවා. 😩 Project Lombok කියන්නේ, මේ වගේ වැඩකට නැති කෝඩ් ගොඩක් අඩු කරලා, අපේ කෝඩ් එක clean, කියවන්න ලේසි එකක් බවට පත් කරන සුපිරි ලයිබ්රරි එකක්. ඔයාලා Spring Boot එක්ක වැඩ කරනවා නම්, මේක නැතුව බෑ කියලම කියන්න පුළුවන්.
Lombok කියන්නේ මොකක්ද?
සරලවම කිව්වොත්, Project Lombok කියන්නේ Java library එකක්. මේක අපේ Java code එක compile වෙන වෙලාවේ (compile-time) අපිට අවශ්ය methods සහ Constructors generate කරනවා. ඒ කියන්නේ, අපි ලියන්න ඕන get, set, equals, hashCode, toString වගේ methods, Lombok automatically හදලා දෙනවා. අපිට කරන්න තියෙන්නේ Lombok සපයන පුංචි annotations කීපයක් අපේ class එකට උඩින් දාන එක විතරයි. 😍
මේ නිසා මොකද වෙන්නේ? අපේ POJO (Plain Old Java Object) classes ඉතාම කෙටියි, කියවන්න ලේසියි. කෝඩ් ලිවීම අඩු වෙන නිසා, වැරදි (bugs) ඇතිවීමේ සම්භාවිතාවත් අඩු වෙනවා. ඒ වගේම, අපි අලුතින් field එකක් add කරාම, ඒකට අදාළ getter/setter modify කරන්න ඕන වෙන්නේ නැහැ. Lombok ඒක බලාගන්නවා. නියමයි නේද? 😎
Project එකට Lombok එකතු කරමු
Project Lombok අපේ Spring Boot project එකට එකතු කරන එක හරිම ලේසියි. අපි Maven පාවිච්චි කරනවා නම්, අපේ pom.xml file එකට මේ dependency එක add කරන්න ඕනේ.
<dependency>
    <groupId>org.projectlombok</groupId>
    <artifactId>lombok</artifactId>
    <optional>true</optional>
</dependency>
Gradle පාවිච්චි කරනවා නම්, build.gradle file එකට මේ විදියට add කරන්න.
dependencies {
    // ...
    compileOnly 'org.projectlombok:lombok'
    annotationProcessor 'org.projectlombok:lombok'
    // ...
}
මේක add කරාට පස්සේ, ඔයාලගේ IDE එකට (IntelliJ IDEA, Eclipse, VS Code) Lombok plugin එක install කරන්නත් අමතක කරන්න එපා. නැත්නම් IDE එකට Lombok generate කරන methods identify කරගන්න බැරි වෙන්න පුළුවන්. 🛠️
දැන් අපි පොඩි උදාහරණයක් බලමු. අපි Book කියන entity එකක් හදනවා කියලා හිතමු.
Lombok නැතිව (Before Lombok):
public class Book {
    private String title;
    private String author;
    private int publicationYear;

    public Book() {
    }

    public Book(String title, String author, int publicationYear) {
        this.title = title;
        this.author = author;
        this.publicationYear = publicationYear;
    }

    public String getTitle() {
        return title;
    }

    public void setTitle(String title) {
        this.title = title;
    }

    public String getAuthor() {
        return author;
    }

    public void setAuthor(String author) {
        this.author = author;
    }

    public int getPublicationYear() {
        return publicationYear;
    }

    public void setPublicationYear(int publicationYear) {
        this.publicationYear = publicationYear;
    }

    @Override
    public String toString() {
        return "Book{" +
               "title='" + title + '\'' +
               ", author='" + author + '\'' +
               ", publicationYear=" + publicationYear +
               '}';
    }

    // hashCode and equals methods would also go here...
}
මේක බලන්නකෝ! පොඩි class එකක් වුනාට කොච්චර code ප්රමාණයක් තියෙනවද කියලා. 😵
Lombok එක්ක (After Lombok):
import lombok.Getter;
import lombok.Setter;
import lombok.NoArgsConstructor;
import lombok.AllArgsConstructor;
import lombok.ToString;

@Getter
@Setter
@NoArgsConstructor
@AllArgsConstructor
@ToString
public class Book {
    private String title;
    private String author;
    private int publicationYear;
}
මේක බලන්නකෝ, කොච්චර ලේසිද කියලා! අපේ class එකේ core logic විතරයි තියෙන්නේ. අනිත් ඔක්කොම Lombok generate කරනවා. මේක තනිකරම මැජික් එකක් වගේ තමයි! ✨
@Data සහ @Builder - කෝඩ් අඩු කිරීමේ රජ්ජුරුවෝ
Lombok එකේ තියෙන හැම annotation එකක්ම වැදගත්. හැබැයි මේ දෙක තමයි වැඩියෙන්ම පාවිච්චි වෙන, වැඩියෙන්ම කෝඩ් අඩු කරනAnnotations ටික. 👑
@Data Annotation
@Data කියන්නේ Lombok එකේ තියෙන powerfulම annotation එකක්. මේකෙන් එකපාරටම annotations කීපයක වැඩ කරනවා. ඒ කියන්නේ, @Data දැම්මා කියන්නේ,
@Getter: හැම field එකකටම Getter methods හදනවා.@Setter: හැම field එකකටම Setter methods හදනවා.@RequiredArgsConstructor:finalfields වලට සහ@NonNullවලින් annotate කරපු fields වලට constructor එකක් හදනවා.@ToString: Object එකේ String representation එක හදනවා.@EqualsAndHashCode:equals()සහhashCode()methods හදනවා.
කියන මේ ඔක්කොම එකපාරටම add වෙනවා. බලන්නකෝ, අපේ Book class එක @Data එක්ක කොහොමද පේන්නේ කියලා.
import lombok.Data;

@Data
public class Book {
    private String title;
    private String author;
    private int publicationYear;
}
දැන් මේක තවත් clean වුණා නේද? හැබැයි මතක තියාගන්න, @Data annotation එකෙන් default constructor එකක් (NoArgsConstructor) හදන්නේ නැහැ. ඒක අවශ්ය නම්, @NoArgsConstructor වෙනම add කරන්න ඕනේ. ඒ වගේම, සමහර වෙලාවට අපිට හැම field එකකටම setter අවශ්ය වෙන්නේ නැහැ. Immutable objects හදනකොට setters අනවශ්යයි. ඒ වගේ වෙලාවට @Data වෙනුවට @Getter විතරක් පාවිච්චි කරන්න පුළුවන්. 💡
@Builder Annotation
@Builder කියන්නේ තව සුපිරි annotation එකක්. අපිට complex objects හදනකොට, constructor එකේ parameter ගොඩක් තියෙනවා නම්, ඒක කියවන්න අමාරුයි, වරදින්නත් පුළුවන්. Builder pattern එක මේකට හොඳ විසඳුමක්. @Builder annotation එකෙන් අපේ class එකට Builder pattern එක automatically implement කරනවා.
මේකේ වාසි මොනවද?
- කියවීමේ පහසුව (Readability): Method chaining නිසා object එකක් හදන හැටි පැහැදිලියි.
- ආරක්ෂාව (Safety): Parameters order එක ගැන හිතන්න ඕනේ නැහැ.
- අත්යවශ්ය නොවන fields (Optional fields): අවශ්ය fields විතරක් set කරන්න පුළුවන්.
Book class එක @Builder එක්ක පාවිච්චි කරන්නේ මෙහෙමයි.
import lombok.Builder;
import lombok.Getter; // Builder use කරද්දි getters manual generate වෙනවා.
import lombok.ToString;

@Getter
@Builder // Builders generate setters for each field, so we can omit @Setter.
@ToString
public class Book {
    private final String title; // Using final for immutability
    private final String author;
    private final int publicationYear;

    // @Builder generates a private all-args constructor automatically.
    // If you need a public one, you can add it manually or use @AllArgsConstructor
    // If you need default constructor, you can add @NoArgsConstructor
}
දැන් මේ Book object එක හදන විදිය බලන්න.
public class Main {
    public static void main(String[] args) {
        Book book = Book.builder()
                        .title("The Hitchhiker's Guide to the Galaxy")
                        .author("Douglas Adams")
                        .publicationYear(1979)
                        .build();

        System.out.println(book.getTitle()); // The Hitchhiker's Guide to the Galaxy
        System.out.println(book.getAuthor());   // Douglas Adams
        System.out.println(book.toString());
    }
}
කොච්චර ලස්සනට, කියවන්න ලේසි විදියට object එකක් හදන්න පුළුවන්ද කියලා බලන්න. විශේෂයෙන්ම final fields එක්ක @Builder පාවිච්චි කරන එක immutable objects හදනකොට හරිම ප්රයෝජනවත්.
ප්රායෝගික උදාහරණයක් - Entity Refactoring
අපි දැන් පොඩි Product Management System එකක Product entity එකක් refactor කරලා බලමු. මේක Spring Data JPA එක්ක වැඩ කරනවා කියලා හිතමු.
Lombok නැති Product Entity එක:
import jakarta.persistence.Entity;
import jakarta.persistence.GeneratedValue;
import jakarta.persistence.GenerationType;
import jakarta.persistence.Id;
import java.util.Objects;

@Entity
public class Product {
    @Id
    @GeneratedValue(strategy = GenerationType.IDENTITY)
    private Long id;
    private String name;
    private String description;
    private double price;
    private int quantity;

    public Product() {
    }

    public Product(String name, String description, double price, int quantity) {
        this.name = name;
        this.description = description;
        this.price = price;
        this.quantity = quantity;
    }

    // Getters
    public Long getId() { return id; }
    public String getName() { return name; }
    public String getDescription() { return description; }
    public double getPrice() { return price; }
    public int getQuantity() { return quantity; }

    // Setters
    public void setId(Long id) { this.id = id; }
    public void setName(String name) { this.name = name; }
    public void setDescription(String description) { this.description = description; }
    public void setPrice(double price) { this.price = price; }
    public void setQuantity(int quantity) { this.quantity = quantity; }

    @Override
    public String toString() {
        return "Product{" +
               "id=" + id +
               ", name='" + name + '\'' +
               ", description='" + description + '\'' +
               ", price=" + price +
               ", quantity=" + quantity +
               '}';
    }

    @Override
    public boolean equals(Object o) {
        if (this == o) return true;
        if (o == null || getClass() != o.getClass()) return false;
        Product product = (Product) o;
        return Double.compare(product.price, price) == 0 && quantity == product.quantity && Objects.equals(id, product.id) && Objects.equals(name, product.name) && Objects.equals(description, product.description);
    }

    @Override
    public int hashCode() {
        return Objects.hash(id, name, description, price, quantity);
    }
}
මේකේ line ගාන ගැන පොඩ්ඩක් හිතලා බලන්නකෝ. 😩
Lombok එක්ක Product Entity එක Refactor කරමු:
අපි මේක @Data සහ @Builder දෙකම පාවිච්චි කරලා refactor කරමු. @Data කියන්නේ entity එකකට හොඳටම ගැලපෙනවා, මොකද අපිට getters/setters, toString, equals, hashCode ඔක්කොම ඕන වෙනවා. @Builder අපිට Product objects හදනකොට ගොඩක් උදව් වෙනවා.
import jakarta.persistence.Entity;
import jakarta.persistence.GeneratedValue;
import jakarta.persistence.GenerationType;
import jakarta.persistence.Id;
import lombok.AllArgsConstructor;
import lombok.Builder;
import lombok.Data;
import lombok.NoArgsConstructor;

@Entity
@Data // Generates getters, setters, toString, equals, hashCode, and RequiredArgsConstructor
@NoArgsConstructor // Required for JPA to create instances
@AllArgsConstructor // For convenience if we need a constructor with all fields
@Builder // Provides a builder for creating instances
public class Product {
    @Id
    @GeneratedValue(strategy = GenerationType.IDENTITY)
    private Long id;
    private String name;
    private String description;
    private double price;
    private int quantity;
}
දැන් බලන්න! කෝඩ් එක කොච්චර කෙටිද? ඒ වගේම, කියවන්නත් හරිම ලේසියි. අපේ Product entity එකේ core details විතරයි පේන්නේ. 💪
දැන් අපි බලමු, Service layer එකකදී මේ Product object එක @Builder එකෙන් හදන විදිය.
import org.springframework.stereotype.Service;

@Service
public class ProductService {

    // Assume ProductRepository is injected here

    public Product createNewProduct(String name, String description, double price, int quantity) {
        // Using Lombok's @Builder to create a new Product instance
        Product newProduct = Product.builder()
                                   .name(name)
                                   .description(description)
                                   .price(price)
                                   .quantity(quantity)
                                   .build();

        // Save the product to the database using repository (e.g., productRepository.save(newProduct);)
        System.out.println("New product created: " + newProduct.getName());
        return newProduct;
    }

    public static void main(String[] args) {
        ProductService service = new ProductService(); // In a real Spring app, this would be dependency injected
        service.createNewProduct("Laptop Pro", "Powerful laptop for professionals", 1200.00, 50);
        service.createNewProduct("Wireless Mouse", "Ergonomic design, long battery life", 25.50, 200);
    }
}
මේ වගේ @Builder එක පාවිච්චි කරලා object හදන එක කොච්චර පහසුද කියලා පේනවා නේද? විශේෂයෙන්ම parameters ගොඩක් තියෙනකොට, ඒ parameter එක මොකක්ද කියලා පැහැදිලිව පේන නිසා වැරදි අඩු වෙනවා.
සාරාංශය සහ නියමයි!
ඉතින්, Project Lombok කියන්නේ Spring Boot Developersලාට අනිවාර්යයෙන්ම තිබිය යුතුම (must-have) tool එකක්. මේකෙන් අපේ කෝඩ් ලිවීමේ අත්දැකීම වැඩි දියුණු කරනවා වගේම, කෝඩ් එකේ ගුණාත්මකභාවය වැඩි කරනවා. Boilerplate code අඩු වීම නිසා, අපි හැමෝටම වැදගත් වෙන Business Logic එකට වැඩියෙන් අවධානය දෙන්න පුළුවන් වෙනවා.
ඔයාලත් මේක පාවිච්චි කරලා බලලා, ඔයාලගේ අත්දැකීම් comment section එකේ කියන්න අමතක කරන්න එපා. මොකද, තවම Lombok පාවිච්චි නොකරන යාළුවන්ටත් මේකෙන් ලොකු උදව්වක් වෙයි. 😊
කිසියම් ගැටලුවක් හෝ පැහැදිලි කිරීමක් අවශ්ය නම්, අහන්න පසුබට වෙන්න එපා! 💬
ඊළඟ ලිපියෙන් හමුවෙමු! Happy Coding! ❤️


