Spring Boot & Apache Thrift: Distributed Systems වලට අලුත් පාරක් | RPC Tutorial SC Guide
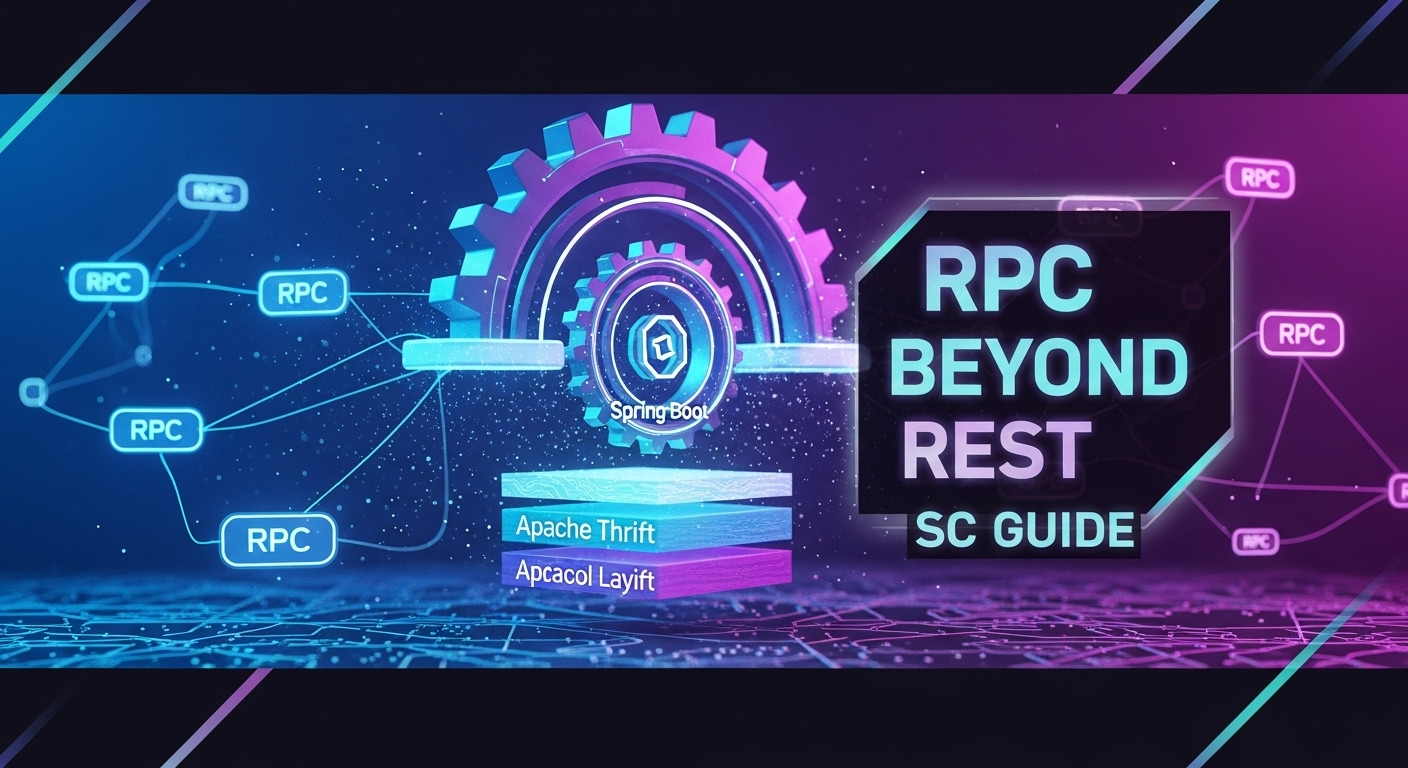
Spring Boot එක්ක Apache Thrift: Distributed Systems වලට අලුත් පාරක්! SC Guide
ආයුබෝවන් කට්ටියට! අද අපි කතා කරන්නේ අපේ software projects වලට මාර වැදගත් වෙන දෙයක් ගැන – Spring Boot එක්ක Apache Thrift පාවිච්චි කරලා cross-language communication කොහොමද කරන්නේ කියලා. ඔයාලා දන්නවනේ දැන් Microservices Architecture කොච්චර ජනප්රියද කියලා. ඒ වගේ distributed systems හදනකොට විවිධ services අතර දත්ත හුවමාරු කරගන්න එක ලොකුම අභියෝගයක්. ගොඩක් වෙලාවට අපි REST APIs තමයි පාවිච්චි කරන්නේ. ඒත් සමහර තැන් වල REST වලට වඩා දියුණු, වේගවත් විසඳුම් ඕන වෙනවා. අන්න ඒ වගේ තැනකට තමයි Apache Thrift වගේ Remote Procedure Call (RPC) Framework එකක් මාර විදියට වැදගත් වෙන්නේ.
අද අපි බලමු,
- Thrift කියන්නේ මොකද්ද? ඇයි අපිට මේක ඕන?
- Spring Boot Project එකකට Thrift එකතු කරගන්නේ කොහොමද?
- Thrift service එකක් හදන්නේ කොහොමද?
- Client එකක් හදලා මේ service එකට කතා කරන්නේ කොහොමද?
කියලා. එහෙනම් අපි වැඩේට බහිමු!
Thrift මොකද්ද මේ? (Thrift คืออะไร?)
සරලවම කිව්වොත්, Apache Thrift කියන්නේ Facebook එකේ අය හදපු Remote Procedure Call (RPC) framework එකක්. මේකෙන් අපිට පුළුවන් වෙනවා විවිධ Programming Languages වලින් ලියපු application වලට එකිනෙකා එක්ක කතා කරන්න. උදාහරණයක් විදියට, ඔයාගේ backend service එක Java වලින් ලියලා, ඒකට කතා කරන client එක Python වලින් ලියලා නම්, Thrift පාවිච්චි කරලා මේ දෙක අතර සන්නිවේදනය පහසුවෙන් කරන්න පුළුවන්.
Thrift වල තියෙන ප්රධානම වාසිය තමයි એයාගේ Interface Definition Language (IDL) එක. මේ IDL එක කියන්නේ programming language එකකට සීමා නොවෙන විදියට, අපේ services වල functions (operations), data types (structs, enums, unions) අඳුනගන්න පුළුවන් භාෂාවක්. අපි මේ IDL file එකක් ලියලා, Thrift compiler එකෙන් ඒක compile කළාම, අපිට ඕන කරන Programming Language එකට (Java, Python, C++, Go, PHP වගේ ගොඩක් languages වලට support කරනවා) අවශ්ය code එක (client-side stub, server-side skeleton) generate වෙනවා.
ඇයි අපිට Thrift ඕන?
ඔයාලා හිතයි, REST API එකක් තිබ්බම මොකටද මේ Thrift කියලා? හොඳ ප්රශ්නයක්. REST APIs කියන්නේ web applications වලට සහ public APIs වලට මාර විදියට හොඳ විසඳුමක්. ඒත් distributed systems, microservices architectures වගේ තැන්වල, විශේෂයෙන්ම service-to-service communication වලදී, Thrift වලට REST වලට වඩා වාසි කීපයක් තියෙනවා:
- Performance: Thrift lightweight binary protocol එකක් පාවිච්චි කරන නිසා REST (JSON/XML) වලට වඩා වේගවත්. Data serialize/deserialize කරන්න යන කාලය අඩුයි.
- Type Safety: IDL එකක් පාවිච්චි කරන නිසා compile-time එකේම data types define වෙනවා. ඒ නිසා runtime එකේ data type errors අඩුයි.
- Cross-Language Support: එකම IDL එකකින් විවිධ භාෂාවලට code generate කරන්න පුළුවන් නිසා polyglot microservices වලට මාරම පහසුයි.
- Schema Evolution: IDL එක manage කරන එක සාපේක්ෂව පහසුයි. අලුත් fields add කරනකොට, remove කරනකොට backward/forward compatibility maintain කරන්න පුළුවන්.
ඇත්තටම කිව්වොත් Thrift කියන්නේ Google වල gRPC, Protobuf වගේ frameworks වලට සමාන දෙයක්. මේවා High-performance internal communications වලට තමයි ගොඩක් වෙලාවට පාවිච්චි වෙන්නේ.
Thrift කටුගාගන්න Spring Boot එක්ක (Getting Started with Thrift and Spring Boot)
දැන් අපි බලමු, ඔයාගේ Spring Boot project එකකට Thrift කොහොමද එකතු කරගන්නේ කියලා. මේකට ඔයාට Maven හෝ Gradle පාවිච්චි කරන්න පුළුවන්. අපි මෙතනදී Maven පාවිච්චි කරමු.
පළමු පියවර: Thrift Compiler එක Install කරගමු
Thrift IDL files වලින් අපිට ඕන කරන language එකට code generate කරන්න, අපිට Thrift compiler එක ඕන වෙනවා. මේක install කරගන්න එක Operating System එක අනුව පොඩ්ඩක් වෙනස් වෙනවා.
- Linux (Ubuntu/Debian):
sudo apt-get install thrift-compiler - macOS:
brew install thrift - Windows: Thrift Downloads page එකෙන් binary එක download කරලා PATH එකට add කරගන්න.
Install කරාට පස්සේ, command line එකේ thrift -version කියලා ගහලා බලන්න compiler එක හරිද කියලා.
දෙවන පියවර: Maven Dependencies සහ Plugins
අපේ pom.xml file එකට අවශ්ය dependencies සහ plugins ටික එකතු කරගන්න ඕන. මේකෙදි අපිට ප්රධාන දේවල් දෙකක් ඕන වෙනවා:
- Thrift runtime library එක. (මේකෙන් තමයි Thrift protocol, transport, server implementations වගේ දේවල් manage වෙන්නේ)
- Thrift Maven plugin එක. (මේකෙන් තමයි IDL files compile වෙලා Java code generate වෙන්නේ)
ඔයාගේ pom.xml එකේ <dependencies> section එකට මේක එකතු කරගන්න:
<dependency>
    <groupId>org.apache.thrift</groupId>
    <artifactId>libthrift</artifactId>
    <version>0.17.0</version> <!-- නවතම stable version එක බලලා දාන්න -->
</dependency>
ඊළඟට, <build> section එකට Thrift Maven plugin එක එකතු කරගන්න. මේකෙන් තමයි අපේ .thrift files compile වෙන්නේ. මේක src/main/thrift වගේ folder එකක තියෙන IDL files scan කරලා, target/generated-sources/thrift වගේ folder එකකට generated Java code එක දානවා.
<build>
    <plugins>
        <plugin>
            <groupId>org.apache.maven.plugins</groupId>
            <artifactId>maven-compiler-plugin</artifactId>
            <version>3.8.1</version>
            <configuration>
                <source>17</source> <!-- ඔයාගේ Java version එකට අනුව හදන්න -->
                <target>17</target>
            </configuration>
        </plugin>
        <plugin>
            <groupId>org.apache.thrift.maven</groupId>
            <artifactId>thrift-maven-plugin</artifactId>
            <version>0.17.0</version> <!-- Thrift library version එකම පාවිච්චි කරන්න -->
            <configuration>
                <thriftSourceRoot>${project.basedir}/src/main/thrift</thriftSourceRoot>
                <outputDirectory>${project.build.directory}/generated-sources/thrift</outputDirectory>
                <outputType>java</outputType>
                <nowarn>true</nowarn> <!-- Warnings නැතුව generate කරන්න -->
            </configuration>
            <executions>
                <execution>
                    <id>thrift-sources</id>
                    <phase>generate-sources</phase>
                    <goals>
                        <goal>compile</goal>
                    </goals>
                </execution>
            </executions>
        </plugin>
        <plugin>
            <groupId>org.codehaus.mojo</groupId>
            <artifactId>build-helper-maven-plugin</artifactId>
            <version>3.2.0</version>
            <executions>
                <execution>
                    <id>add-source</id>
                    <phase>generate-sources</phase>
                    <goals>
                        <goal>add-source</goal>
                    </goals>
                    <configuration>
                        <sources>
                            <source>${project.build.directory}/generated-sources/thrift</source>
                        </sources>
                    </configuration>
                </execution>
            </executions>
        </plugin>
    </plugins>
</build>
build-helper-maven-plugin එක එකතු කරන්නේ generated source folder එක Maven compiler එකට source path එකක් විදියට එකතු කරන්න. නැත්නම් generated classes IDE එකේදී සහ compile කරනකොට හඳුනාගන්නේ නැති වෙන්න පුළුවන්.
අපි Service එකක් හදමු: IDL එකේ ඉඳන් Implementation එකට (From IDL to Implementation)
දැන් අපි Spring Boot Service එකක් හදන්න අවශ්ය IDL file එක හදමු, ඒක compile කරමු, සහ Service එක implement කරමු.
පළමු පියවර: Thrift IDL File එකක් හදමු
src/main/thrift folder එකක් හදලා, ඒක ඇතුලේ UserService.thrift කියන file එක හදමු. මේකෙන් අපි User කෙනෙක්ගේ විස්තර define කරලා, UserService එකේ method එකක් define කරමු.
// UserService.thrift

namespace java com.example.thrift.user.service

struct User {
    1: required i32 id;
    2: required string name;
    3: optional string email;
}

exception UserNotFoundException {
    1: required i32 userId;
    2: required string message;
}

service UserService {
    User getUserById(1: i32 id) throws (1: UserNotFoundException userNotFound);
    list<User> getAllUsers();
    void addUser(1: User user);
}
මේ IDL file එකේ:
namespace java com.example.thrift.user.serviceකියන්නේ generated Java code එකේ package name එක.struct Userකියන්නේ data structure එකක් (Java class එකකට translate වෙනවා).requiredසහoptionalකියන ඒවා field එක අනිවාර්යද නැද්ද කියලා පෙන්නනවා.1:,2:වගේ numbers field IDs. මේවා unique වෙන්න ඕන.exception UserNotFoundExceptionකියන්නේ custom exception එකක්.service UserServiceකියන්නේ අපේ RPC service එක. මේක ඇතුලේ service operations (methods) define කරනවා.throwskeyword එකෙන් exception handling define කරන්න පුළුවන්.
දෙවන පියවර: Thrift Code Generate කරමු
දැන් ඔයා command line එකේ mvn clean install කියලා run කරන්න. මේකෙන් Maven plugin එක run වෙලා UserService.thrift file එක compile වෙලා Java code එක generate වෙනවා. Generated files target/generated-sources/thrift/com/example/thrift/user/service කියන path එකේදී බලන්න පුon.
මේකෙන් User.java, UserNotFoundException.java, සහ UserService.java කියන files generate වෙනවා. UserService.java file එකේ Iface කියන interface එකක් සහ Processor කියන class එකක් වගේ දේවල් තියෙනවා. අපිට Service එක implement කරන්න ඕන UserService.Iface interface එක.
තුන්වන පියවර: Spring Boot Thrift Service එක Implement කරමු
දැන් අපි generated UserService.Iface එක implement කරලා Thrift service එක හදමු. මේක සාමාන්ය Spring Component එකක් විදියට implement කරන්න පුළුවන්.
package com.example.thrift.user.service.impl;

import com.example.thrift.user.service.User;
import com.example.thrift.user.service.UserNotFoundException;
import com.example.thrift.user.service.UserService;
import org.apache.thrift.TException;
import org.springframework.stereotype.Service;

import java.util.ArrayList;
import java.util.HashMap;
import java.util.List;
import java.util.Map;

@Service
public class UserServiceImpl implements UserService.Iface {

    private final Map<Integer, User> users = new HashMap<>();

    public UserServiceImpl() {
        users.put(1, new User(1, "Kamal Perera", "[email protected]"));
        users.put(2, new User(2, "Nimal Silva", "[email protected]"));
        users.put(3, new User(3, "Sunil Fernando", null));
    }

    @Override
    public User getUserById(int id) throws UserNotFoundException, TException {
        System.out.println("Request to getUserById: " + id);
        User user = users.get(id);
        if (user == null) {
            throw new UserNotFoundException(id, "User with ID " + id + " not found");
        }
        return user;
    }

    @Override
    public List<User> getAllUsers() throws TException {
        System.out.println("Request to getAllUsers");
        return new ArrayList<>(users.values());
    }

    @Override
    public void addUser(User user) throws TException {
        System.out.println("Request to addUser: " + user.getName());
        users.put(user.getId(), user);
    }
}
හතරවන පියවර: Thrift Server Configuration
අපිට දැන් Spring Boot application එක start කරනකොට Thrift server එකත් start කරන්න ඕන. මේකට Spring @Configuration class එකක් පාවිච්චි කරන්න පුළුවන්.
package com.example.thrift.config;

import com.example.thrift.user.service.UserService;
import com.example.thrift.user.service.impl.UserServiceImpl;
import org.apache.thrift.server.TServer;
import org.apache.thrift.server.TThreadPoolServer;
import org.apache.thrift.transport.TServerSocket;
import org.apache.thrift.transport.TServerTransport;
import org.slf4j.Logger;
import org.slf4j.LoggerFactory;
import org.springframework.beans.factory.annotation.Value;
import org.springframework.context.annotation.Bean;
import org.springframework.context.annotation.Configuration;

@Configuration
public class ThriftServerConfig {

    private static final Logger LOGGER = LoggerFactory.getLogger(ThriftServerConfig.class);

    @Value("${thrift.server.port:9090}")
    private int thriftPort;

    @Bean
    public TServer thriftServer(UserServiceImpl userService) {
        try {
            // Processor for the service
            UserService.Processor<UserService.Iface> processor = new UserService.Processor<>(userService);

            // Server transport (socket)
            TServerTransport serverTransport = new TServerSocket(thriftPort);

            // Server options (e.g., thread pool for concurrent requests)
            TThreadPoolServer.Args args = new TThreadPoolServer.Args(serverTransport)
                    .processor(processor);

            // Create and return the server
            TServer server = new TThreadPoolServer(args);

            // Start the server in a new thread
            new Thread(() -> {
                LOGGER.info("Starting Thrift server on port {}...", thriftPort);
                server.serve();
                LOGGER.info("Thrift server stopped.");
            }).start();

            return server;

        } catch (Exception e) {
            LOGGER.error("Error starting Thrift server: ", e);
            throw new RuntimeException("Failed to start Thrift server", e);
        }
    }
}
මේ code එකෙන් අපි 9090 port එකේ Thrift server එකක් start කරනවා. (ඔයාට මේ port එක application.properties එකේ thrift.server.port කියලා define කරන්න පුළුවන්). අපි මෙතනදී TThreadPoolServer එකක් පාවිච්චි කරන්නේ concurrent requests handle කරන්න පුළුවන් වෙන්න. TServerSocket කියන්නේ TCP connection එක handle කරන transport mechanism එක.
දැන් ඔයාට ඔයාගේ Spring Boot application එක run කරන්න පුළුවන්. Console එකේ Starting Thrift server on port 9090... කියලා message එකක් පෙනෙයි.
Client එකක් හැදුවොත්? (What if we build a Client?)
දැන් අපි server එක හදලා ඉවරයිනේ. Client එකක් හදන්නේ කොහොමද කියලා පොඩ්ඩක් බලමු. Client එකත් ඒ වගේම IDL එකෙන් generate වෙන classes පාවිච්චි කරනවා.
Java Client Example:
ඔයාගේ client project එකටත් libthrift dependency එක සහ Thrift Maven plugin එක එකතු කරගන්න. ඊට පස්සේ mvn clean install කරලා IDL එකෙන් generated classes ටික client project එකටත් add කරගන්න. ඊට පස්සේ පහල තියෙන විදියට client එකක් හදන්න පුළුවන්.
package com.example.thrift.client;

import com.example.thrift.user.service.User;
import com.example.thrift.user.service.UserNotFoundException;
import com.example.thrift.user.service.UserService;
import org.apache.thrift.TException;
import org.apache.thrift.protocol.TBinaryProtocol;
import org.apache.thrift.protocol.TProtocol;
import org.apache.thrift.transport.TSocket;
import org.apache.thrift.transport.TTransport;
import org.apache.thrift.transport.TTransportException;

import java.util.List;

public class ThriftClient {

    public static void main(String[] args) {
        TTransport transport = null;
        try {
            // Establish connection to the server
            transport = new TSocket("localhost", 9090);
            transport.open();

            // Protocol for data serialization
            TProtocol protocol = new TBinaryProtocol(transport);

            // Create a client for the UserService
            UserService.Client client = new UserService.Client(protocol);

            System.out.println("\n--- Calling getUserById ---");
            try {
                User user1 = client.getUserById(1);
                System.out.println("Found User: " + user1.getName() + " (" + user1.getEmail() + ")");
            } catch (UserNotFoundException e) {
                System.out.println("Error: " + e.getMessage());
            }

            System.out.println("\n--- Calling getUserById (Not Found) ---");
            try {
                client.getUserById(99);
            } catch (UserNotFoundException e) {
                System.out.println("Error: " + e.getMessage());
            }

            System.out.println("\n--- Calling addUser ---");
            User newUser = new User(4, "Bandara", "[email protected]");
            client.addUser(newUser);
            System.out.println("Added User: " + newUser.getName());

            System.out.println("\n--- Calling getAllUsers ---");
            List<User> allUsers = client.getAllUsers();
            System.out.println("All Users:");
            for (User user : allUsers) {
                System.out.println("- " + user.getName() + " (" + user.getEmail() + ")");
            }

        } catch (TTransportException e) {
            e.printStackTrace();
        } catch (TException e) {
            e.printStackTrace();
        } finally {
            if (transport != null) {
                transport.close();
            }
        }
    }
}
මේ client code එක run කළාම, server එකට requests ගිහින් responses එන හැටි ඔයාට console එකේ බලන්න පුළුවන්. Client එකත් server එකත් අතරේ communicate වෙන්නේ Thrift protocol එකෙන්.
මතක තියාගන්න, Python, Go, Node.js වගේ ඕනම language එකකින් මේ client එක හදන්න පුළුවන්. IDL එක compile කරලා අදාල language එකට code generate කරගෙන, ඒකේ client stubs පාවිච්චි කරලා server එකට කතා කරන්න පුළුවන්.
අවසන් වචන (Conclusion)
අද අපි බැලුවේ Spring Boot එක්ක Apache Thrift කොහොමද පාවිච්චි කරන්නේ කියලා. Thrift කියන්නේ high-performance, cross-language RPC communication වලට මාරම හොඳ විසඳුමක්. විශේෂයෙන්ම ඔයා distributed systems, microservices වගේ දේවල් හදනකොට, services අතරේ වේගවත්, type-safe සන්නිවේදනයක් අවශ්ය නම් Thrift ඔයාට හොඳ තෝරාගැනීමක් වෙන්න පුළුවන්.
ඒ වගේම, Thrift, gRPC, Protobuf වගේ frameworks REST APIs වලට විකල්ප විදියට පාවිච්චි කරනවා මිසක්, REST සම්පූර්ණයෙන්ම අයින් කරලා මේවාම පාවිච්චි කරන්න ඕන කියන එක නෙවෙයි මේකේ තේරුම. Public APIs, browser applications වගේ තැන්වලට REST APIs තමයි ගොඩක් වෙලාවට වඩාත්ම හොඳ විසඳුම. ඒත් internal service-to-service communication වලදී මේ වගේ RPC frameworks වලින් ලොකු වාසි ගන්න පුළුවන්.
ඔයාලත් මේක ඔයාලගේ projects වලට අත්හදා බලන්න. ගැටලු ආවොත්, ඔයාලගේ අදහස්, ප්රශ්න පහලින් comment කරන්න අමතක කරන්න එපා. අපි ඊළඟ ලිපියෙන් හම්බවෙමු! සුභ දවසක්!


