Spring Boot AOP භාවිතයෙන් Method Execution Logging - SC Guide
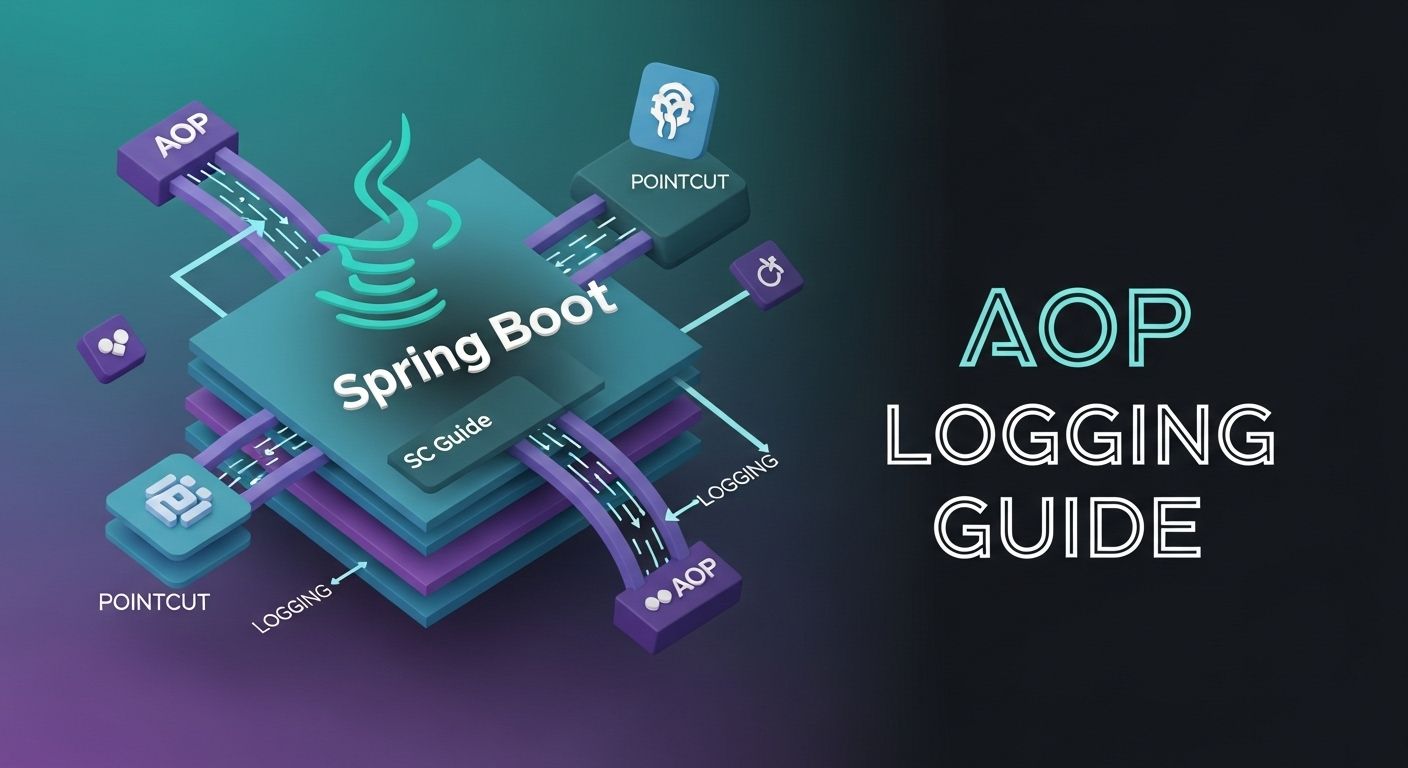
ආයුබෝවන් යාළුවනේ! ඔන්න අද අපි කතා කරන්න යන්නේ software development වලදි අපිට නිතරම වගේ මුහුණ දෙන්න වෙන පොඩි අවුලකට කදිම විසඳුමක් ගැන. ඒ තමයි Spring Boot වල AOP (Aspect-Oriented Programming). මේක නිකන් හරියට අපේ code එක අවුල් නොකර, තව වැඩ ගොඩක් කරගන්න පුළුවන් tool එකක් වගේ.
සාමාන්යයෙන් අපි application එකක් හදනකොට, logging, security, transaction management වගේ දේවල් හැම තැනටම වගේ add කරන්න වෙනවා, එහෙම නැත්තම් cross-cutting concerns කියලා කියන්නේ මේවට තමයි. නිකන් හිතන්නකෝ, ඔයාගේ application එකේ method දහයක් තියෙනවා නම්, ඒ හැම method එකකටම මුලටයි අගටයි logging code ටිකක් add කරන්න ඕන කියලා. ඒක අතින් කරන්න ගියොත්, code එක අවුල් වෙනවා වගේම, පස්සේ maintain කරන්නත් අමාරුයි. අන්න ඒ වගේ අවස්ථා වලදි තමයි AOP අපිට උදව් වෙන්නේ.
මේ blog post එකේදි අපි බලමු AOP කියන්නේ මොකක්ද, Spring Boot එක්ක මේක කොහොමද වැඩ කරන්නේ, ඒ වගේම real-world example එකක් විදිහට method execution logging කොහොමද AOP පාවිච්චි කරලා කරන්නේ කියලා. සරලවම කිව්වොත්, ඔයාගේ code එකේ methods run වෙනකොට ඒක automatically log වෙන විදිහ හදමු!
AOP කියන්නේ මොකක්ද? (What is AOP?)
AOP කියන්නේ programming paradigm එකක්. මේකෙන් කරන්නේ cross-cutting concerns, එහෙම නැත්තම් application එකේ එක එක තැන් වලදි අවශ්ය වෙන පොදු features, main business logic එකෙන් වෙන් කරලා manage කරන එක. මේක design pattern එකක් වගේ නෙවෙයි, මේක programming methodology එකක්.
AOP වලදී ප්රධාන concepts කිහිපයක් තියෙනවා. අපි එකින් එක බලමු.
Aspect
Aspect එකක් කියන්නේ cross-cutting concern එකක් implement කරන module එකක්. උදාහරණයක් විදිහට, logging, security වගේ දේවල් Aspect එකක් විදිහට හදන්න පුළුවන්. මේක ඇතුලේ Pointcut සහ Advice තියෙනවා.
Join Point
Join Point එකක් කියන්නේ program එකක execution flow එකේදී Advice එකක් inject කරන්න පුළුවන් තැනක්. Method calls, exception handling, field access වගේ දේවල් Join Point වෙන්න පුළුවන්. Spring AOP වලදී නම් ප්රධාන Join Point එක තමයි method execution.
Pointcut
Pointcut එකක් කියන්නේ එක එක Join Point කිහිපයක් match කරන්න පාවිච්චි කරන expression එකක්. මේකෙන් අපි specify කරනවා මොන methods වලටද අපේ Advice එක apply වෙන්න ඕන කියලා. උදාහරණයක් විදිහට, "සියලුම Service layer methods වලට" වගේ තැනක් Pointcut එකකින් define කරන්න පුළුවන්.
Advice
Advice කියන්නේ Aspect එක ඇතුලේ තියෙන ක්රියාව. ඒ කියන්නේ, "මොනවද කරන්න ඕන" කියන එක. මේක join point එකකට අදාළව run වෙන code එක තමයි. AOP වලදී ප්රධාන Advice වර්ග කිහිපයක් තියෙනවා:
@BeforeAdvice: Joint Point එකක් run වෙන්න කලින් run වෙනවා. උදාහරණයක් විදිහට, method එකකට යන්න කලින් log කරනවා.@AfterAdvice: Joint Point එකක් run වුණාට පස්සේ (successful වුණත්, exception එකක් ආවත්) run වෙනවා.@AfterReturningAdvice: Joint Point එකක් successful විදිහට run වෙලා return වුණාට පස්සේ run වෙනවා.@AfterThrowingAdvice: Joint Point එකකදී exception එකක් throw වුණාට පස්සේ run වෙනවා.@AroundAdvice: මේක තමයි බලවත්ම Advice එක. මේකෙන් Joint Point එකක execution එක සම්පූර්ණයෙන්ම වට කරනවා. ඒ කියන්නේ, method එක run වෙන්න කලින්, run වෙනකොට, run වුණාට පස්සේ කියන හැම අවස්ථාවකටම control කරන්න පුළුවන්. Method එක run කරන එක නවත්තන්න, return value එක වෙනස් කරන්න වගේ දේවලුත් මේකෙන් කරන්න පුළුවන්.
Weaving
Weaving කියන්නේ Aspect එකක් target object එකකට apply කරන process එක. මේක compilation time එකේදී, class loading time එකේදී, එහෙම නැත්තම් runtime එකේදී කරන්න පුළුවන්. Spring AOP වලදී මේක runtime එකේදී (proxies පාවිච්චි කරලා) තමයි කරන්නේ.
Spring Boot වලට AOP කොහොමද මේ වගේ හොද? (Why AOP in Spring Boot?)
Spring Framework එකේ AOP support එක තියෙන්නේ ප්රධාන වශයෙන්ම Spring AOP සහ AspectJ integration හරහා. Spring Boot කියන්නේ Spring Framework එකේම extension එකක් නිසා, AOP features Spring Boot වලට seamless විදිහට integrate වෙලා තියෙනවා. Spring AOP වලදී use වෙන්නේ runtime proxies. ඒ කියන්නේ, ඔයාගේ bean එකේ method එකක් call කරනකොට, Spring එකෙන් ඒ bean එකේ proxy එකක් හදලා, ඒ proxy එක හරහා තමයි call එක යන්නේ. මේ proxy එක තමයි Advice execute කරන්නේ.
Spring Boot එක්ක AOP පාවිච්චි කිරීමෙන් ලොකු වාසි කිහිපයක්ම තියෙනවා:
- Code maintainability: Cross-cutting concerns එක තැනකට ගේන නිසා code එක පැහැදිලියි, maintain කරන්න ලේසියි.
- Reduced code duplication: එකම logging code එක හැම තැනටම ලියන එක වළක්වා ගන්න පුළුවන්.
- Modularity: Business logic එකෙන් logging/security වගේ දේවල් වෙන් කරලා තියන්න පුළුවන්.
- Easier testing: Modules වෙන් කරලා තියෙන නිසා test කරන්න ලේසියි.
Practical Example: Method Execution Logging with AOP
හරි, දැන් අපි බලමු කොහොමද Spring Boot application එකක AOP පාවිච්චි කරලා methods run වෙනකොට ඒක automatically log කරන්නේ කියලා. මේක මාරම ලේසියි!
Step 1: Dependencies Add කරමු
මුලින්ම ඔයාගේ pom.xml (Maven පාවිච්චි කරනවා නම්) එකට AOP dependency එක add කරන්න ඕන. Gradle නම් build.gradle එකට.
<dependency>
    <groupId>org.springframework.boot</groupId>
    <artifactId>spring-boot-starter-aop</artifactId>
</dependency>
මේ dependency එක add කළාම, Spring AOP සහ AspectJ weaver support එක ඔයාගේ project එකට add වෙනවා. සාමාන්යයෙන් Spring Boot applications වල @EnableAspectJAutoProxy annotation එක automatically enable වෙනවා, ඒ නිසා ඒක manually add කරන්න අවශ්ය වෙන්නේ නැහැ. ඒත් සමහර වෙලාවට එහෙම නැත්තම් ඔයාට @SpringBootApplication annotation එක තියෙන main class එකට @EnableAspectJAutoProxy annotation එක add කරන්න පුළුවන්.
Step 2: Sample Service එකක් හදමු
අපි මේක log කරන්න බලාපොරොත්තු වෙන Service class එකක් හදමු.
package com.example.aopdemo.service;

import org.slf4j.Logger;
import org.slf4j.LoggerFactory;
import org.springframework.stereotype.Service;

@Service
public class ProductService {

    private static final Logger logger = LoggerFactory.getLogger(ProductService.class);

    public String getProductById(String id) {
        logger.info("Fetching product with ID: {}", id);
        // Simulate some business logic
        if ("P123".equals(id)) {
            return "Laptop X1 - " + id;
        } else if ("P456".equals(id)) {
            throw new IllegalArgumentException("Product not found for ID: " + id);
        }
        return "Unknown Product";
    }

    public void createNewProduct(String name, double price) {
        logger.info("Creating new product: {} with price {}", name, price);
        // Simulate saving to DB
        System.out.println("Product '" + name + "' created successfully.");
    }

    public int calculateTotal(int item1, int item2) {
        logger.info("Calculating total for {} and {}", item1, item2);
        return item1 + item2;
    }
}
මේ ProductService එකේ methods කිහිපයක් තියෙනවා. අපි AOP පාවිච්චි කරලා මේ methods වල execution එක log කරමු.
Step 3: Logger Aspect එකක් හදමු
දැන් අපි Aspect එක හදමු. මේක තමයි අපේ logging logic එක තියෙන තැන.
package com.example.aopdemo.aspect;

import org.aspectj.lang.JoinPoint;
import org.aspectj.lang.ProceedingJoinPoint;
import org.aspectj.lang.annotation.*;
import org.slf4j.Logger;
import org.slf4j.LoggerFactory;
import org.springframework.stereotype.Component;

import java.util.Arrays;

@Aspect
@Component
public class LoggingAspect {

    private final Logger logger = LoggerFactory.getLogger(this.getClass());

    // Pointcut for all methods in the service package
    @Pointcut("execution(* com.example.aopdemo.service.*.*(..))")
    public void forServicePackage() {}

    // Pointcut for all methods in the controller package (if you had one)
    // @Pointcut("execution(* com.example.aopdemo.controller.*.*(..))")
    // public void forControllerPackage() {}

    // Combine Pointcuts if needed
    // @Pointcut("forServicePackage() || forControllerPackage()")
    // public void forAppFlow() {}

    // @Before Advice
    @Before("forServicePackage()")
    public void beforeAdvice(JoinPoint theJoinPoint) {
        String method = theJoinPoint.getSignature().toShortString();
        logger.info("=====>> @Before: Executing method: {}", method);

        // Display arguments to the method
        Object[] args = theJoinPoint.getArgs();
        for (Object tempArg : args) {
            logger.info("=====>> Argument: {}", tempArg);
        }
    }

    // @AfterReturning Advice
    @AfterReturning(
            pointcut="forServicePackage()",
            returning="result"
    )
    public void afterReturningAdvice(JoinPoint theJoinPoint, Object result) {
        String method = theJoinPoint.getSignature().toShortString();
        logger.info("=====>> @AfterReturning: From method: {}", method);
        logger.info("=====>> Result: {}", result);
    }

    // @AfterThrowing Advice
    @AfterThrowing(
            pointcut="forServicePackage()",
            throwing="theExc"
    )
    public void afterThrowingAdvice(JoinPoint theJoinPoint, Throwable theExc) {
        String method = theJoinPoint.getSignature().toShortString();
        logger.error("=====>> @AfterThrowing: Exception in method: {}", method);
        logger.error("=====>> The exception is: {}", theExc.getMessage());
    }

    // @After (finally) Advice
    @After("forServicePackage()")
    public void afterFinallyAdvice(JoinPoint theJoinPoint) {
        String method = theJoinPoint.getSignature().toShortString();
        logger.info("=====>> @After: Finally from method: {}", method);
    }

    // @Around Advice for performance logging
    @Around("forServicePackage()")
    public Object aroundAdvice(ProceedingJoinPoint theProceedingJoinPoint) throws Throwable {
        String method = theProceedingJoinPoint.getSignature().toShortString();
        logger.info("=====>> @Around: Executing method: {}", method);

        long begin = System.currentTimeMillis();

        Object result = null;
        try {
            result = theProceedingJoinPoint.proceed();
        } catch (Exception exc) {
            logger.error("=====>> @Around: Exception in {}: {}", method, exc.getMessage());
            // Re-throw the exception so the calling code knows about it
            throw exc;
        }

        long end = System.currentTimeMillis();
        long duration = end - begin;

        logger.info("=====>> @Around: Method: {} - Duration: {} ms", method, duration);

        return result;
    }
}
මේ LoggingAspect එකේ දේවල් ටික පැහැදිලි කරගමු:
@Aspect: මේ annotation එකෙන් Spring එකට කියනවා මේ class එක Aspect එකක් කියලා.@Component: මේකෙන් කියන්නේ මේ class එක Spring bean එකක් කියලා, ඒ නිසා Spring container එකෙන් මේක detect කරලා manage කරනවා.@Pointcut("execution(* com.example.aopdemo.service.*.*(..))"):- මේක තමයි Pointcut expression එක. මේකෙන් define කරන්නේ "මොන methods වලටද අපේ Advice apply වෙන්න ඕන" කියන එක.
execution(): මේක commonම Pointcut designator එක. Method execution Join Point වලට use කරනවා.*: Return type එක ඕන එකක් වෙන්න පුළුවන්.com.example.aopdemo.service.: මේ package එක.- පළවෙනි
*: මේ package එකේ තියෙන ඕනම class එකක්. - දෙවෙනි
*: ඒ class එකේ තියෙන ඕනම method එකක්. (..): Argument කිහිපයක් (0 or more arguments) ඕනම type එකකින්.
beforeAdvice(JoinPoint theJoinPoint):@Before("forServicePackage()"): මේකෙන් කියන්නේforServicePackage()Pointcut එකට අදාළ methods run වෙන්න කලින් මේ Advice එක run කරන්න කියලා.JoinPointobject එකෙන් අපිට method signature, arguments වගේ විස්තර ගන්න පුළුවන්.
afterReturningAdvice(JoinPoint theJoinPoint, Object result):@AfterReturning: Method එක successful විදිහට return වුණාම run වෙනවා.returning="result": මේකෙන් return value එකresultparameter එකට assign කරනවා.
afterThrowingAdvice(JoinPoint theJoinPoint, Throwable theExc):@AfterThrowing: Method එකේදී exception එකක් throw වුණාම run වෙනවා.throwing="theExc": throw වුණ exception එකtheExcparameter එකට assign කරනවා.
afterFinallyAdvice(JoinPoint theJoinPoint):@After: Method එක run වුණාට පස්සේ (successful වුණත්, exception ආවත්) run වෙනවා. මේකfinallyblock එකක් වගේ වැඩ කරනවා.
aroundAdvice(ProceedingJoinPoint theProceedingJoinPoint):@Around: මේකෙන් method execution එක වට කරනවා.ProceedingJoinPointobject එක පාවිච්චි කරලාtheProceedingJoinPoint.proceed()කියලා call කළොත් තමයි actual method එක execute වෙන්නේ.- මේක පාවිච්චි කරලා method එක run වෙන්න ගත්ත වෙලාව (duration) වගේ දේවල් log කරන්න පුළුවන්. Exception handling, security checks වගේ දේවලුත් මේකෙන් කරන්න පුළුවන්.
Step 4: Application එකක Test කරමු
දැන් අපි මේක test කරන්න Spring Boot main application class එකේ ProductService එක call කරමු.
package com.example.aopdemo;

import com.example.aopdemo.service.ProductService;
import org.springframework.boot.CommandLineRunner;
import org.springframework.boot.SpringApplication;
import org.springframework.boot.autoconfigure.SpringBootApplication;
import org.springframework.context.annotation.EnableAspectJAutoProxy;

@SpringBootApplication
// @EnableAspectJAutoProxy // Not strictly necessary in most modern Spring Boot apps
public class AopdemoApplication implements CommandLineRunner {

	private final ProductService productService;

	public AopdemoApplication(ProductService productService) {
		this.productService = productService;
	}

	public static void main(String[] args) {
		SpringApplication.run(AopdemoApplication.class, args);
	}

	@Override
	public void run(String... args) throws Exception {
		System.out.println("\n--- Calling ProductService.getProductById(P123) ---");
		String product = productService.getProductById("P123");
		System.out.println("Result: " + product);

		System.out.println("\n--- Calling ProductService.createNewProduct ---");
		productService.createNewProduct("MousePad", 1500.00);

		System.out.println("\n--- Calling ProductService.calculateTotal ---");
		int total = productService.calculateTotal(10, 20);
		System.out.println("Result: " + total);

		System.out.println("\n--- Calling ProductService.getProductById(P456) to test exception ---");
		try {
			productService.getProductById("P456");
		} catch (Exception exc) {
			System.out.println("Caught exception: " + exc.getMessage());
		}
	}
}
දැන් application එක run කරලා බලන්න. ඔයාගේ console එකේ, ProductService එකේ methods call වෙනකොට, අපි LoggingAspect එකේ ලියපු logging messages ටිකත් print වෙනවා දකින්න පුළුවන්.
Sample Console Output (parts of it):
--- Calling ProductService.getProductById(P123) ---
=====>> @Around: Executing method: ProductService.getProductById(..)
=====>> @Before: Executing method: ProductService.getProductById(..)
=====>> Argument: P123
Fetching product with ID: P123
=====>> @Around: Method: ProductService.getProductById(..) - Duration: 5ms
=====>> @AfterReturning: From method: ProductService.getProductById(..)
=====>> Result: Laptop X1 - P123
=====>> @After: Finally from method: ProductService.getProductById(..)
Result: Laptop X1 - P123

--- Calling ProductService.createNewProduct ---
=====>> @Around: Executing method: ProductService.createNewProduct(..)
=====>> @Before: Executing method: ProductService.createNewProduct(..)
=====>> Argument: MousePad
=====>> Argument: 1500.0
Creating new product: MousePad with price 1500.0
Product 'MousePad' created successfully.
=====>> @Around: Method: ProductService.createNewProduct(..) - Duration: 2ms
=====>> @AfterReturning: From method: ProductService.createNewProduct(..)
=====>> Result: null
=====>> @After: Finally from method: ProductService.createNewProduct(..)

--- Calling ProductService.getProductById(P456) to test exception ---
=====>> @Around: Executing method: ProductService.getProductById(..)
=====>> @Before: Executing method: ProductService.getProductById(..)
=====>> Argument: P456
Fetching product with ID: P456
=====>> @Around: Exception in ProductService.getProductById(..): Product not found for ID: P456
=====>> @AfterThrowing: Exception in method: ProductService.getProductById(..)
=====>> The exception is: Product not found for ID: P456
=====>> @After: Finally from method: ProductService.getProductById(..)
Caught exception: Product not found for ID: P456
ඔන්න ඔය විදිහට තමයි AOP පාවිච්චි කරලා method execution log කරන්නේ. මේකෙන් ඔයාගේ application එකේ flow එක නිරීක්ෂණය කරන්න, performance bottlenecks හොයාගන්න, වගේම debugging කරන්නත් ලොකු උදව්වක් වෙනවා.
කවදාද AOP පාවිච්චි කරන්න ඕන? කොහොමද හොඳ විදිහට use කරන්න ඕන?
AOP කියන්නේ ගොඩක් බලවත් tool එකක්. ඒත් හැම ප්රශ්නයකටම AOP තමයි විසඳුම කියලා හිතන්න එපා. සමහර වෙලාවට සාමාන්ය OOP patterns වුණත් ප්රමාණවත් වෙන්න පුළුවන්. AOP ප්රධාන වශයෙන්ම හොඳයි මේ වගේ අවස්ථා වලදී:
- Logging සහ Monitoring: Application එකේ operations log කරන්න, performance metrics ගන්න.
- Security: User authentication, authorization checks කරන්න.
- Transaction Management: Database transactions handle කරන්න. (Spring වලදී මේක AOP වලින් තමයි කරන්නේ).
- Caching: Frequently accessed data cache කරන්න.
- Error Handling: පොදු exception handling logic එකක් apply කරන්න.
හැබැයි, AOP ඕනවට වඩා පාවිච්චි කළොත් code එක තේරුම් ගන්න අමාරු වෙන්න පුළුවන් (debugging කරන්න අමාරුයි, මොකද code flow එක direct නැති නිසා). ඒ නිසා, use කරනකොට ප්රවේශම් වෙන්න. Aspect එකක් හැම විටම focus කරලා තියෙන්න ඕන එක cross-cutting concern එකකට විතරයි.
සාරාංශය සහ නිවැරදි කිරීම
අද අපි Spring Boot වල AOP ගැන හොඳටම කතා කළා. AOP කියන්නේ මොකක්ද, ඒකේ තියෙන ප්රධාන Concepts (Aspect, Join Point, Pointcut, Advice, Weaving), Spring Boot එක්ක මේක කොහොමද වැඩ කරන්නේ, ඒ වගේම ප්රායෝගික උදාහරණයක් විදිහට method execution logging කොහොමද කරන්නේ කියලා අපි දැක්කා.
මේකෙන් ඔයාගේ application එකේ common concerns ටික business logic එකෙන් වෙන් කරලා manage කරන්න පුළුවන් වෙනවා. ඒකෙන් code එක maintain කරන්න, test කරන්න, වගේම scalability එක වැඩි කරන්නත් පුළුවන්.
ඔයාත් ඔයාගේ Spring Boot project වලට AOP integrate කරලා බලන්න. මොනවා හරි ප්රශ්න තියෙනවා නම්, එහෙම නැත්තම් මේ ගැන තවත් අදහස් තියෙනවා නම්, පහළින් comment එකක් දාගෙන යන්න. ඒක අනිවාර්යයෙන්ම අනිත් අයටත් ගොඩක් වටිනවා.
එහෙනම් තවත් අලුත් දෙයක් එක්ක හම්බවෙමු! ගිහින් එන්නම්!