Spring Beans සහ Lifecycle: කන්ටේනර් එකේ හදවත - Sinhala SC Guide
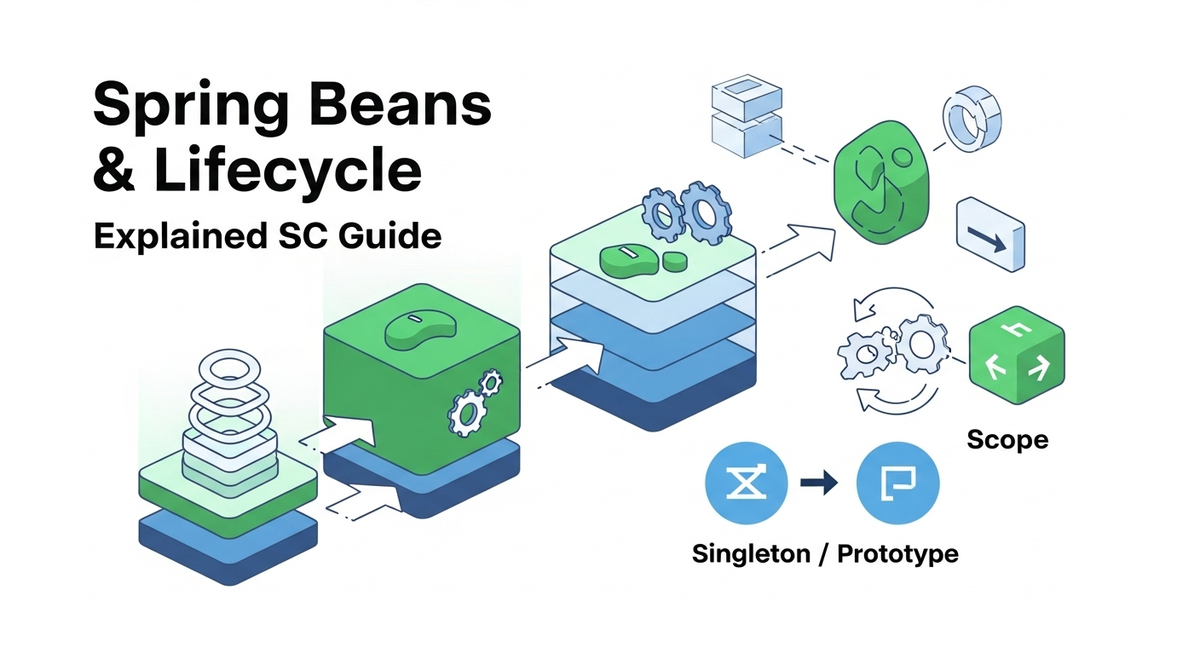
Spring Beans සහ Lifecycle: කන්ටේනර් එකේ හදවත
ආයුබෝවන් යාළුවනේ! අද අපි කතා කරන්න යන්නේ Spring Framework එකේ හරිම වැදගත් කොටසක් ගැන – ඒ තමයි Spring Beans සහ ඒවායේ Lifecycle එක. මම දන්නවා Spring කියනකොටම සමහරුන්ට පොඩි බයක් එනවා, ඒත් බයවෙන්න එපා! අද අපි මේක සරලව, අපේම විදියට තේරුම් ගමු. Spring applications වල හදවත වගේ තමයි මේ Beans. මේවා හරියට තේරුම් ගත්තොත් ඔයාට ඕනම Spring project එකක වැඩ කරන්න පුළුවන් කිසිම අවුලක් නැතුව.
Spring Framework එකේ කොහොමත් Dependency Injection (DI) සහ Inversion of Control (IoC) කියන concepts දෙක තමයි ප්රධාන. මේවා හරියට තේරුම් ගන්න නම්, Spring IoC Container එක objects manage කරන විදිය සහ ඒ objects වල Lifecycle එක කොහොමද කියන එක දැනගන්න ඕනේ. ඒ නිසා මේ article එක කියෙව්වට පස්සේ ඔයාට මේ ගැන හොඳ අවබෝධයක් ලැබෙයි කියලා මට විශ්වාසයි.
Bean කියන්නේ මොනවද මේ Spring එකේ?
හරි, මුලින්ම බලමු මේ Bean කියන්නේ මොකක්ද කියලා. සරලවම කිව්වොත්, Spring Bean එකක් කියන්නේ Spring IoC (Inversion of Control) Container එක මගින් manage කරන object එකකට. ඔයා සාමාන්ය Java application එකකදී object එකක් create කරනවා වගේම තමයි, හැබැයි මෙතනදී ඒ වැඩේ කරන්නේ Spring. Spring IoC Container එක තමයි ඔයාගේ objects create කරන්නේ, ඒවා configure කරන්නේ, ඒ වගේම ඒවායේ dependencies (වෙන objects) handle කරන්නේ. මේකට තමයි Dependency Injection (DI) කියන්නේ.
ඒ කියන්නේ අපිට ඕන කරන object එක Spring Container එකෙන් ඉල්ලලා ගන්න පුළුවන්. ඒක හරියට restaurant එකකට ගිහින් කෑම ඕඩර් කරනවා වගේ. ඔයාට ඕන කෑම එක ඉල්ලුවාම, ඒක හදලා දෙන්න තියෙන හැමදේම restaurant එක බලාගන්නවා වගේ තමයි. මෙතනදී Spring අපේ වැඩේ ගොඩක් ලේසි කරනවා, Boilerplate code අඩු කරනවා, ඒ වගේම application එක maintain කරන්නත් ලේසි කරනවා. අපි බලමු සරල Bean එකක් කොහොමද හදන්නේ කියලා.
// LoggerService.java
package com.sc.beans.services;

import org.springframework.stereotype.Component;

@Component // Spring මේක Bean එකක් විදියට recognize කරනවා
public class LoggerService {

    public void logMessage(String message) {
        System.out.println("LOG: " + message);
    }
}

// AppConfig.java
package com.sc.beans;

import org.springframework.context.annotation.ComponentScan;
import org.springframework.context.annotation.Configuration;

@Configuration // මේ class එක Spring Configuration එකක් කියලා define කරනවා
@ComponentScan(basePackages = "com.sc.beans") // "com.sc.beans" කියන package එක scan කරලා beans හොයන්න කියලා කියනවා
public class AppConfig {
    // Spring @ComponentScan එකෙන් හොයාගන්න beans ටික මෙතනින් register වෙනවා
}

// Application.java
package com.sc.beans;

import com.sc.beans.services.LoggerService;
import org.springframework.context.ApplicationContext;
import org.springframework.context.annotation.AnnotationConfigApplicationContext;

public class Application {
    public static void main(String[] args) {
        // Spring Container එක initialize කරනවා. AppConfig එකෙන් Beans load වෙනවා.
        ApplicationContext context = new AnnotationConfigApplicationContext(AppConfig.class);

        // LoggerService Bean එක Container එකෙන් ඉල්ලගන්නවා
        LoggerService logger = context.getBean(LoggerService.class);
        logger.logMessage("Hello from Spring Bean!");

        // Container එක වහනවා (මේක lifecycle methods වලදී වැදගත් වෙනවා)
        ((AnnotationConfigApplicationContext) context).close();
    }
}
උඩ තියෙන Code එක බැලුවොත්, අපි LoggerService කියන class එකට @Component කියලා annotation එකක් දාලා තියෙනවා. ඒකෙන් Spring ට තේරෙනවා මේක Bean එකක් කියලා. ඊට පස්සේ Application class එකේදී අපි ApplicationContext එකක් හදලා ඒකෙන් LoggerService Bean එක ඉල්ලගන්නවා. වැඩේ හරිම සරලයි නේද?
Bean Scopes - කී දෙනෙක් ඉන්නවද?
හරි, දැන් අපි බලමු මේ Beans වල scopes ගැන. Bean Scope එකකින් කියවෙන්නේ Spring Container එක ඇතුලේ ඒ Bean එකේ instances (ප්රතිරූප) කීයක් තියෙනවද කියන එකයි. ප්රධාන scopes දෙකක් තියෙනවා, ඒවා තමයි Singleton සහ Prototype. මේවා හරියට තේරුම් ගන්න එක හරිම වැදගත්, මොකද ඔයාගේ application එකේ performance සහ memory management වලට මේක සෘජුවම බලපානවා.
Singleton Scope: හැමෝටම එකයි!
Singleton කියන්නේ Spring Beans වල default scope එක. ඒ කියන්නේ ඔයා කිසිම scope එකක් specify කරේ නැත්නම්, Spring විසින් ඒ Bean එක Singleton එකක් විදියට තමයි manage කරන්නේ. Singleton Bean එකක් කියන්නේ Spring Container එක ඇතුලේ ඒ Bean class එකට එකම instance එකක් විතරයි තියෙන්නේ. ඒ කියන්නේ ඔයා කීප වතාවක්ම ඒ Bean එක ඉල්ලුවත්, හැම පාරම ඔයාට ලැබෙන්නේ එකම instance එකයි. මේක ගොඩක් වෙලාවට Stateless services (යම්කිසි තත්වයක් රඳවා නොගන්නා services), Configuration Beans, Utility Beans වගේ දේවල් වලට තමයි පාවිච්චි කරන්නේ. Performance වැඩි කරගන්නයි, memory save කරගන්නයි මේක හරිම හොඳයි.
// SingletonService.java
package com.sc.beans.services;

import org.springframework.context.annotation.Scope;
import org.springframework.stereotype.Component;

@Component
@Scope("singleton") // මෙය default එක වුවත්, පැහැදිලිකරණයට මෙසේ දමමු
public class SingletonService {
    private String message = "I am a Singleton!";

    public SingletonService() {
        System.out.println("SingletonService instance created!");
    }

    public String getMessage() {
        return message;
    }

    public void setMessage(String message) {
        this.message = message;
    }
}
Prototype Scope: හැම පාරම අලුත්!
Prototype scope එක කියන්නේ Singleton එකට හාත්පසින්ම වෙනස්. Prototype Bean එකක් කියන්නේ ඔයා Spring Container එකෙන් ඒ Bean එක request කරන හැම පාරම අලුත් instance එකක් create කරනවා. ඒ කියන්නේ ඔයා 5 වතාවක් ඒ Bean එක ඉල්ලුවොත්, ඔයාට අලුත් instances 5ක් ලැබෙනවා. මේක ගොඩක් වෙලාවට Statefull objects (යම්කිසි තත්වයක් රඳවා ගන්නා objects), එහෙම නැත්නම් database connections වගේ දේවල් වලට පාවිච්චි කරනවා. මොකද හැම user request එකකටම අලුත් object එකක් ඕන වෙන නිසා. හැබැයි මේකේදී memory usage එක වැඩි වෙන්න පුළුවන්, මොකද හැම පාරම අලුත් object එකක් හදන නිසා.
// PrototypeService.java
package com.sc.beans.services;

import org.springframework.context.annotation.Scope;
import org.springframework.stereotype.Component;

@Component
@Scope("prototype")
public class PrototypeService {
    private String operationId;

    public PrototypeService() {
        this.operationId = "Op-" + System.nanoTime(); // Unique ID for each instance
        System.out.println("PrototypeService instance created with ID: " + operationId);
    }

    public String getOperationId() {
        return operationId;
    }
}
මේ දෙකේ වෙනස බලන්න මේ example එක දිහා බැලුවොත්:
// Application.java (Updated to demonstrate scopes)
package com.sc.beans;

import com.sc.beans.services.PrototypeService;
import com.sc.beans.services.SingletonService;
import org.springframework.context.ApplicationContext;
import org.springframework.context.annotation.AnnotationConfigApplicationContext;

public class Application {
    public static void main(String[] args) {
        ApplicationContext context = new AnnotationConfigApplicationContext(AppConfig.class);

        System.out.println("--- Singleton Scope Demo ---");
        SingletonService s1 = context.getBean(SingletonService.class);
        SingletonService s2 = context.getBean(SingletonService.class);

        System.out.println("Are s1 and s2 the same instance? " + (s1 == s2)); // True
        s1.setMessage("Updated by s1");
        System.out.println("s2's message: " + s2.getMessage()); // Updated by s1

        System.out.println("\n--- Prototype Scope Demo ---");
        PrototypeService p1 = context.getBean(PrototypeService.class);
        PrototypeService p2 = context.getBean(PrototypeService.class);

        System.out.println("Are p1 and p2 the same instance? " + (p1 == p2)); // False
        System.out.println("p1's ID: " + p1.getOperationId());
        System.out.println("p2's ID: " + p2.getOperationId());

        ((AnnotationConfigApplicationContext) context).close();
    }
}
මේ output එක බැලුවොත් ඔයාට පේනවා ඇති Singleton instances දෙකම එකම object එකක් බවත්, Prototype instances දෙකම වෙනස් objects බවත්. මේක හරිම වැදගත්! මොකද ඔයාගේ අවශ්යතාවය අනුව තමයි Bean එකේ scope එක තෝරගන්න ඕනේ.
Bean Lifecycle - උපතේ සිට මරණය දක්වා
හරි, දැන් අපි කතා කරමු Bean එකක Lifecycle එක ගැන. ඕනෑම object එකකට වගේම Spring Bean එකකටත් උපතක් (initialization) සහ මරණයක් (destruction) තියෙනවා. Spring Container එක Bean එකක් manage කරනකොට, ඒක create කරන වෙලාවේදී සහ destroy කරන වෙලාවේදී අපිට customize කරන්න පුළුවන්. මේක හරිම ප්රයෝජනවත්, මොකද ඔයාට database connections open කරනවා වගේ වැඩ Initializing වෙලාවෙදී කරන්නත්, connections close කරනවා වගේ cleanup වැඩ Destroying වෙලාවෙදී කරන්නත් පුළුවන්.
Spring මේ lifecycle events handle කරන්න විවිධ ක්රම සපයනවා. අපි ප්රධාන වශයෙන් භාවිතා වන @PostConstruct සහ @PreDestroy annotations ගැන කතා කරමු.
Initialization Callbacks: උපතින් පසු
Bean එකක් create කරලා, ඒකේ dependencies inject කරාට පස්සේ Spring විසින් initialization methods execute කරනවා. මේකට අපිට @PostConstruct annotation එක පාවිච්චි කරන්න පුළුවන්. මේ method එක execute වෙන්නේ Bean එක complete විදියට construct වුණාට පස්සේ, හැබැයි Container එකෙන් ඒක පාවිච්චියට දෙන්න කලින්. මේක ගොඩක් හොඳයි initial setup tasks, data loading, or resource initialization වගේ දේවල් වලට.
// MyService.java
package com.sc.beans.services;

import org.springframework.stereotype.Component;
import javax.annotation.PostConstruct;
import javax.annotation.PreDestroy;

@Component
public class MyService {

    public MyService() {
        System.out.println("1. MyService Constructor called.");
    }

    @PostConstruct
    public void init() {
        System.out.println("2. @PostConstruct method called: MyService is ready to be used.");
        // Database connection, file loading, etc. can be done here
    }

    public void performAction() {
        System.out.println("MyService is performing an action.");
    }

    @PreDestroy // @PreDestroy example එකටත් මේ class එකම පාවිච්චි කරනවා
    public void destroy() {
        System.out.println("3. @PreDestroy method called: MyService is about to be destroyed.");
        // Cleanup resources: close database connection, release memory, etc.
    }
}
Destruction Callbacks: අවසානයේදී
Bean එක Container එකෙන් ඉවත් කරනකොට, එහෙම නැත්නම් Container එක shutdown කරනකොට, Spring විසින් destruction methods execute කරනවා. මේකට අපිට @PreDestroy annotation එක පාවිච්චි කරන්න පුළුවන්. මේ method එක execute වෙන්නේ Bean එක Container එකෙන් ඉවත් කරන්න කලින්. Database connections close කරනවා, temp files delete කරනවා වගේ cleanup operations වලට මේක හරිම හොඳයි. මේකත් @PostConstruct වගේම JSR-250 standard එකේ කොටසක්.
// Application.java (Updated to demonstrate lifecycle)
package com.sc.beans;

import com.sc.beans.services.MyService;
import org.springframework.context.ConfigurableApplicationContext;
import org.springframework.context.annotation.AnnotationConfigApplicationContext;

public class Application {
    public static void main(String[] args) {
        // ConfigurableApplicationContext එකක් භාවිතා කරන්නේ shutdown hook එක register කරන්න
        ConfigurableApplicationContext context = new AnnotationConfigApplicationContext(AppConfig.class);

        System.out.println("\n--- MyService Bean Lifecycle Demo ---");
        MyService myService = context.getBean(MyService.class);
        myService.performAction();

        // Container එක shutdown කරනවා, මේකෙන් @PreDestroy method එක call වෙනවා
        context.close();
        System.out.println("Spring Container has been closed.");
    }
}
මේක run කරලා බැලුවොත් ඔයාට පේනවා ඇති කොහොමද Constructor, @PostConstruct, සහ @PreDestroy කියන methods ටික call වෙන්නේ කියලා. context.close() call කරපු ගමන් @PreDestroy method එක activate වෙනවා. Production applications වලදී, web server shutdown වෙනකොට එහෙමත් මේ @PreDestroy methods automatically call වෙනවා.
ප්රායෝගික උදාහරණයක්: Notification Service එකක් (Practical Example)
අපි දැන් පොඩි ප්රායෝගික උදාහරණයක් කරලා බලමු, මේ Beans, Scopes, සහ Lifecycle concepts ටික එකට භාවිතා කරලා. හිතන්න අපිට User කෙනෙක්ට Email එකක් සහ SMS එකක් හරහා Notification එකක් යවන්න ඕන කියලා. මේකේදී Email යවන service එක Singleton එකක් වුණත්, Notification එකේ state (කාටද, මොන message එකද) තියෙන නිසා, Notification service එක Prototype එකක් වෙන්න පුළුවන්.
// EmailService.java (This would typically be a Singleton)
package com.sc.beans.services;

import org.springframework.stereotype.Component;

@Component
public class EmailService { // Default scope is Singleton

    public EmailService() {
        System.out.println("EmailService: Singleton instance created.");
    }

    public void sendEmail(String to, String subject, String body) {
        System.out.println("Email sent to " + to + ": Subject - " + subject + ", Body - " + body);
    }
}

// NotificationService.java
package com.sc.beans.services;

import org.springframework.beans.factory.annotation.Autowired;
import org.springframework.context.annotation.Scope;
import org.springframework.stereotype.Component;

import javax.annotation.PostConstruct;
import javax.annotation.PreDestroy;

@Component
@Scope("prototype") // Each notification needs its own state
public class NotificationService {

    private String recipient;
    private String message;

    @Autowired // Auto-injects an instance of EmailService (which is a Singleton by default)
    private EmailService emailService;

    public NotificationService() {
        System.out.println("NotificationService: Instance created.");
    }

    @PostConstruct
    public void initializeService() {
        // This will be called after recipient and message are set (if injected via setters)
        // or before the bean is given out if recipient/message are set via constructor
        System.out.println("NotificationService: Initializing for recipient: " + this.recipient);
        // Maybe open a dedicated connection for this specific notification, if needed
    }

    public void setNotificationDetails(String recipient, String message) {
        this.recipient = recipient;
        this.message = message;
    }

    public void sendNotification() {
        System.out.println("Sending notification to " + recipient + ": " + message);
        emailService.sendEmail(recipient, "Your Notification", message);
        // Assume an SMSService also exists and is used here
    }

    @PreDestroy
    public void cleanupService() {
        System.out.println("NotificationService: Cleaning up for recipient: " + this.recipient);
        // Close connections or release resources specific to this notification
    }
}

// Application.java (To run the practical example)
package com.sc.beans;

import com.sc.beans.services.NotificationService;
import org.springframework.context.ConfigurableApplicationContext;
import org.springframework.context.annotation.AnnotationConfigApplicationContext;

public class Application {
    public static void main(String[] args) {
        ConfigurableApplicationContext context = new AnnotationConfigApplicationContext(AppConfig.class);

        System.out.println("\n--- Notification Service Demo ---");

        // Get first notification service instance (new instance due to prototype scope)
        NotificationService notification1 = context.getBean(NotificationService.class);
        notification1.setNotificationDetails("[email protected]", "Your order has shipped!");
        notification1.sendNotification();

        System.out.println("\n");

        // Get second notification service instance (another new instance)
        NotificationService notification2 = context.getBean(NotificationService.class);
        notification2.setNotificationDetails("[email protected]", "New offer for you!");
        notification2.sendNotification();

        // Close the context to trigger @PreDestroy methods
        context.close();
        System.out.println("Spring Container has been closed after notifications.");
    }
}
මේ උදාහරණයේදී, NotificationService එක prototype scope එකක් විදියට හැදුවා, මොකද හැම notification එකකටම වෙනම recipient කෙනෙක් සහ message එකක් වගේ state එකක් තියෙන්න පුළුවන් නිසා. ඒ වගේම EmailService එක singleton එකක් විදියට තියෙනවා, මොකද Email යවන්න හැම පාරම අලුත් service instance එකක් ඕන වෙන්නේ නැහැ. NotificationService එකේ constructor එක, @PostConstruct සහ @PreDestroy methods ටික ක්රියාත්මක වෙන විදියත් බලන්න පුළුවන්. මේකෙන් ඔයාට තේරෙනවා ඇති කොහොමද මේ concepts ටික practical scenario එකකදී පාවිච්චි කරන්නේ කියලා.
ඉතින්, මේකෙන් අපිට මොකක්ද ලැබෙන්නේ?
ඉතින් යාළුවනේ, අද අපි Spring Beans, ඒවායේ Scopes (Singleton, Prototype) සහ Lifecycle methods (@PostConstruct, @PreDestroy) ගැන ගැඹුරින් කතා කළා. මේ concepts ටික Spring development වලදී හරිම වැදගත්, මොකද මේවා තමයි ඔයාගේ application එක කොච්චර efficient ද, scalable ද, maintainable ද කියන එක තීරණය කරන්නේ. හරියට Beans manage කරගන්න පුළුවන් නම්, ඔයාට Spring Framework එකෙන් හරිම ෆට්ට applications හදන්න පුළුවන්.
Singleton Beans වලදී resources efficient විදියට පාවිච්චි කරන්න පුළුවන්. Prototype Beans වලදී stateful operations වලට flexibility එකක් දෙනවා. @PostConstruct වලින් initial setup වැඩ පහසුවෙන් කරන්න පුළුවන්, ඒ වගේම @PreDestroy වලින් clean shutdown එකක් සහ resource release එකක් සහතික කරන්න පුළුවන්. මේ සියල්ලම එකට එකතු වෙලා තමයි Spring Framework එක මෙච්චර බලවත් වෙන්නේ.
මේ ගැන ඔයාලට මොනවා හරි ප්රශ්න තියෙනවා නම්, එහෙම නැත්නම් මේක තවදුරටත් පැහැදිලි කරන්න ඕන කියලා හිතෙනවා නම්, පහලින් comment එකක් දාගෙන යන්න. ඒ වගේම මේ concepts ඔයාගේ next project එකේදී try කරලා බලන්නත් අමතක කරන්න එපා. අපි තවත් මේ වගේ වැදගත් article එකකින් හමුවෙමු! හැමෝටම ජය වේවා!