REST API පරීක්ෂා කිරීම | WebMvcTest | Spring Boot Controller Testing | SC Guide
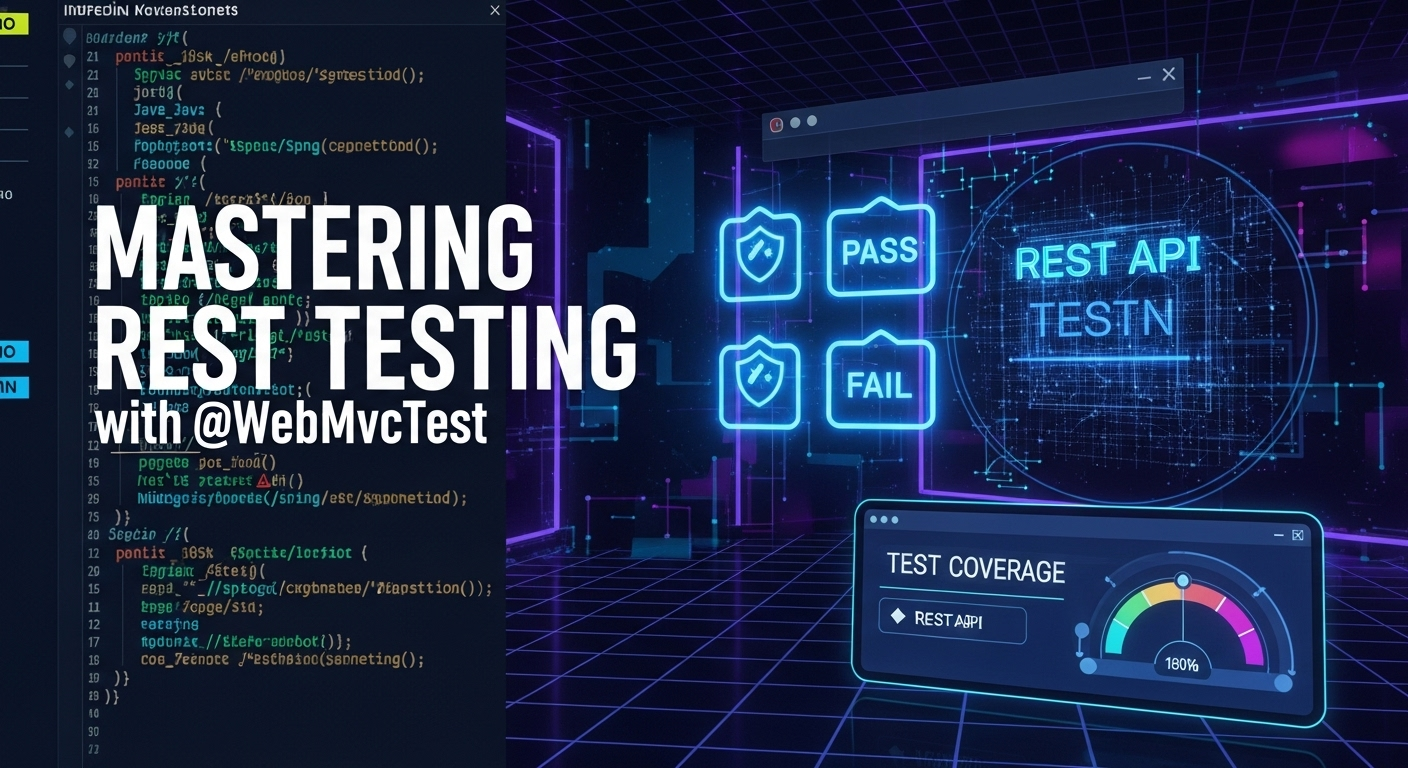
ආයුබෝවන්, Software Engineering වලට ආස කරන හැමෝටම! කොහොමද ඉතින්, වැඩිය කම්මැලි නැතුව, අද අපි ටිකක් වැදගත් දෙයක් ගැන කතා කරමු. ඒ තමයි, Spring Boot REST API Controllers හරියටම Test කරන්නේ කොහොමද? කියන එක.
සමහරවිට ඔයාලටත් මේ ගැටලුව ඇති වෙන්න ඇති නේද? API එකක් හදලා ඉවර වුණාම, ඒක හරියට වැඩ කරනවද කියලා බලන්න Postman, Insomnia නැත්නම් curl වගේ tools වලින් request ගහලා බලනවා. හැබැයි ඒක manual testing එකක්. හැමදාම අලුතෙන් code ටිකක් add කරාම, නැත්නම් bug එකක් fix කරාම, අර කලින් හදපු API endpoints ඔක්කොම ආයේ manual check කරන්න වෙනවා. මේක ටික කාලයක් යනකොට වෙහෙසකරයි, වරදින්නත් තියෙන ඉඩ වැඩියි.
නමුත්, අපි automated tests ලියනවා නම්, මේ වැඩේ ගොඩක් ලේසි වෙනවා. අද අපි කතා කරන්න යන්නේ Spring Boot Applications වල REST API Controllers test කරන්න තියෙන සුපිරිම විදියක් ගැන – ඒ තමයි @WebMvcTest.
මේ ලිපිය ඉවර වෙනකොට ඔයාට පුළුවන් වෙයි තමන්ගේ Spring Boot REST Controllers හරියටම test කරන්න, ඒ වගේම හොඳ quality එකකින් maintain කරන්න. එහෙනම් අපි පටන් ගමු!
මොකක්ද මේ @WebMvcTest කියන්නේ?
Spring Boot project එකක REST API එකක් හදනකොට, ඒක හරියට වැඩ කරනවද කියලා බලන්න testing අනිවාර්යයි නේද? සමහරු Postman එකෙන් ගහලා, තව සමහරු curl වලින්, හැමෝම තමන්ගේ විදිහට test කරනවා. ඒත් මේවා manual tests. මේවා එක දිගට කර කර ඉන්න බැහැ, ඒ වගේම පොඩි වෙනසක් කරාම ආයේ මුල ඉඳන් ඔක්කොම test කරන්න වෙනවා. Automatic, reliable tests ලියන්න ඕනේ නම් මොකද කරන්නේ?
මෙන්න මෙතනදී තමයි Spring Boot Framework එකේ තියෙන @WebMvcTest කියන annotation එක අපිට ගොඩක් උදව් වෙන්නේ. මේක හරියට, අපි හදන API endpoint එක ඇත්තටම HTTP request එකක් එනකොට කොහොමද behave කරන්නේ කියලා බලන්න හදන "virtual environment" එකක් වගේ. ඒ කියන්නේ, මේකෙන් අපේ Spring MVC Controller layer එක විතරක් load කරලා test කරන්න පුළුවන්.
ඔබ හිතයි @SpringBootTest කියලා එකකුත් තියෙනවා නේද කියලා. ඔව්, ඒකෙන් complete Spring application context එකම load කරනවා. Database එක, service layer එක, repository layer එක, හැම දෙයක්ම load කරනවා. ඒක integration testing වලට හොඳයි. හැබැයි @WebMvcTest වලින් වෙන්නේ අපේ Controller layer එකේ logic එක විතරක් test කරන එක. මේකේ වාසි ගොඩක් තියෙනවා:
- වේගවත් (Fast): සම්පූර්ණ application context එක load නොකරන නිසා test run වෙන වෙලාව ගොඩක් අඩුයි.
- Isolation: Controller එකේ dependency වෙන service layer එක, repository layer එක වගේ ඒවා අපිට Mock කරන්න පුළුවන්. ඒ කියන්නේ අපි test කරන්නේ Controller එකේ logic එක විතරයි, service layer එකේ bug එකක් තිබ්බත් අපේ Controller test එක fail වෙන්නේ නැහැ. ඒකෙන් bug එක තියෙන තැන pinpoint කරන්න ලේසියි.
- Focus: අපිට focus කරන්න පුළුවන් Controller එක හරියට Request එක handle කරනවද, Data Binding හරියට වෙනවද, Response එක හරියට return කරනවද, HTTP Status codes හරියට දෙනවද වගේ දේවල් ගැන විතරයි.
හරි, දැන් අපි බලමු මේක code එකෙන් කොහොමද පාවිච්චි කරන්නේ කියලා. සාමාන්යයෙන් @WebMvcTest පාවිච්චි කරනකොට අපි MockMvc object එක සහ @MockBean annotation එක භාවිතා කරනවා. MockMvc එකෙන් අපිට HTTP request simulate කරන්න පුළුවන්, හරියට Postman එකෙන් request එකක් ගහනවා වගේ. @MockBean එකෙන් අපේ Controller එකේ depend වෙලා තියෙන Service layer වගේ components, Mockito framework එකෙන් mock කරන්න පුළුවන්.
import org.junit.jupiter.api.Test;
import org.springframework.beans.factory.annotation.Autowired;
import org.springframework.boot.test.autoconfigure.web.servlet.WebMvcTest;
import org.springframework.boot.test.mock.mockito.MockBean;
import org.springframework.http.MediaType;
import org.springframework.test.web.servlet.MockMvc;
import com.fasterxml.jackson.databind.ObjectMapper; // Object to JSON conversion
import static org.mockito.Mockito.*; // For Mockito methods like when, verify, any
import static org.springframework.test.web.servlet.request.MockMvcRequestBuilders.*; // For GET, POST, PUT, DELETE
import static org.springframework.test.web.servlet.result.MockMvcResultMatchers.*; // For status, jsonPath
import static org.hamcrest.Matchers.*; // For jsonPath matchers
// ProductController කියන එක විතරක් test කරන්න අවශ්ය නිසා ProductController.class දානවා
@WebMvcTest(ProductController.class)
class ProductControllerTest {
// HTTP requests simulate කරන්න MockMvc object එක Auto-wire කරනවා
@Autowired
private MockMvc mockMvc;
// ProductController එක ProductService එකට depend නිසා, ඒක mock කරනවා
@MockBean
private ProductService productService;
// Object එක JSON String එකකට convert කරන්න Helper method එකක්
// මෙය test class එකටම add කරන්න පුලුවන්
public static String asJsonString(final Object obj) {
try {
return new ObjectMapper().writeValueAsString(obj);
} catch (Exception e) {
throw new RuntimeException(e);
}
}
// ... test methods will go here ...
}
CRUD API එකක් සකසා ගැනීම
හරි, දැන් අපි බලමු අපි test කරන්න යන Product Management System එකේ Controller, Service, සහ Model classes ටික කොහොමද කියලා. මේවා ගොඩක් සරලයි, මොකද අපේ focus එක testing ගැනනේ.
1. Product Model
// Product.java
public class Product {
    private Long id;
    private String name;
    private double price;

    public Product() {
    }

    public Product(Long id, String name, double price) {
        this.id = id;
        this.name = name;
        this.price = price;
    }

    // Getters and Setters
    public Long getId() {
        return id;
    }

    public void setId(Long id) {
        this.id = id;
    }

    public String getName() {
        return name;
    }

    public void setName(String name) {
        this.name = name;
    }

    public double getPrice() {
        return price;
    }

    public void setPrice(double price) {
        this.price = price;
    }

    @Override
    public String toString() {
        return "Product{" +
               "id=" + id +
               ", name='" + name + '\'' +
               ", price=" + price +
               '}';
    }
}
2. Product DTO (Data Transfer Object)
මේක Client එකෙන් එන request body එකට සහ response body එකට පාවිච්චි කරනවා.
// ProductDTO.java
public class ProductDTO {
    private String name;
    private double price;

    public ProductDTO() {
    }

    public ProductDTO(String name, double price) {
        this.name = name;
        this.price = price;
    }

    // Getters and Setters
    public String getName() {
        return name;
    }

    public void setName(String name) {
        this.name = name;
    }

    public double getPrice() {
        return price;
    }

    public void setPrice(double price) {
        this.price = price;
    }
}
3. Product Service Interface
අපේ Controller එක මේ Service එකට depend වෙනවා. අපි test කරනකොට මේක mock කරනවා.
// ProductService.java
import java.util.List;

public interface ProductService {
    Product createProduct(ProductDTO productDTO);
    Product getProductById(Long id);
    List<Product> getAllProducts();
    Product updateProduct(Long id, ProductDTO productDTO);
    void deleteProduct(Long id);
}
4. Product Controller
මේ තමයි අපි test කරන්න යන Controller එක. මේකේ CRUD operations (Create, Read, Update, Delete) තියෙනවා.
// ProductController.java
import org.springframework.beans.factory.annotation.Autowired;
import org.springframework.http.HttpStatus;
import org.springframework.http.ResponseEntity;
import org.springframework.web.bind.annotation.*;

import java.util.List;

@RestController
@RequestMapping("/api/products")
public class ProductController {

    @Autowired
    private ProductService productService;

    @PostMapping
    public ResponseEntity<Product> createProduct(@RequestBody ProductDTO productDTO) {
        Product newProduct = productService.createProduct(productDTO);
        return new ResponseEntity<>(newProduct, HttpStatus.CREATED);
    }

    @GetMapping("/{id}")
    public ResponseEntity<Product> getProductById(@PathVariable Long id) {
        Product product = productService.getProductById(id);
        if (product == null) {
            return new ResponseEntity<>(HttpStatus.NOT_FOUND);
        }
        return new ResponseEntity<>(product, HttpStatus.OK);
    }

    @GetMapping
    public ResponseEntity<List<Product>> getAllProducts() {
        List<Product> products = productService.getAllProducts();
        return new ResponseEntity<>(products, HttpStatus.OK);
    }

    @PutMapping("/{id}")
    public ResponseEntity<Product> updateProduct(@PathVariable Long id, @RequestBody ProductDTO productDTO) {
        Product updatedProduct = productService.updateProduct(id, productDTO);
        if (updatedProduct == null) {
            return new ResponseEntity<>(HttpStatus.NOT_FOUND);
        }
        return new ResponseEntity<>(updatedProduct, HttpStatus.OK);
    }

    @DeleteMapping("/{id}")
    public ResponseEntity<Void> deleteProduct(@PathVariable Long id) {
        productService.deleteProduct(id);
        return new ResponseEntity<>(HttpStatus.NO_CONTENT);
    }
}
@WebMvcTest භාවිතා කරමින් Test කරමු
දැන් අපි බලමු මේ හදාගත්තු CRUD API එක @WebMvcTest වලින් test කරන්නේ කොහොමද කියලා. අපි ProductControllerTest class එකට මේ test methods ටික එකතු කරමු.
1. POST Request එකක් Test කිරීම (Create Product)
අපි මේ test එකෙන් බලන්නේ, Product එකක් POST request එකකින් එව්වම, Controller එක හරියට Service එක call කරලා, ඒකෙන් return වෙන Product එක 201 Created status එකත් එක්ක client එකට යවනවද කියලා.
    @Test
    void createProduct_shouldReturnCreatedProduct() throws Exception {
        ProductDTO productDTO = new ProductDTO("Laptop", 1200.00);
        Product savedProduct = new Product(1L, "Laptop", 1200.00);

        // ProductService.createProduct() method එක call කරාම savedProduct එක return කරන්න mock කරනවා
        when(productService.createProduct(any(ProductDTO.class))).thenReturn(savedProduct);

        mockMvc.perform(post("/api/products")
                .contentType(MediaType.APPLICATION_JSON) // Request body එක JSON කියලා කියනවා
                .content(asJsonString(productDTO))) // DTO එක JSON string එකක් විදියට යවනවා
                .andExpect(status().isCreated()) // HTTP status 201 Created ද කියලා බලනවා
                .andExpect(jsonPath("$.id", is(1))) // Response JSON එකේ id එක 1 ද කියලා බලනවා
                .andExpect(jsonPath("$.name", is("Laptop")))
                .andExpect(jsonPath("$.price", is(1200.00)));

        // ProductService.createProduct() method එක හරියටම call වුනාද කියලා verify කරනවා
        verify(productService, times(1)).createProduct(any(ProductDTO.class));
    }
2. GET Request එකක් Test කිරීම (Get Product by ID)
මේ test එකෙන් බලන්නේ, id එකක් දීලා Product එකක් ඉල්ලුවම, Controller එක Service එක හරහා හරි Product එකක් return කරනවද, නැත්නම් 404 Not Found එකක් දෙනවද කියලා.
    @Test
    void getProductById_shouldReturnProduct_whenProductExists() throws Exception {
        Product product = new Product(1L, "Mouse", 25.00);

        when(productService.getProductById(1L)).thenReturn(product);

        mockMvc.perform(get("/api/products/{id}", 1L) // /api/products/1 වගේ request එකක් යවනවා
                .contentType(MediaType.APPLICATION_JSON))
                .andExpect(status().isOk()) // HTTP status 200 OK ද කියලා බලනවා
                .andExpect(jsonPath("$.id", is(1)))
                .andExpect(jsonPath("$.name", is("Mouse")))
                .andExpect(jsonPath("$.price", is(25.00)));

        verify(productService, times(1)).getProductById(1L);
    }

    @Test
    void getProductById_shouldReturnNotFound_whenProductDoesNotExist() throws Exception {
        when(productService.getProductById(99L)).thenReturn(null); // Service එකෙන් null එකක් return කරනවා කියලා mock කරනවා

        mockMvc.perform(get("/api/products/{id}", 99L)
                .contentType(MediaType.APPLICATION_JSON))
                .andExpect(status().isNotFound()); // HTTP status 404 Not Found ද කියලා බලනවා

        verify(productService, times(1)).getProductById(99L);
    }
3. GET All Request එකක් Test කිරීම (Get All Products)
මේකෙන් අපි බලන්නේ හැම Product එකක්ම ගන්න request එක හරියට වැඩ කරනවද කියලා.
    @Test
    void getAllProducts_shouldReturnListOfProducts() throws Exception {
        List<Product> products = Arrays.asList(
            new Product(1L, "Laptop", 1200.00),
            new Product(2L, "Keyboard", 75.00)
        );

        when(productService.getAllProducts()).thenReturn(products);

        mockMvc.perform(get("/api/products")
                .contentType(MediaType.APPLICATION_JSON))
                .andExpect(status().isOk())
                .andExpect(jsonPath("$.length()", is(2))) // List එකේ item 2ක් තියෙනවද බලනවා
                .andExpect(jsonPath("$[0].name", is("Laptop")))
                .andExpect(jsonPath("$[1].name", is("Keyboard")));

        verify(productService, times(1)).getAllProducts();
    }
4. PUT Request එකක් Test කිරීම (Update Product)
Product එකක් update කරන request එක හරියට update කරනවද, නැත්නම් නොතිබුණොත් 404 Not Found දෙනවද කියලා බලනවා.
    @Test
    void updateProduct_shouldReturnUpdatedProduct_whenProductExists() throws Exception {
        ProductDTO updatedProductDTO = new ProductDTO("Updated Keyboard", 85.00);
        Product updatedProduct = new Product(1L, "Updated Keyboard", 85.00);

        when(productService.updateProduct(eq(1L), any(ProductDTO.class))).thenReturn(updatedProduct);

        mockMvc.perform(put("/api/products/{id}", 1L)
                .contentType(MediaType.APPLICATION_JSON)
                .content(asJsonString(updatedProductDTO)))
                .andExpect(status().isOk())
                .andExpect(jsonPath("$.id", is(1)))
                .andExpect(jsonPath("$.name", is("Updated Keyboard")))
                .andExpect(jsonPath("$.price", is(85.00)));

        verify(productService, times(1)).updateProduct(eq(1L), any(ProductDTO.class));
    }

    @Test
    void updateProduct_shouldReturnNotFound_whenProductDoesNotExist() throws Exception {
        ProductDTO updatedProductDTO = new ProductDTO("Non-Existent Product", 100.00);

        when(productService.updateProduct(eq(99L), any(ProductDTO.class))).thenReturn(null);

        mockMvc.perform(put("/api/products/{id}", 99L)
                .contentType(MediaType.APPLICATION_JSON)
                .content(asJsonString(updatedProductDTO)))
                .andExpect(status().isNotFound());

        verify(productService, times(1)).updateProduct(eq(99L), any(ProductDTO.class));
    }
5. DELETE Request එකක් Test කිරීම (Delete Product)
Product එකක් delete කරන request එක හරියට 204 No Content status එකක් දෙනවද කියලා බලනවා.
    @Test
    void deleteProduct_shouldReturnNoContent() throws Exception {
        doNothing().when(productService).deleteProduct(1L); // void method එකක් mock කරන්න doNothing() භාවිතා කරනවා

        mockMvc.perform(delete("/api/products/{id}", 1L)
                .contentType(MediaType.APPLICATION_JSON))
                .andExpect(status().isNoContent()); // HTTP status 204 No Content ද කියලා බලනවා

        verify(productService, times(1)).deleteProduct(1L);
    }
වැදගත් Tips සහ Tricks
@WebMvcTest වලින් test කරනකොට ඔයාට තව ගොඩක් දේවල් කරන්න පුළුවන්. මෙන්න ඒවායින් ටිකක්:
- ObjectMapper Configuration:සමහර වෙලාවට ඔබගේ Model objects වලට custom Jackson configurations (
@JsonIgnore,@JsonFormat, etc.) අවශ්ය වෙන්න පුළුවන්. එහෙම වෙලාවටMockMvcඑකටObjectMapperbean එක inject කරලා test කරන්න පුළුවන්. ඒ වගේම, Lazy Loading හෝ Circular References වගේ ප්රශ්න JSON conversion එකේදී එනවා නම්, ඒකටObjectMapperඑක හරියට configure කරන්න පුළුවන්.
Error Handling:Service layer එකෙන් exception එකක් (උදාහරණයක් විදියට, ProductNotFoundException) throw කරපු වෙලාවට Controller එක හරියට exception handle කරනවද කියලා test කරන්න. මේකට @ControllerAdvice (Global Exception Handler) භාවිතා කරනවා නම්, ඒකත් @WebMvcTest එකට එක්ක load කරලා test කරන්න පුළුවන්.
    @Test
    void getProductById_shouldHandleCustomException() throws Exception {
        when(productService.getProductById(anyLong())).thenThrow(new ProductNotFoundException("Product not found"));

        mockMvc.perform(get("/api/products/{id}", 1L))
                .andExpect(status().isNotFound())
                .andExpect(jsonPath("$.message", is("Product not found")));
    }
Security Testing:ඔයාගේ Project එකට Spring Security එකතු කරලා නම්, @WithMockUser වගේ annotations වලින් authenticated user කෙනෙක් විදිහට request යවලා authorization rules test කරන්න පුළුවන්. උදාහරණයක් විදියට, admin කෙනෙක්ට විතරක් Product එකක් delete කරන්න පුළුවන් නම්, සාමාන්ය user කෙනෙක්ට 403 Forbidden එනවද කියලා test කරන්න පුළුවන්.
    @Test
    @WithMockUser(username = "admin", roles = {"ADMIN"})
    void deleteProduct_asAdmin_shouldReturnNoContent() throws Exception {
        // ... delete test logic ...
    }

    @Test
    @WithMockUser(username = "user", roles = {"USER"})
    void deleteProduct_asUser_shouldReturnForbidden() throws Exception {
        mockMvc.perform(delete("/api/products/{id}", 1L))
                .andExpect(status().isForbidden());
    }
Input Validation Testing:Request Body එකේ වැරදි data (උදාහරණයක් විදියට, product name එක null, නැත්නම් price එක negative) දාපු වෙලාවට API එක validation errors හරියට handle කරලා, 400 Bad Request වගේ status එකක් එක්ක error response එකක් දෙනවද කියලා test කරන්න පුළුවන්. මේකට Spring Validation (@Valid, @NotNull, @Min, etc.) භාවිතා කරනවා නම්, MockMvc එකේ andExpect(jsonPath("$.errors[0].defaultMessage")) වගේ assertions දාලා test කරන්න පුළුවන්.
    @Test
    void createProduct_shouldReturnBadRequest_whenNameIsMissing() throws Exception {
        ProductDTO invalidProductDTO = new ProductDTO(null, 50.00);

        mockMvc.perform(post("/api/products")
                .contentType(MediaType.APPLICATION_JSON)
                .content(asJsonString(invalidProductDTO)))
                .andExpect(status().isBadRequest())
                .andExpect(jsonPath("$.errors[0].field", is("name"))); // Assuming your error response has an 'errors' array
    }
අවසාන වශයෙන්
ඉතින් යාළුවනේ, මේ ලිපියෙන් අපි @WebMvcTest කියන powerful annotation එක භාවිතා කරලා Spring Boot REST API Controllers Test කරන්නේ කොහොමද කියලා විස්තරාත්මකව ඉගෙන ගත්තා. මේකෙන් අපේ tests ගොඩක් වේගවත් වෙනවා වගේම, code quality එකත් ඉහළ යනවා. Bug නැති, හොඳට maintain කරන්න පුළුවන් applications හදන්න automated tests අනිවාර්යයි.
මතක තියාගන්න, හොඳ developer කෙනෙක් වෙන්න නම් code ලියනවා වගේම, ඒක හරියට වැඩ කරනවද කියලා බලන එකත් ගොඩක් වැදගත්. Test-Driven Development (TDD) වගේ concepts වලට යන්නත් මේ වගේ tools ගොඩක් උදව් වෙනවා.
දැන් ඔයාට පුළුවන් මේ concepts තමන්ගේ Spring Boot projects වලට add කරලා බලන්න. මොකද, theory විතරක් මදි, practice එකත් ඕනේ. ඔයාට ප්රශ්න තියෙනවා නම්, නැත්නම් මේ ගැන තවත් අදහස් තියෙනවා නම්, පහළින් comment section එකේ කියන්න. අපි කතා කරමු!
හැමෝටම ජය!