නූතන Software නිර්මාණයට Layered Architecture: Controller-Service-Repository Pattern SC Guide
නූතන Software නිර්මාණයට Layered Architecture: Controller-Service-Repository Pattern SC Guide
කොහොමද යාලුවනේ? ඔන්න අදත් අපි ආවා Software Engineering වලට පට්ටම වැදගත් දෙයක් ගැන කතා කරන්න. ඔයා අලුතින් Software Development වලට ආපු කෙනෙක්ද, නැත්නම් දැන් අවුරුදු ගාණක් මේ පැත්තේ ඉන්න කෙනෙක්ද කියන එක අදාළ නෑ, මේ Concept එක හැමෝටම වටිනවා. අපි අද කතා කරන්නේ Layered Architecture එක ගැන. ඒක ඇතුලෙ තියෙන Controller-Service-Repository Pattern එක ගැන විශේෂයෙන් අවධානය යොමු කරමු.
හිතන්නකෝ, ඔයා ලස්සන ගෙයක් හදන්න යනවා කියලා. ගේ හදද්දි ඔයා මොනවද කරන්නේ? 그냥 ගල්, වැලි, සිමෙන්ති ගෙනත් ගොඩක් දානවද? නෑ නේද? මුලින්ම Plan එකක් හදනවා, ඊටපස්සේ Foundation එක දානවා, බිත්ති, වහලය, වයරින්, ප්ලම්බින් කියලා එක එක දේවල් පිළිවෙලට, හරියට කරනවා. ඒ වගේම තමයි Software එකක් හදනකොටත්. හිතූ හිතූ විදිහට Code ගහගෙන ගියොත්, ටික කාලයක් යද්දි ඒක maintain කරන්න බැරි, අලුත් Features දාන්න බැරි, පොඩි Bug එකක් ආවත් හොයාගන්න බැරි, රවුම් ගැහෙන, අවුල් ජාලාවක් වෙනවා.
එතනදි තමයි මේ Architecture කියන දේ අපිට ගොඩක් වැදගත් වෙන්නේ. හරියට ගේකට Plan එකක් වගේ, Software එකකට Architecture එකක් කියන්නේ ඒක කොහොමද හදන්නේ, ඒක ඇතුලේ කොටස් කොහොමද එකට වැඩ කරන්නේ කියලා පෙන්නන සිතියමක්. මේ Layered Architecture කියන්නේ, Software එකේ තියෙන Responsibilities (වගකීම්) එක එක Layer වලට බෙදලා, ඒ Layer අතර Communication (සන්නිවේදනය) විතරක් සිද්ධ වෙන්න සලස්වන විදියක්. මේකෙන් ලැබෙන වාසි නම් කියලා වැඩක් නෑ!
Layered Architecture කියන්නේ මොකක්ද?
සරලවම කිව්වොත්, Layered Architecture කියන්නේ Software Application එකේ තියෙන Code Base එක එකිනෙකට වෙන් වුණු, ස්වාධීන (Independent) කොටස් හෙවත් 'Layers' වලට බෙදන ක්රමයක්. මේ Layer එකිනෙකට උඩින් පිහිටනවා වගේ තමයි වැඩ කරන්නේ. උදාහරණයක් විදිහට, ඔයාගේ Computer එකේ OS එක ගත්තොත්, Hardware Layer එකක් තියෙනවා, ඒකට උඩින් OS Kernel එක, ඊට උඩින් Device Drivers, ඊටත් උඩින් Application Layer එක වගේ. මේ හැම Layer එකකටම තමන්ටම ආවේණික වගකීමක් තියෙනවා.
Software එකකදි මේ Layers වල ප්රධාන අරමුණ වෙන්නේ 'Separation of Concerns' කියන මූලධර්මය ආරක්ෂා කරන එක. ඒ කියන්නේ, එක Layer එකක් තවත් Layer එකක වැඩකට අතපොවන්නේ නැතිව, තමන්ගේ වැඩේ විතරක් හරියට කරන එක. මේකෙන් ලැබෙන ලොකුම වාසිය තමයි, Code එක Clean වෙන එක, Maintain කරන්න පහසු වෙන එක, අලුතින් Features එකතු කරන්න ලේසි වෙන එක, සහ Test කරන්න පහසු වෙන එක. ඒ වගේම, Application එකක Database එක මාරු කරන්න සිද්ධ වුණොත්, Layered Architecture එකක් තියෙනවා නම්, Database එකට අදාළ Layer එක විතරක් වෙනස් කරලා අනිත් Layer වලට බලපෑමක් නැතිව වැඩේ කරගන්න පුළුවන්.
අපි දැන් මේ Layered Architecture එකේ, අපි Software Projects වල නිතරම භාවිතා කරන Controller-Service-Repository Pattern එක ගැන විස්තරාත්මකව බලමු.
Controller-Service-Repository Pattern එක ගලපගමු!
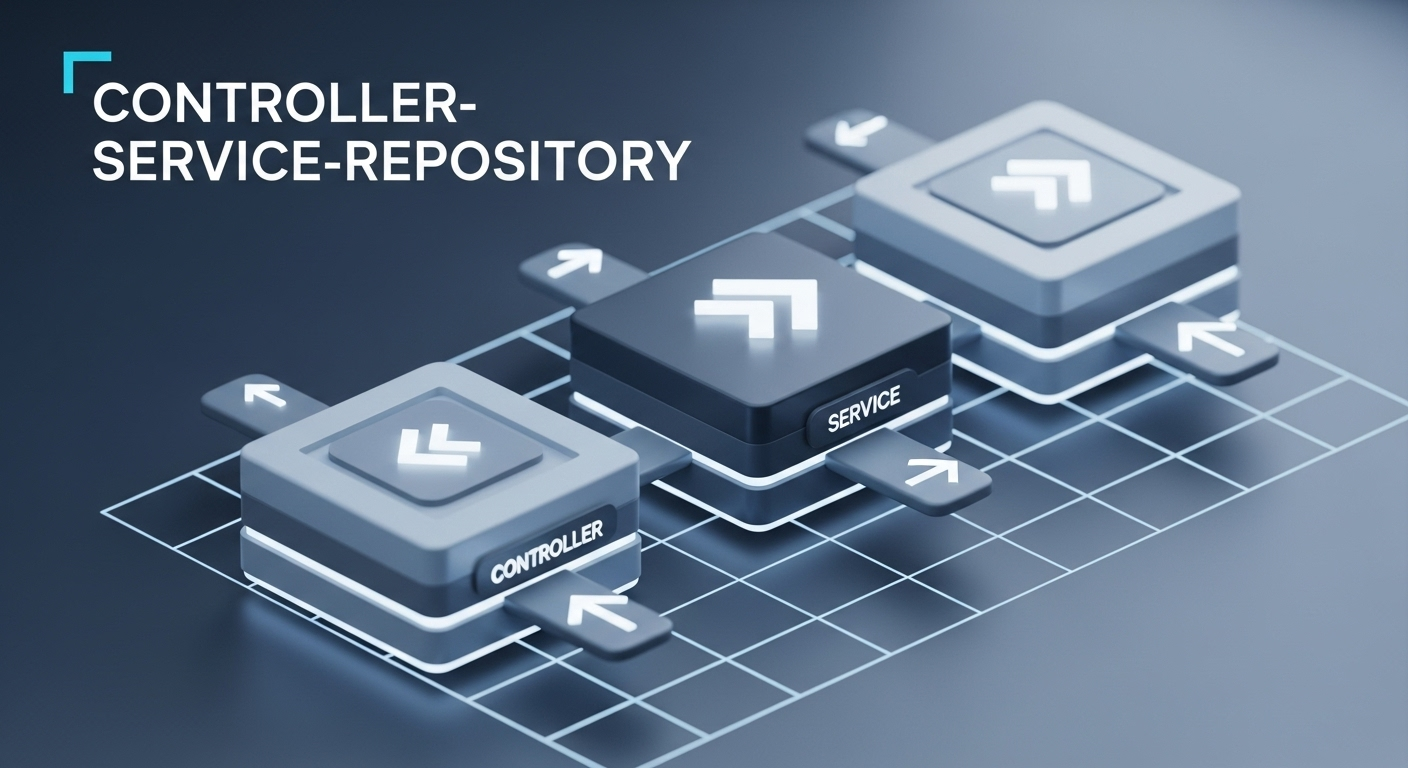
මේ Pattern එකේදී ප්රධාන වශයෙන් Layers තුනක් තියෙනවා. ඒවා තමයි:
- Controller Layer (Presentation Layer / API Layer)
- Service Layer (Business Logic Layer)
- Repository Layer (Data Access Layer / Persistence Layer)
1. Controller Layer
Controller Layer එක තමයි Application එකට එළියෙන් එන Requests (ඉල්ලීම්) මුලින්ම අල්ලගන්නේ. ඔයා Web Application එකක් හදනවා නම්, මේක HTTP Requests වෙන්න පුළුවන්. Mobile App එකක් නම්, ඒකේ API Calls වෙන්න පුළුවන්. මේ Controller එකේ ප්රධාන වගකීම වෙන්නේ:
- Requests අල්ලගැනීම (Request Handling): User කෙනෙක් Button එකක් Click කරාම, Page එකක් Load කරාම එන request එක receive කරගන්න එක.
- Input Validation (ආදාන සත්යාපනය): Request එකත් එක්ක එන දත්ත (Data) වල මූලික Validation ටිකක් කරන එක. උදාහරණයක් විදිහට, Password එකක් දෙනවා නම්, ඒකේ දිග (Length) හරිද, අවශ්ය කරන Characters තියෙනවද කියලා බලන එක.
- Service Layer එකට Request එක යොමු කිරීම: Controller එක තමන්ට අදාළ මූලික ටික කරලා, ඊළඟට Business Logic එක handle කරන්න අදාළ Service එකට Request එක යොමු කරනවා.
- Response එක නැවත යැවීම (Response Sending): Service Layer එකෙන් වැඩේ කරලා දුන්නට පස්සේ, ඒ result එක User ට තේරෙන විදිහට (JSON, XML, HTML වගේ Format එකකින්) response එකක් විදිහට ආපහු යවන එක.
වැදගත්ම දේ තමයි, Controller එකට කිසිම Business Logic (ව්යාපාරික තර්කයක්) අයිති නෑ. ඒ කියන්නේ, Controller එකක් ඇතුලේ Database එකකට දත්ත දාන එක, සංකීර්ණ ගණනය කිරීම් කරන එක වගේ දේවල් කරන්න හොඳ නෑ. Controller එක හරියට කන්තෝරුවක Receptionist කෙනෙක් වගේ. එයාට Call එකක් ආවම, එයා ඒක අදාළ අංශයට Connect කරනවා විතරයි. එයා Call එකෙන් කියන දේවල් විසඳන්න යන්නේ නෑ.
// Example using Spring Boot (Conceptual)
@RestController
@RequestMapping("/api/students")
public class StudentController {

    private final StudentService studentService;

    public StudentController(StudentService studentService) {
        this.studentService = studentService;
    }

    @GetMapping
    public ResponseEntity<List<Student>> getAllStudents() {
        List<Student> students = studentService.findAllStudents();
        return ResponseEntity.ok(students);
    }

    @PostMapping
    public ResponseEntity<Student> createStudent(@RequestBody Student student) {
        // Basic validation could happen here, e.g., check if name is null
        if (student.getName() == null || student.getName().isEmpty()) {
            return ResponseEntity.badRequest().build();
        }
        Student savedStudent = studentService.saveStudent(student);
        return ResponseEntity.status(HttpStatus.CREATED).body(savedStudent);
    }
}
මේ උදාහරණයේදී පේනවනේ, Controller එක StudentService එක විතරක් තමයි පාවිච්චි කරන්නේ. ඒක Database එක ගැන දන්නේ නෑ, දත්ත ගේන්න ඕන කොහොමද කියලාවත් දන්නේ නෑ. ඒකෙන් Request එක අරගෙන, Service එකට දීලා, Response එක ආපහු දෙනවා විතරයි.
2. Service Layer
අපේ Application එකේ 'heart' එක වගේ තමයි මේ Service Layer එක. Controller එකෙන් එවන Request එකට අදාළ සියලුම Business Logic (ව්යාපාරික තර්ක) සිද්ධ වෙන්නේ මෙතනදි. ඒ කියන්නේ, දත්ත Save කරන්න කලින් තියෙන සංකීර්ණ Validations, ගණනය කිරීම්, වෙනත් Service Calls එක්ක Integration කරන එක වගේ දේවල් ඔක්කොම කරන්නේ මෙයා.
Service Layer එකේ ප්රධාන වගකීම්:
- Business Logic ක්රියාත්මක කිරීම: උදාහරණයක් විදිහට, Student කෙනෙක්ව Save කරන්න කලින්, එයාගේ වයස (Age) හරියට තියෙනවද, NIC අංකය කලින් Register කරලා නැද්ද වගේ සංකීර්ණ නීති (Rules) Check කරන එක.
- වෙනත් Services/Components සමග සම්බන්ධ වීම: සමහර වෙලාවට එක Request එකක් Handle කරන්න වෙනත් Services ගණනාවක් එක්ක කතා කරන්න වෙනවා. උදාහරණයක් විදිහට, Order එකක් Create කරනකොට, Product Service එකෙන් Product Details අරගෙන, Payment Gateway Service එකත් එක්ක ගනුදෙනු කරලා, Email Service එකෙන් Confirmation Email එකක් යවන එක වගේ. මේ ඔක්කොම Orchestrate කරන්නේ Service Layer එකෙන්.
- Repository Layer එක සමග සම්බන්ධ වීම: දත්ත ලබා ගැනීමට හෝ දත්ත Save කිරීමට, Update කිරීමට, Delete කිරීමට අදාළ Repository Layer එකේ Methods කැඳවීම.
Service Layer එක හරියට කන්තෝරුවක Manager කෙනෙක් වගේ. Receptionist ගෙන් වැඩේ බාරගත්තට පස්සේ, එයා ඒ වැඩේට අදාළ ඔක්කොම දේවල් organise කරනවා. අවශ්ය නම් අදාළ අංශ වලට (Repository වගේ) කියනවා අවශ්ය දත්ත දෙන්න කියලා, වැඩේ ඉවර වුණාම Result එක ආපහු Receptionist ට දෙනවා.
// Example using Spring Boot (Conceptual)
@Service
public class StudentService {

    private final StudentRepository studentRepository;

    public StudentService(StudentRepository studentRepository) {
        this.studentRepository = studentRepository;
    }

    public List<Student> findAllStudents() {
        // Business logic: Maybe filter inactive students, or transform data
        return studentRepository.findAll();
    }

    public Student saveStudent(Student student) {
        // Complex Business Logic Validations
        if (student.getAge() < 5 || student.getAge() > 25) {
            throw new IllegalArgumentException("Invalid age for student registration.");
        }
        if (studentRepository.findByNic(student.getNic()).isPresent()) {
            throw new DuplicateEntryException("Student with this NIC already exists.");
        }
        // More business rules, e.g., assign a default class
        if (student.getClassRoom() == null) {
            student.setClassRoom("Grade 1");
        }
        return studentRepository.save(student);
    }

    public void deleteStudent(Long id) {
        // Check if student has outstanding fees before deleting
        if (studentRepository.findById(id).isPresent()) {
            // Assume a method exists to check fees
            // if (feesService.hasOutstandingFees(id)) {
            //    throw new IllegalStateException("Cannot delete student with outstanding fees.");
            // }
            studentRepository.deleteById(id);
        } else {
            throw new NotFoundException("Student not found.");
        }
    }
}
මේ Code එක බැලුවොත්, Service එක Repository එක එක්ක කතා කරන හැටි පැහැදිලියි. ඒ වගේම, Controller එකේ නොතිබුණු සංකීර්ණ Validations සහ Business Rules මෙතනදී Add කරලා තියෙනවා.
3. Repository Layer
Repository Layer එක තමයි Database එකත් එක්ක කෙලින්ම ගනුදෙනු කරන්නේ. මේ Layer එකේ ප්රධාන වගකීම වෙන්නේ Data Access Operations (දත්ත ලබාගැනීම, Save කිරීම, Update කිරීම, Delete කිරීම) පමණයි. මේ Layer එක, Application එකේ ඉතිරි කොටස් වලින් Database එකේ Detail ටික වහලා තියනවා. ඒ කියන්නේ, Service Layer එකට දත්ත ඕන වුණාම, එයා Repository එකට කියනවා විතරයි 'මට මේ Student ලා ටික ඕන' කියලා. ඒක MySQL ද, MongoDB ද, Redis ද කියලා Service එකට දැනගන්න අවශ්ය නෑ.
Repository Layer එකේ ප්රධාන වගකීම්:
- Data Access Operations (CRUD): Create, Read, Update, Delete වගේ දත්ත මෙහෙයුම් ටික කරන එක.
- Database Abstraction: Application එකේ ඉතිරි කොටස් වලින් Database එකේ වර්ගය, Connection Details වගේ දේවල් වහලා තියනවා. ඒකෙන් Database එක මාරු කරන්න අවශ්ය වුණොත්, Repository Layer එක විතරක් වෙනස් කරලා අනිත් Layer වලට කිසිම බලපෑමක් නැතිව වැඩේ කරගන්න පුළුවන්.
- Data Mapping: Database එකෙන් එන දත්ත Application එකේ භාවිතා කරන Objects වලට Convert කරන එක.
Repository එක හරියට පුස්තකාලයක Librarian කෙනෙක් වගේ. ඔයාට පොතක් ඕන වුණාම, ඔයා Librarian ට කියනවා 'මට මේ පොත ඕන' කියලා. එයා ඒ පොත තියෙන තැන හරියටම දන්නවා, ගිහින් අරන් ඇවිත් ඔයාට දෙනවා. ඔයාට පොත තියෙන්නේ කොහෙද කියලා දැනගන්න අවශ්ය නෑ. ඒ වගේම, Service Layer එක Repository එකෙන් දත්ත ඉල්ලනවා මිසක්, දත්ත ගේන විදිය ගැන වද වෙන්නේ නෑ.
// Example using Spring Data JPA (Conceptual)
import org.springframework.data.jpa.repository.JpaRepository;
import org.springframework.stereotype.Repository;

import java.util.Optional;

@Repository
public interface StudentRepository extends JpaRepository<Student, Long> {
    // Custom query method
    Optional<Student> findByNic(String nic);

    // You can add more custom queries here if needed
    List<Student> findByClassRoom(String classRoom);
}

// If not using Spring Data JPA, you might have a class like this:
/*
public class StudentRepositoryImpl implements StudentRepository {
    private final DataSource dataSource;

    public StudentRepositoryImpl(DataSource dataSource) {
        this.dataSource = dataSource;
    }

    public Student save(Student student) {
        // JDBC code to insert/update student in database
        // return saved student
    }

    public Optional<Student> findById(Long id) {
        // JDBC code to retrieve student by id
        // return Optional<Student>
    }

    // Other CRUD methods
}
*/
මේ Layer තුන එකට වැඩ කරන්නේ හරියට Team එකක් වගේ. Controller එක Request එක අරගෙන Service එකට දෙනවා, Service එක Business Logic ටික කරලා Repository එකට කියනවා දත්ත අල්ලගන්න කියලා, Repository එක Database එකත් එක්ක වැඩේ කරලා Result එක Service එකට දෙනවා, Service එක ඒ Result එක Controller එකට දෙනවා, Controller එක ඒක User ට පෙන්නනවා. හැමෝම තමන්ගේ වැඩේ විතරක් හරියට කරනවා.
මේකෙන් අපිට මොකක්ද ලැබෙන්නේ?
Layered Architecture, විශේෂයෙන්ම Controller-Service-Repository Pattern එක භාවිතා කරන එකෙන් අපිට ලැබෙන වාසි ගොඩක් තියෙනවා:
1. Maintainability (නඩත්තු කිරීම පහසුයි)
Code Base එක කොටස් වලට බෙදලා තියෙන නිසා, Bug එකක් ආවොත් ඒක තියෙන්නේ මොන Layer එකේද කියලා ඉක්මනටම හොයාගන්න පුළුවන්. ඒ වගේම, අලුත් Feature එකක් Add කරනකොට, දැනට තියෙන Code වලට බලපෑමක් නොකර, අදාළ Layer එකේ විතරක් වෙනස්කම් කරන්න පුළුවන්. මේකෙන් කාලයත් ශ්රමයත් ඉතිරි වෙනවා.
2. Testability (පරීක්ෂා කිරීම පහසුයි)
මේ Layers එකිනෙකට ස්වාධීන නිසා, අපිට Unit Tests ලේසියෙන් ලියන්න පුළුවන්. Controller එක වෙනම Test කරන්න පුළුවන්, Service එක වෙනම Test කරන්න පුළුවන් (Repository එක Mock කරලා), Repository එක වෙනම Test කරන්න පුළුවන් (Database එකක් එක්ක හෝ in-memory database එකක් එක්ක). මේකෙන් Quality එක වැඩි වෙනවා වගේම, Bugs අඩුවෙන් එනවා.
3. Scalability (විශාල කිරීමේ හැකියාව)
Application එක විශාල වෙද්දි හෝ වැඩි Load එකක් ආවොත්, Layered Architecture එකක් තියෙනවා නම්, අපිට අවශ්ය Layer එක විතරක් Scale කරන්න පුළුවන්. උදාහරණයක් විදිහට, Business Logic එකට වැඩි Load එකක් එනවා නම්, Service Layer එකේ Instances ප්රමාණය වැඩි කරන්න පුළුවන්.
4. Flexibility (නම්යශීලී බව)
අපේ Application එකේ Data Storage (Database) එක මාරු කරන්න සිද්ධ වුණොත්, අපිට Repository Layer එක විතරක් වෙනස් කරලා අනිත් Layers වලට කිසිම බලපෑමක් නැතිව වැඩේ කරගන්න පුළුවන්. ඒ වගේම, Front-end එක වෙනස් කරන්න සිද්ධ වුණත්, Backend එකේ Controller Layer එකට එච්චරම බලපෑමක් වෙන්නේ නෑ.
5. Collaboration (සමගාමීව වැඩ කිරීම)
විශාල Team එකකදී, Layered Architecture එකක් තියෙනවා නම්, Developers ලා කීප දෙනෙකුට එකවර එකිනෙකට වෙනස් Layers වල වැඩ කරන්න පුළුවන්. එක් කෙනෙක් Controller ලියද්දි, තව කෙනෙක් Service එක ලියනවා, තවත් කෙනෙක් Repository එක ලියනවා. මේකෙන් Development Process එක ඉක්මන් වෙනවා.
පුංචි අභියෝගයක්! (Practical Exercise)
අපි දැන් මේ කතා කරපු දේවල් ඔයාගේ දැනුමට විතරක් සීමා නොකර, ප්රායෝගිකව Apply කරලා බලමු. ඔයා දැනට හදපු පොඩි Application එකක් තියෙනවා නම් (එක File එකක හෝ පොඩි Functions ගොඩක් එක්ක ලියපු Simple REST API එකක් වගේ), ඒක Refactor කරන්න උත්සාහ කරන්න.
නැත්නම්, මේ වගේ පොඩි Project එකක් අලුතින් හදන්න පටන් ගන්න. උදාහරණයක් විදිහට, Simple Student Management System එකක් හදමු.
මේකේදී:
- Student Model/Entity එකක් හදන්න: Student ටිකේ details (id, name, age, class) තියෙන Class එකක් හදන්න.
- Controller Package/Folder එකක් හදන්න: මේක ඇතුලේ
StudentControllerඑක හදන්න. මේකෙන්/studentsවගේ Paths වලට එන GET, POST, PUT, DELETE Requests ටික අල්ලගන්න. මේ Controller එක ඇතුලේStudentServiceඑක Inject කරගන්න. - Service Package/Folder එකක් හදන්න: මේක ඇතුලේ
StudentServiceඑක හදන්න. මේක ඇතුලේ Student කෙනෙක්ව Save කරනකොට age Validation එකක් දාන්න, නැත්නම් NIC එක duplicate ද කියලා බලන්න වගේ Business Logic ටික ලියන්න. මේ Service එක ඇතුලේStudentRepositoryඑක Inject කරගන්න. - Repository Package/Folder එකක් හදන්න: මේක ඇතුලේ
StudentRepositoryඑක හදන්න. මේකෙන් Data Storage එකත් එක්ක වැඩ කරන්න. ඒක In-memory List එකක් වෙන්න පුළුවන් (පටන් ගන්න), නැත්නම් H2 Database එකක් වගේ පොඩි Database එකක් පාවිච්චි කරන්න පුළුවන්. මේකේදී CRUD (Create, Read, Update, Delete) Operations ටික Implement කරන්න.
මේ Exercise එක කරද්දි ඔයාට දැනෙයි, Code එක කොච්චර Clean ද, එකිනෙකට වෙන් වුණු කොටස් විදිහට තියෙන නිසා මොනතරම් පහසුවෙන් තේරුම් ගන්න පුළුවන්ද කියලා. අලුත් Feature එකක් add කරන්න ඕන වුණොත්, අදාළ Layer එකට ගිහින් add කරන්න පුළුවන්. Example: Student කෙනෙක්ට Subject එකක් Assign කරන්න ඕන නම්, SubjectService එකක් හදලා ඒක StudentService එකට inject කරලා වැඩේ කරගන්න පුළුවන්.
වැදගත් උපදෙස් ටිකක්
- Layers Skip කරන්න එපා: Controller එකෙන් කෙලින්ම Repository එකට කතා කරන්න එපා. Controller -> Service -> Repository කියන Flow එක හැමවෙලේම පාවිච්චි කරන්න. මේක තමයි මේ Architecture එකේ මූලිකම රීතිය.
- Service Layer එක Business Logic එකට Focus කරන්න: Service Layer එකේ තියෙන්න ඕන Business Rules, Validations, සහ 여러 Services අතර Coordination එක විතරයි.
- Repository Layer එක Data Access වලට විතරයි: Repository එකේ තියෙන්න ඕන Database operations විතරයි. Business Logic එකක් Repository එක ඇතුලේ තියන්න එපා.
- Dependency Injection (DI) පාවිච්චි කරන්න: Spring Boot, Node.js NestJS වගේ Frameworks වලදී Dependency Injection පාවිච්චි කරන එකෙන් Layers අතර සම්බන්ධතාවය (Coupling) අඩු කරගන්න පුළුවන්.
- Error Handling: හැම Layer එකකම Proper Error Handling එකක් තියාගන්න. Controller එකේදී User friendly Error messages දෙන්න, Service එකේදී Business Errors handle කරන්න, Repository එකේදී Database related Errors handle කරන්න.
- Naming Conventions: Clear සහ Consistent Naming Conventions පාවිච්චි කරන්න. (e.g.,
StudentController,StudentService,StudentRepository)
අවසාන වශයෙන්
Layered Architecture, විශේෂයෙන්ම Controller-Service-Repository Pattern එක, කියන්නේ නූතන Software Development වලදී අනිවාර්යයෙන්ම දැනගෙන ඉන්න ඕන Best Practice එකක්. මේකෙන් ඔයාට Maintain කරන්න පහසු, Test කරන්න පහසු, සහ අවශ්ය වෙලාවට පහසුවෙන් Scale කරන්න පුළුවන් Robust Application එකක් හදන්න පුළුවන් වෙනවා.
මුලින් මේක ටිකක් අමාරු වගේ පෙනුනත්, ටිකක් පුරුදු වුණාම 'බඩු බනිස්' වගේ ලේසියෙන් වැඩේ කරගන්න පුළුවන් වේවි. ඕනෑම සංකීර්ණ Software Project එකක් හදද්දි මේ Architecture එකට අනුව වැඩ කරන එක ඔයාට වගේම ඔයාගේ Team එකටත් පට්ට වටිනවා. මොකද, මේකෙන් Bug අඩු වෙනවා, Develop කරන්න යන කාලය අඩු වෙනවා, ඒ වගේම Team එකේ Productivity එක වැඩි වෙනවා.
ඉතින් යාලුවනේ, ඔයා මේ Controller-Service-Repository Pattern එක පාවිච්චි කරලා තියෙනවද? නැත්නම් මොකක්ද ඔයාගේ අදහස? ඔයාට මේ ගැන මොනවා හරි ප්රශ්න තියෙනවා නම්, තවත් දැනගන්න අවශ්ය දේවල් තියෙනවා නම්, අනිවාර්යයෙන්ම Comments section එකේ කියන් යන්න!
එහෙනම්, තවත් අලුත් දෙයක් එක්ක ඉක්මනින්ම හම්බවෙමු! Happy Coding!