Java Swing Layout Managers: Flow, Border, Grid - SC Guide for Developers | Java UI Design
ආයුබෝවන් යාළුවනේ! කොහොමද ඉතින්? අද කතා කරන්න යන්නේ Java Swing එක්ක වැඩ කරනකොට අපිට නැතුවම බැරි වෙන වැදගත් දෙයක් ගැන. මේක අපි UI එකක් හදනකොට, ඒ කියන්නේ අපේ application එකේ පේන කොටස හදනකොට, හරියටම පිහිටුවා ගන්න ඕන කරන දෙයක්. හිතන්නකෝ ඔයා ලස්සනට Swing application එකක් හැදුවා කියලා, ඒත් ඒකේ buttons ටිකයි, text fields ටිකයි එකට පැටලිලා අවුල් වෙලා නම් පේන්නේ, වැඩක් නෑ නේ? එතකොට තමයි අපිට Layout Managersලගේ පිහිට ඕන වෙන්නේ.
මේ Layout Managersලා කියන්නේ අපේ components (buttons, text fields, labels වගේ ඒවා) JFrame එකක් හෝ JPanel එකක් වගේ container එකක් ඇතුළේ කොහොමද පිහිටුවන්න ඕන කියලා කියල දෙන නීති රීති වගයක්. මේවා නැතුව අපි pixel ගාණට components තියන්න ගියොත් වැඩේ එලියට එනකොට අනිවාර්යෙන්ම කැත වෙයි. මොකද screen size වෙනස් වෙනකොට, components එහා මෙහා වෙලා responsive නැති වෙයි. ඒ නිසා අද අපි බලමු Swing වල ප්රධාන Layout Managersලා තුන් දෙනෙක් ගැන – FlowLayout, BorderLayout, සහ GridLayout.
Layout Managers කියන්නේ මොනවාද?
සරලවම කිව්වොත්, Layout Managersලා කියන්නේ අපි GUI application එකක් හදනකොට components ටික (උදාහරණයක් විදියට buttons, text fields, labels, panels) container එකක් ඇතුළේ (ඒ කියන්නේ window එක ඇතුළේ) කොහොමද පිළිවෙලට තියන්න ඕන කියලා තීරණය කරන ක්රමවේදයක්. මේගොල්ලෝ අපිට උදව් කරනවා componentsවල size එකයි, position එකයි හරියටම පාලනය කරගන්න. අපි Layout Manager කෙනෙක් පාවිච්චි නොකර, තනි තනිව componentsවල size එකයි position එකයි pixel ගාණට දීලා application එකක් හැදුවොත්, ඒක වෙන computer එකක, වෙන screen resolution එකකදි බලනකොට අවුල් වෙන්න පුළුවන්. ඒ කියන්නේ ඒක responsive වෙන්නේ නෑ. ඒත් Layout Managersලා ඉන්න නිසා අපේ application එක screen size එකට අනුව හැඩගැහෙන්න පුළුවන්කම ලැබෙනවා. මේක ඉතාම වැදගත් දෙයක් professional application එකක් හදනකොට.
හිතන්නකෝ ඔයා application එකක් හැදුවා, ඒක පොඩි laptop screen එකකදිත් ලස්සනට පේන්න ඕන, ලොකු desktop monitor එකකදිත් ලස්සනට පේන්න ඕන. එතකොට Layout Managersලා තමයි මේ වැඩේට උදව් කරන්නේ. එයාලා components ටික container එකේ තියෙන ඉඩ අනුව auto-adjust කරනවා. ඒක හරියට ගේ ඇතුළේ බඩු ටික පිළිවෙලට තියනවා වගේ වැඩක්. අපි හැම බඩුවකටම තැනක් දීලා තියනවා වගේ, Layout Manager කෙනෙක් එක්ක components ටිකට එයාලගේ තැන ලැබෙනවා.
FlowLayout – 'කෝපි කඩේ වගේ හැදෙන එක'
අපිට මේ Layout Managersලා අතරින් FlowLayout කියන්නේ සරලම කෙනා. මේක හරියට කෝපි කඩේක බංකු ටික තියලා තියෙනවා වගේ. ඒ කියන්නේ, components ටික එකින් එකට වමේ ඉඳන් දකුණට යනවා. ඒ පේළිය ඉවර වුණාම, ඊළඟ component එක ඊළඟ පේළියේ වමේ ඉඳන් පටන් ගන්නවා. මේක තමයි JPanel එකකට default විදියට එන layout manager එක. ඒ කියන්නේ අපි JPanel එකකට වෙන layout manager කෙනෙක් set නොකළොත්, FlowLayout තමයි automatically ඒකට එන්නේ.
FlowLayout එකට alignment එකක් (වමට, මැදට, දකුණට) දෙන්න පුළුවන්. ඒ වගේම horizontal සහ vertical gaps (components අතර ඉඩ) දෙන්නත් පුළුවන්. මේක බොහොම සරලයි, ඒ නිසා පොඩි පොඩි panels වලට, උදාහරණයක් විදියට buttons ටිකක් එක පේලියට තියන්න වගේ දේවල් වලට මේක හොඳට ගැලපෙනවා.
උදාහරණයක්:
import javax.swing.*;
import java.awt.*;

public class FlowLayoutDemo extends JFrame {
    public FlowLayoutDemo() {
        setTitle("FlowLayout Demo - SC Guide");
        setSize(400, 200);
        setDefaultCloseOperation(JFrame.EXIT_ON_CLOSE);
        setLocationRelativeTo(null); // Center the window

        // FlowLayout with default alignment (CENTER) and 5 pixel gaps
        // setLayout(new FlowLayout()); // Default is FlowLayout.CENTER, 5px gaps

        // FlowLayout with LEFT alignment and 10 pixel horizontal/vertical gaps
        setLayout(new FlowLayout(FlowLayout.LEFT, 10, 10));

        add(new JButton("Button 1"));
        add(new JButton("Button 2 - Long Name"));
        add(new JButton("Button 3"));
        add(new JButton("Button 4"));
        add(new JButton("Button 5"));
        add(new JButton("Button 6"));

        setVisible(true);
    }

    public static void main(String[] args) {
        // Run the GUI creation on the Event Dispatch Thread (EDT)
        SwingUtilities.invokeLater(() -> new FlowLayoutDemo());
    }
}
මේ code එක run කරලා බලන්න. ඔයාලට පෙනෙයි buttons ටික එකින් එකට වමේ ඉඳන් දකුණට යනවා. Window එකේ size එක වෙනස් කරනකොට, buttons ටික ඊළඟ පේළියට යන හැටිත් බලාගන්න පුළුවන්. මේක පොඩි forms වලට හෝ toolbars වලට ඉතාම සුදුසුයි.
BorderLayout – 'දේශ සීමා ගහලා'
දෙවනුවට අපි කතා කරන්නේ BorderLayout ගැන. මේක තමයි JFrame, JWindow, JDialog වගේ ප්රධාන container වලට default විදියට එන layout manager එක. BorderLayout එක container එක ප්රධාන කොටස් පහකට බෙදනවා: NORTH (උතුර), SOUTH (දකුණ), EAST (නැගෙනහිර), WEST (බටහිර), සහ CENTER (මැද). මේ කොටස් region කියලා හඳුන්වනවා.
- NORTH: උඩම තියෙන කොටස. සාමාන්යයෙන් menu bars, toolbars වගේ දේවල් වලට මේක පාවිච්චි කරනවා. මේකේ height එක component එකේ preferred height එකට අනුව හැදෙනවා, width එක container එකේ width එකට දිග ඇදෙනවා.
- SOUTH: යටම තියෙන කොටස. status bars, footer buttons වගේ දේවල් වලට මේක හොඳයි. මේකත් NORTH එක වගේමයි හැසිරෙන්නේ.
- EAST: දකුණු පැත්තේ තියෙන කොටස. side panels, scrollbars වගේ දේවල් වලට. මේකේ width එක component එකේ preferred width එකට අනුව හැදෙනවා, height එක ඉතුරු ඉඩ ප්රමාණයට දිග ඇදෙනවා.
- WEST: වම් පැත්තේ තියෙන කොටස. navigation panes, sidebars වගේ දේවල් වලට. මේකත් EAST එක වගේමයි හැසිරෙන්නේ.
- CENTER: මැද තියෙන කොටස. මේක තමයි ලොකුම කොටස. ඉතුරු වෙන ඉඩ ප්රමාණය පුරාම මේක පැතිරෙනවා. main content area එක, text areas, tables වගේ දේවල් වලට මේක පාවිච්චි කරනවා. මේ region එකට component එකක් add කරද්දි region එක සඳහන් නොකළොත් default විදියට CENTER එකට add වෙනවා.
BorderLayout එකකදී හැම region එකකටම එක component එකක් විතරයි add කරන්න පුළුවන්. ඒත් ඔයාලට පුළුවන් JPanel එකක් add කරලා, ඒ JPanel එක ඇතුළට තව components ගොඩක් දාන්න. මේ layout එක main application window එකක overall structure එක හදන්න ඉතාම හොඳයි.
උදාහරණයක්:
import javax.swing.*;
import java.awt.*;

public class BorderLayoutDemo extends JFrame {
    public BorderLayoutDemo() {
        setTitle("BorderLayout Demo - SC Guide");
        setSize(600, 400);
        setDefaultCloseOperation(JFrame.EXIT_ON_CLOSE);
        setLocationRelativeTo(null);

        setLayout(new BorderLayout(10, 10)); // 10 pixel horizontal and vertical gaps

        // NORTH region
        JButton northButton = new JButton("North - Header");
        add(northButton, BorderLayout.NORTH);

        // SOUTH region
        JButton southButton = new JButton("South - Footer/Status");
        add(southButton, BorderLayout.SOUTH);

        // EAST region
        JButton eastButton = new JButton("East - Sidebar");
        add(eastButton, BorderLayout.EAST);

        // WEST region
        JButton westButton = new JButton("West - Navigation");
        add(westButton, BorderLayout.WEST);

        // CENTER region (This expands to fill remaining space)
        JTextArea centerTextArea = new JTextArea("This is the main content area (CENTER). It expands to fill available space.\n" +
                                                "You can resize the window to see how it adjusts.");
        centerTextArea.setLineWrap(true);
        centerTextArea.setWrapStyleWord(true);
        JScrollPane scrollPane = new JScrollPane(centerTextArea); // Add scroll capability
        add(scrollPane, BorderLayout.CENTER);

        setVisible(true);
    }

    public static void main(String[] args) {
        SwingUtilities.invokeLater(() -> new BorderLayoutDemo());
    }
}
මේ code එක run කරලා බලනකොට ඔයාලට පෙනෙයි window එක කොටස් පහකට බෙදිලා තියෙන හැටි. Window එක resize කරනකොට, NORTH, SOUTH components වල width එකත්, EAST, WEST components වල height එකත්, විශේෂයෙන්ම CENTER එකේ width එකයි height එකයි auto adjust වෙන හැටි බලන්න. මේ layout එකෙන් තමයි අපි ගොඩක් complex applications වල මූලික සැකැස්ම හදන්නේ.
GridLayout – 'ග්රිල් එකක් වගේ'
අවසානයට අපි බලමු GridLayout ගැන. මේක හරියට components ටික grid එකක්, ඒ කියන්නේ rows (පේළි) සහ columns (තීරු) විදියට පිළිවෙලකට තියන්න උදව් කරනවා. GridLayout එකේ තියෙන විශේෂත්වය තමයි, grid එකේ හැම කොටසකටම එක සමාන size එකක් ලැබෙන එක. ඒ කියන්නේ components ටික container එකේ තියෙන ඉඩ අනුව සමානව බෙදිලා පිහිටනවා. මේක විශේෂයෙන්ම කැල්කියුලේටරයක් හදනකොට buttons ටික තියන්න, නැත්නම් game board එකක් වගේ components ටික එකම size එකට තියන්න ඕන තැන් වලට ඉතාම සුදුසුයි.
GridLayout එකක් create කරනකොට අපි rows ගාණයි, columns ගාණයි සඳහන් කරනවා. ඒ වගේම horizontal සහ vertical gaps (components අතර ඉඩ) දෙන්නත් පුළුවන්.
උදාහරණයක්:
import javax.swing.*;
import java.awt.*;

public class GridLayoutDemo extends JFrame {
    public GridLayoutDemo() {
        setTitle("GridLayout Demo - SC Guide");
        setSize(400, 400);
        setDefaultCloseOperation(JFrame.EXIT_ON_CLOSE);
        setLocationRelativeTo(null);

        // Create a GridLayout with 4 rows, 3 columns, and 10 pixel gaps
        setLayout(new GridLayout(4, 3, 10, 10)); // rows, columns, hgap, vgap

        // Add 12 buttons to fill the 4x3 grid
        for (int i = 1; i <= 12; i++) {
            add(new JButton("Button " + i));
        }

        setVisible(true);
    }

    public static void main(String[] args) {
        SwingUtilities.invokeLater(() -> new GridLayoutDemo());
    }
}
මේ code එක run කරලා බලන්න. ඔයාලට පෙනෙයි buttons ටික 4x3 grid එකක පිළිවෙලට තියෙනවා. Window එක resize කරනකොට, හැම button එකකම size එක auto adjust වෙන හැටි බලන්න. මේක කැල්කියුලේටරයක් වගේ UI එකකට කොච්චර ගැලපෙනවද කියලා ඔයාලට තේරෙයි.
නිගමනය (Conclusion)
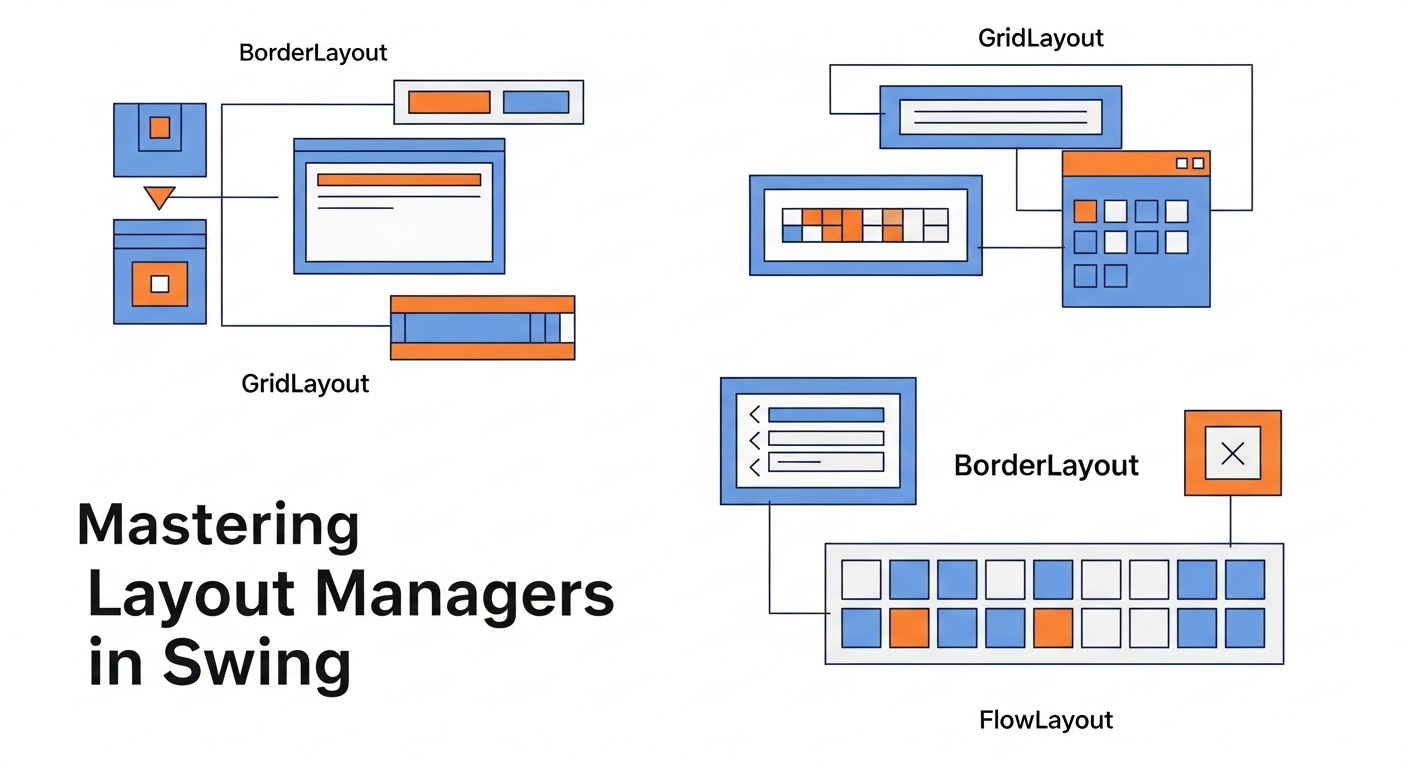
ඉතින් යාළුවනේ, අද අපි Java Swing වලදී UI components පිළිවෙලට තියාගන්න පාවිච්චි කරන ප්රධාන Layout Managersලා තුන් දෙනෙක් ගැන කතා කළා – FlowLayout, BorderLayout, සහ GridLayout. මේ තුන් දෙනාම එක එක අවශ්යතා වලට ගැලපෙන විදියට හදලා තියෙනවා.
- FlowLayout: සරලව components ටික එක පේළියට වමේ ඉඳන් දකුණට තියන්න. buttons ටිකක් panel එකක තියන්න වගේ පොඩි පොඩි වැඩ වලට හොඳයි.
- BorderLayout: ප්රධාන application window එකක් හදන්න ඉතාම හොඳයි. NORTH, SOUTH, EAST, WEST, CENTER කියන regions වලට components තියන්න පුළුවන්.
- GridLayout: components ටික grid එකක, ඒ කියන්නේ rows සහ columns විදියට එක සමාන size එකට තියන්න හොඳයි. කැල්කියුලේටරයක් වගේ UI එකකට මේක පට්ට.
මතක තියාගන්න, Layout Managersලා පාවිච්චි කරන එක responsive සහ ලස්සන GUI applications හදන්න අත්යවශ්යයි. සමහර වෙලාවට ඔයාලට මේ Layout Managersලා කීප දෙනෙක් එකට පාවිච්චි කරන්නත් සිද්ධ වෙයි. ඒ කියන්නේ, BorderLayout එකේ CENTER එකට JPanel එකක් add කරලා, ඒ JPanel එකට GridLayout එකක් set කරලා components තියන්න වගේ දේවල්.
දැන් ඔයාලට පොඩි අදහසක් ආවනේ මේ ගැන. ඉතින් නිකන් බලන් ඉන්න එපා, මේ code examples ටික අරන් run කරලා බලන්න, වෙනස්කම් කරලා බලන්න. එතකොට තමයි හරියටම වැඩේ තේරෙන්නේ. මොනවා හරි ප්රශ්න තියෙනවා නම් හෝ ඔයාලගේ අදහස් තියෙනවා නම්, පහළින් comment එකක් දාගෙන යන්න. ඊළඟ post එකෙන් හම්බවෙමු! තව දේවල් ඉගෙන ගමු!