Flyway Advanced Spring Boot DB Migrations | Rollbacks & Baselines Sinhala Guide

ආයුබෝවන් කට්ටිය! කොහොමද ඉතින්, වැඩ එහෙම සාර්ථකද? Software develop කරනකොට ලොකුම headache එකක් තමයි Database එක manage කරන එක. 'අනේ මට මේ table එකට column එකක් දාන්න ඕනේ, ඒත් production එකේ බඩු හරි යයිද දන්නේ නෑ!' වගේ සිතිවිලි ඔයාලටත් එනවා නේද? විශේෂයෙන්ම team එකක් විදිහට වැඩ කරනකොට, එක developer කෙනෙක් database schema එක change කරාම අනිත් අයට ඒක update කරගන්න එක ලොකු වදයක් වෙනවා. Local එකේ වැඩ කරද්දී අවුලක් නැති වුණාට, production එකට deployment එකක් දාද්දී database schema එක sync නැත්නම්, වැඩේ හරි යන්නේ නැති වෙන්න පුළුවන්. අන්න ඒකට තියෙන සුපිරිම විසඳුමක් තමයි Flyway.
Flyway කියන්නේ Database migration tool එකක්. ඒත් අද අපි කතා කරන්නේ Flyway වල සාමාන්ය දේවල් ගැන නෙවෙයි. ටිකක් advanced මට්ටමට ගිහින්, production වගේ environments වලටත් සුදුසු විදිහට Flyway කොහොමද පාවිච්චි කරන්නේ කියලා. විශේෂයෙන්ම, database rollbacks වගේ complex scenarios කොහොමද manage කරන්නේ, ඒ වගේම baseline වගේ features කොයිවෙලාවටද පාවිච්චි කරන්නේ කියන එක ගැන අපි ගැඹුරින් සාකච්ඡා කරනවා. මේක Spring Boot project එකක් එක්ක කොහොමද implement කරන්නේ කියලා අපි practical example එකක් එක්කම ඉගෙන ගමු. එහෙනම්, අපි වැඩේට බහිමු!
Flyway Basics Revisited: පදනම ශක්තිමත් කරගමු!
මුලින්ම අපි චුට්ටක් මතක් කරගමු Flyway කියන්නේ මොකක්ද කියලා. සරලවම කිව්වොත් Flyway කියන්නේ ඔයාගේ Database එකට version control දාන වැඩේ. ගිට් (Git) එකෙන් අපේ code එක version කරනවා වගේම, Flyway එකෙන් අපේ database schema එක version කරනවා. මේක මාරම වැදගත් දෙයක්, මොකද database schema changes කියන්නේ software development වල නිතරම වෙන දෙයක්.
Flyway වැඩ කරන්නේ කොහොමද?
- SQL scripts: Flyway වලදී ඔයා database changes ඔක්කොම SQL files විදිහට ලියනවා. මේ files වල නම් තියෙන්නේ නියමිත format එකකට. උදාහරණයක් විදිහට:
V1__initial_schema.sql,V2__add_users_table.sqlවගේ. මේVඑකෙන් පස්සේ තියෙන අංකය තමයි version එක. - Schema history table: Flyway automatically database එක ඇතුලේ
flyway_schema_history(හෝ ඔයා define කරන නමකින්) කියන table එකක් හදනවා. මේ table එකේ, මොන migration script එකද run කරේ, කවදද run කරේ, ඒක successful ද වගේ විස්තර තියාගන්නවා. මේකෙන් Flyway එකට පුළුවන් database එකේ current state එක මොකක්ද කියලා දැනගන්න. - Migrate command: ඔයාගේ Spring Boot application එක start කරනකොට Flyway auto-migrate වෙනවා (මේක configure කරන්න පුළුවන්). එහෙම නැත්නම් manual command එකකින් run කරන්නත් පුළුවන්. Flyway බලනවා
flyway_schema_historytable එකේ නැති, අලුත් SQL scripts මොනවද කියලා. ඊට පස්සේ ඒවා version order එකට database එකට apply කරනවා.
ඇයි Flyway වැදගත් වෙන්නේ?
- Reliability: Database changes හැම වෙලාවෙම predictable විදිහට run වෙනවා. එහෙම නැත්නම්, "අනේ production එකේ නම් වැඩ කළා, test එකේ අවුල්" වගේ ප්රශ්න අඩු වෙනවා.
- Repeatability: ඔයාට ඕනම වෙලාවක හිස් database එකකට (හෝ කලින් version එකක database එකකට) අලුත්ම schema එක deploy කරන්න පුළුවන්, එකම විදිහට. මේක CI/CD pipelines වලදී මාරම වැදගත්.
- Team Collaboration: Team එකක ඉන්න හැමෝටම database changes commit කරලා share කරන්න පුළුවන්. Database එකේ version එකක් තියාගෙන වැඩ කරනකොට, conflicts එන එකත් අඩු වෙනවා.
Spring Boot project එකකට Flyway එකතු කරගන්න එක නම් ගොඩක්ම ලේසියි. pom.xml එකට dependency එක දාලා, application.properties එකේ database connection details දීලා, SQL scripts src/main/resources/db/migration folder එක ඇතුලට දැම්මම ඇති. හරි, දැන් අපි යමු තව ටිකක් ගැඹුරට.
Complex Migrations: සාමාන්ය Alter Table වලින් එහාට
දැන් අපි යමු තව ටිකක් ගැඹුරට. සාමාන්යයෙන් SQL script එකක් කියන්නේ ALTER TABLE එකක් හරි, CREATE TABLE එකක් හරි විතරක් නෙවෙයි. සමහර වෙලාවට අපිට data transformation කරන්න වෙනවා, එහෙම නැත්නම් business logic එකක් apply කරන්න වෙනවා. මේ වගේ complex scenarios වලදී Flyway අපිට උදව් වෙන්නේ කොහොමද කියලා බලමු.
Data Transformations සහ Complex Logic
අපි හිතමු ඔයා user table එකක firstName සහ lastName කියන columns දෙක fullName කියලා එක column එකකට merge කරන්න හදනවා කියලා. මේක කරන්න ඕනේ migration script එකකින්. එතකොට ඔයාට පුළුවන් V3 වගේ script එකක මේ වගේ දෙයක් ලියන්න:
-- V3__merge_names_into_fullname.sql
ALTER TABLE users ADD COLUMN full_name VARCHAR(255);

UPDATE users SET full_name = CONCAT(first_name, ' ', last_name);

ALTER TABLE users DROP COLUMN first_name;
ALTER TABLE users DROP COLUMN last_name;
මෙතනදී වැදගත් දේ තමයි, මේ හැම operation එකක්ම එකම migration script එක ඇතුලේ කරන එක. Flyway වල default behavior එක තමයි හැම migration script එකක්ම transaction එකක් ඇතුලේ execute කරන එක. ඒ කියන්නේ, script එකේ මොකක් හරි error එකක් ආවොත්, මුළු script එකේම changes revert වෙනවා. ඒක database එකේ consistency එක maintain කරන්න ගොඩක් උදව් වෙනවා.
Transactional Migrations (Defaults)
ගොඩක් relational databases වල (MySQL, PostgreSQL, SQL Server වගේ) Flyway හැම SQL migration එකක්ම single database transaction එකක් ඇතුලේ run කරනවා. මේකෙන් වරදක් වුණොත් rollback කරන්න පුළුවන්. නමුත්, සමහර DDL operations (data definition language, schema changes) databases අනුව transactional වෙන්නේ නැහැ. උදාහරණයක් විදිහට, MySQL වල CREATE TABLE වගේ දේවල් transactional නෑ. ඒ නිසා, මේ වගේ database එකක් පාවිච්චි කරනවා නම් ඒ ගැන සැලකිලිමත් වෙන්න ඕනේ. PostgreSQL නම් ගොඩක් DDL transactional.
Callbacks: Migration Lifecycle එක Control කරමු
Flyway වලට callbacks කියන feature එකක් තියෙනවා. මේකෙන් අපිට migration process එකේ විවිධ අවස්ථාවලදී customs operations කරන්න පුළුවන්. උදාහරණයක් විදිහට, migrations run කරන්න කලින් data backup එකක් ගන්න, නැත්නම් migrations successful වුණාට පස්සේ cache එක clear කරන්න වගේ දේවල් කරන්න පුළුවන්.
Callbacks ලියන්න පුළුවන් SQL script විදිහට හරි, Java class විදිහට හරි. පොදු callbacks ටිකක් මෙන්න:
beforeMigrate.sql/AfterMigrate.sql: හැම migration එකක්ම run වෙන්න කලින්/පස්සේ.beforeEachMigrate.sql/afterEachMigrate.sql: හැම තනි migration script එකක්ම run වෙන්න කලින්/පස්සේ.afterBaseline.sql: Baseline operation එකක් successful වුණාට පස්සේ.afterRepair.sql: Repair operation එකක් successful වුණාට පස්සේ.
මේවා src/main/resources/db/callback folder එක ඇතුලේ දාන්න පුළුවන්. උදාහරණයක් විදිහට, beforeMigrate.sql එකක් මෙහෙම වෙන්න පුළුවන්:
-- beforeMigrate.sql
-- Create a backup of critical data before migrations
CREATE TABLE users_backup AS SELECT * FROM users;
මේ වගේ දේවල් පාවිච්චි කරලා අපිට migration process එක තවත් robust කරගන්න පුළුවන්. හැබැයි මේවා පාවිච්චි කරද්දී පරිස්සම් වෙන්න ඕනේ. මොකද මේවා production එකට ගහද්දී unexpected issues එන්න පුළුවන්.
The Art of Rollbacks with Flyway: වැරදුනොත් මොකද කරන්නේ?
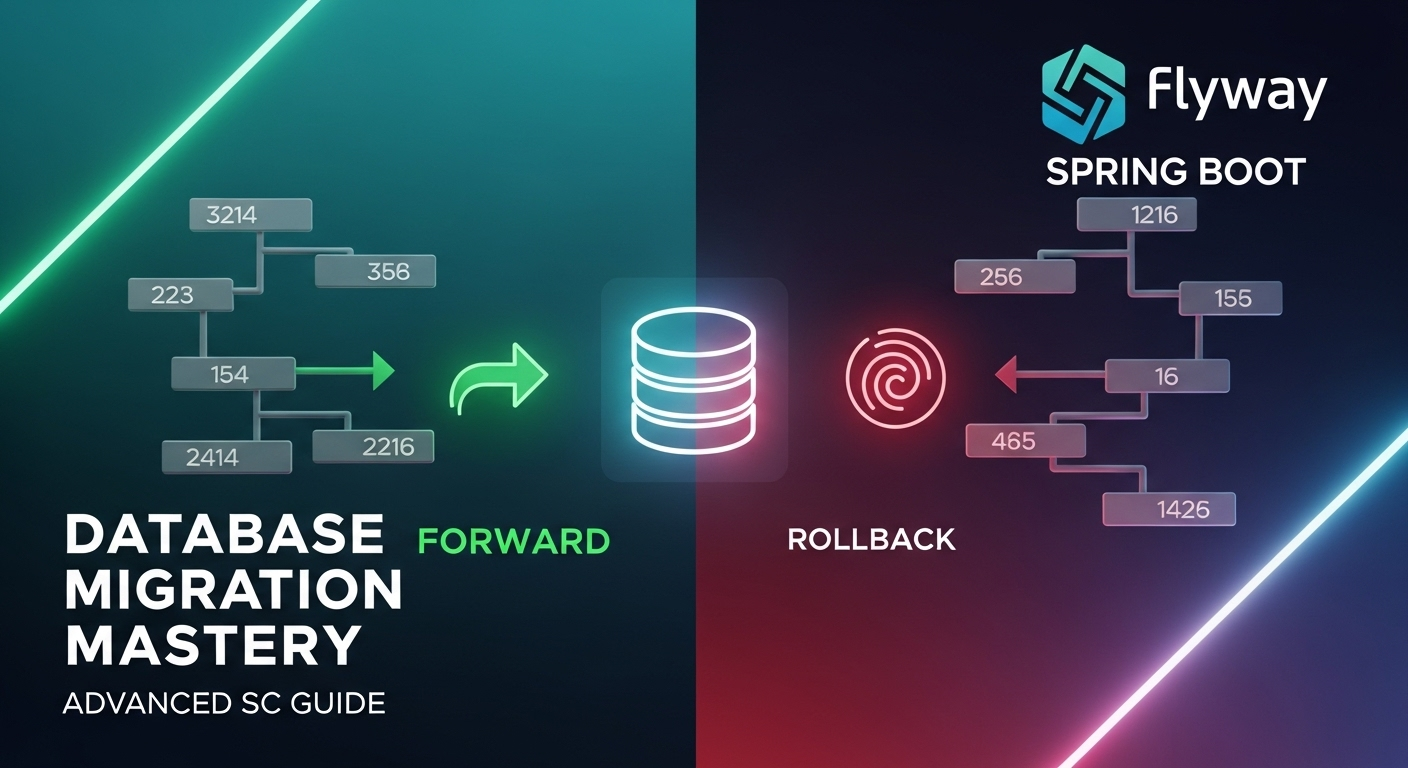
හරි, දැන් අපි එමු මේ post එකේ ප්රධානම මාතෘකාවට. 'Flyway එක්ක rollback කොහොමද කරන්නේ?' මේක හුඟක් අයට තියෙන ප්රශ්නයක්. මොකද database එකේ schema change එකක් වැරදුනොත් production එකේ ලොකු ප්රශ්නයක් වෙන්න පුළුවන්. Flyway වල direct 'rollback' කියන command එකක් නෑ. ඇයි ඒ? Database migration කියන්නේ forward-only ක්රියාවලියක්. ඒ කියන්නේ, ඔයා හැම වෙලාවෙම අලුත් version එකකට update වෙනවා මිසක්, පරණ version එකකට ආපහු යන්නේ නෑ. මේක Flyway වල design philosophy එකක්.
හැබැයි අපිට 'rollback-like' behavior එකක් ගන්න පුළුවන්. ඒ කියන්නේ, වැරදි migration එකක් වුණාම ඒක හදන්න අපි තවත් අලුත් migration එකක් ලියනවා මිසක්, තිබ්බ migration එක reverse කරන්නේ නෑ. මේ ක්රම ගැන අපි බලමු:
1. Fixing Forward Migration: හොඳම විසඳුම!
මේක තමයි production environments වලට හොඳම සහ safeම ක්රමය. ඔයා වැරදි migration එකක් run කරා නම්, ඒක undo කරන්න තවත් අලුත් migration script එකක් (ඊළඟ version එක විදිහට) ලියනවා. උදාහරණයක් විදිහට:
V1__create_users_table.sqlV2__add_email_column.sql(වැරදීමකින්emailcolumn එකට වැරදි data type එකක් දුන්නා)V3__fix_email_column_type.sql(V2 එකේ වැරැද්ද හදන migration එක)
V3__fix_email_column_type.sql එක මේ වගේ වෙන්න පුළුවන්:
-- V3__fix_email_column_type.sql
ALTER TABLE users MODIFY COLUMN email VARCHAR(255); -- MySQL syntax, PostgreSQL will be ALTER COLUMN TYPE
-- If data was lost or corrupted, try to restore from a recent backup here if possible
මේ ක්රමය safe, මොකද ඔයා හැම වෙලාවෙම database history එකට අලුත් entry එකක් එකතු කරනවා මිසක්, පරණ ඒවා modify කරන්නේ නෑ. ඒකෙන් auditability එක වැඩි වෙනවා.
2. Reversible Migrations (පරෙස්සමෙන්!)
සමහර අය හැම migration එකකටම rollback script එකක් ලියනවා. උදාහරණයක් විදිහට V1__create_table.sql එකට U1__drop_table.sql වගේ එකක්. හැබැයි Flyway මේකට direct support දෙන්නේ නෑ. මේවා manage කරන එක ලොකු headache එකක් වෙන්න පුළුවන්. විශේෂයෙන්ම production වලදී මේ ක්රමය recommend කරන්නේ නෑ. මොකද data loss වෙන්න පුළුවන්, අනික forward-only philosophy එකටත් මේක පටහැනියි. මේක develop කරනකොට local environments වලට විතරක් පාවිච්චි කරන්න.
3. Database Recreate (Development/Test Environments වලට)
Development හෝ test environments වලදී නම්, ඉක්මනින් වැඩේ කරගන්න පුළුවන් ක්රමය තමයි database එක drop කරලා ආපහු මුල ඉඳන් build කරන එක. CI/CD pipelines වලදී automated tests run කරන්න කලින් database එක clean කරලා අලුතින් build කරන එක සාමාන්ය දෙයක්. මේක තමයි වඩාත්ම reliable ක්රමය, මොකද හැම වෙලාවෙම database එක clean state එකක ඉඳන් build වෙන නිසා consistency එක guaranteed.
ප්රායෝගික අභ්යාසය: Database Rollback එකක් Simulate කරමු
අපි කරමු පොඩි practical එකක්. අපි Spring Boot project එකක් පාවිච්චි කරලා, වැරදි migration එකක් run කරලා, ඒක කොහොමද "fixing forward migration" එකකින් හදන්නේ කියලා බලමු.
පියවර 1: Spring Boot Project එකක් හදමු
Spring Initializr (start.spring.io) එකට ගිහින් මෙන්න මේ dependencies ටිකත් එක්ක අලුත් Spring Boot project එකක් හදන්න:
- Spring Web
- Spring Data JPA
- H2 Database (අපි local එකේ පහසුවට H2 පාවිච්චි කරමු)
- Flyway Migration
පියවර 2: application.properties සකසමු
src/main/resources/application.properties එකට මේ ටික එකතු කරන්න:
spring.datasource.url=jdbc:h2:mem:testdb;DB_CLOSE_DELAY=-1
spring.datasource.driver-class-name=org.h2.Driver
spring.datasource.username=sa
spring.datasource.password=

spring.jpa.hibernate.ddl-auto=validate
spring.jpa.show-sql=true

# Flyway configuration
spring.flyway.enabled=true
spring.flyway.baseline-on-migrate=true # This is useful for existing databases
spring.flyway.locations=classpath:db/migration
spring.flyway.baseline-on-migrate=true කියන එක වැදගත්. මොකද database එකක් හිස් නැත්නම්, Flyway baseline එකක් හදලා migrations පටන් ගන්නවා.
පියවර 3: පළමු Migration එක (V1)
src/main/resources/db/migration folder එක හදලා ඒක ඇතුලේ V1__create_user_table.sql කියලා file එකක් හදන්න. මේක අපේ මුල්ම schema එක:
-- V1__create_user_table.sql
CREATE TABLE users (
    id INT AUTO_INCREMENT PRIMARY KEY,
    name VARCHAR(255) NOT NULL,
    age INT
);

INSERT INTO users (name, age) VALUES ('Kasun Perera', 30);
INSERT INTO users (name, age) VALUES ('Nimal Sirisena', 25);
දැන් ඔයාගේ Spring Boot application එක run කරන්න. Console එකේ බලන්න Flyway migration එක successful වුණා කියලා පෙන්නයි.
පියවර 4: "නරක" Migration එක (V2)
දැන් අපි හිතමු, ඔයාගේ team එකේ කෙනෙක් (හරි ඔයත් වෙන්න පුළුවන් 😬) වැරදීමකින් users table එකේ age column එක drop කරලා කියලා, ඒක වෙනත් migration එකකින් වෙනම table එකකට දාන්න හිතන්. ඒත් ඒක කරද්දී වැරදීමක් වුණා කියලා හිතමු.
src/main/resources/db/migration ඇතුලේ V2__drop_age_column.sql කියලා file එකක් හදන්න:
-- V2__drop_age_column.sql
ALTER TABLE users DROP COLUMN age;
දැන් application එක ආපහු run කරන්න. Flyway එක V2 migration එක run කරයි. දැන් ඔයාගේ users table එකේ age column එක නෑ!
පියවර 5: "Rollback" Migration එක (V3 - fixing forward)
අපෝ! දැන් database එකේ age column එක නෑ. ඒක system එකේ අනිත් තැන් වලට බලපාන්න පුළුවන්. දැන් අපි මේ වැරැද්ද හදාගන්න අලුත් migration එකක් ලියමු.
src/main/resources/db/migration ඇතුලේ V3__readd_age_column_and_restore_data.sql කියලා file එකක් හදන්න:
-- V3__readd_age_column_and_restore_data.sql
ALTER TABLE users ADD COLUMN age INT;

-- This part is crucial for "rollback". You need to restore data if possible.
-- In a real-world scenario, you might have to restore from a backup or use default values.
-- For this simulation, let's just add some default or guessed values.
UPDATE users SET age = 0 WHERE name = 'Kasun Perera';
UPDATE users SET age = 0 WHERE name = 'Nimal Sirisena';
-- If you had a backup of the 'users' table before V2 was applied,
-- you could use it to restore the 'age' values more accurately.
-- For example: INSERT INTO users (id, name, age) SELECT id, name, age FROM users_backup;
V3 එක ඇතුලේ අපි age column එක ආපහු දැම්මා. හැබැයි lost වුණ data restore කරන එක ලේසි නෑ. ඒක තමයි වැදගත්ම අභියෝගය. production environment එකකදී database backup එකක් අරන් තිබ්බා නම්, ඒ backup එකෙන් restore කරලා, ඊට පස්සේ V3 migration එක run කරන්න පුළුවන්. නැත්නම් V3 script එක ඇතුලෙම missing data ටික insert කරන්න වෙනවා. මේ example එකේදි අපි age එකට default value එකක් දැම්මා.
දැන් Spring Boot application එක ආපහු run කරන්න. Flyway V3 migration එක successful වුණා කියලා පෙන්නයි. දැන් ඔයාගේ users table එකේ age column එක ආපහු තියෙනවා.
මේ simulation එකෙන් අපිට තේරෙනවා, Flyway වල "rollback" කියන්නේ අලුත් migration එකකින් පරණ වැරැද්දක් හදන එක මිසක්, පරණ script එකක් revert කරන එක නෙවෙයි කියලා. මේක තමයි Flyway වල philosophy එක. මේ ක්රමයෙන් production environments වලට දාන changes වල විශ්වාසනීයත්වය වැඩි වෙනවා. database එකේ history එකත් හැම වෙලාවෙම clear එකට තියෙනවා.
Flyway Baselines & Repair: පැරණි Database වලටයි, අවුල් වුණොත් හදන්නයි
Flyway වල තියෙන තව වැදගත් features දෙකක් තමයි Baseline සහ Repair. මේවා හුඟක්ම වැදගත් වෙන්නේ දැනටමත් පාවිච්චි කරන database එකකට Flyway එකතු කරද්දී (baseline) සහ Flyway එකේ schema history table එක අවුල් වුණොත් (repair).
Flyway Baseline
අපි Flyway අලුතින් පාවිච්චි කරන්න පටන් ගන්නකොට production database එකක් දැනටමත් තියෙනවනම් එතකොට කොහොමද කරන්නේ? ඒ database එකේ දැනටමත් tables, data ගොඩක් තියෙන්න පුළුවන්. මේ වගේ වෙලාවට අපිට බැහැ V1__create_table.sql වගේ එකක් run කරන්න, මොකද tables දැනටමත් තියෙන නිසා errors එනවා.
මෙතනදි තමයි Flyway baseline කියන concept එක වැදගත් වෙන්නේ. baseline command එකෙන් කරන්නේ, Flyway එකට කියනවා "මේ database එකේ මේ version එක දක්වා changes ඔක්කොම දැනටමත් apply කරලා තියෙන්නේ, ඒ නිසා මේකෙන් එහාට තියෙන migrations ටික විතරක් run කරන්න" කියලා. මේකෙන් Flyway flyway_schema_history table එකට baseline entry එකක් දානවා.
කොහොමද baseline කරන්නේ?
ඔයාට පුළුවන් baseline command එක පාවිච්චි කරන්න. Spring Boot වල නම්, application.properties එකේ spring.flyway.baseline-on-migrate=true කියලා දැම්මම ඇති. මේකෙන් වෙන්නේ, database එක හිස් නම් සාමාන්ය විදිහට migrations run කරනවා, database එක හිස් නැත්නම්, Flyway baseline එකක් හදලා migration process එක පටන් ගන්නවා.
උදාහරණයක් විදිහට, ඔයාගේ දැනට තියෙන production database එකේ V10 version එක දක්වා changes තියෙනවා නම්, ඔයාට පුළුවන් baselineVersion එක V10 විදිහට configure කරලා, baseline run කරන්න. ඊට පස්සේ Flyway V11, V12 වගේ අලුත් migrations ටික විතරක් run කරයි.
Flyway Repair
සමහර වෙලාවට Flyway flyway_schema_history table එකේ inconsistencies ඇති වෙන්න පුළුවන්. උදාහරණයක් විදිහට, migration script එකක් successful වුණා කියලා flyway_schema_history එකේ record වුණාට, ඇත්තටම database එකේ ඒ change එක apply වෙලා නැත්නම්. මේ වගේ වෙලාවට Flyway repair command එක උපකාරී වෙනවා. repair command එකෙන් කරන්නේ flyway_schema_history table එක scan කරලා, database එකේ තියෙන actual state එකත් එක්ක ඒක match කරන එක. සමහර වෙලාවට corrupted entries delete කරනවා, checksums update කරනවා වගේ දේවල් මේකෙන් කරනවා.
repair command එක අන්තිම විකල්පය විදිහට විතරක් පාවිච්චි කරන්න. මොකද මේකෙන් database එකේ consistency එකට බලපෑම් කරන්න පුළුවන්. සාමාන්යයෙන් errors ආවොත්, ඒක fix කරන්න forward migration එකක් ලියන එක තමයි හොඳම ක්රමය.
අවසාන වචන: Flyway වලින් Database Management එක Smart කරමු!
ඉතින් යාලුවනේ, ඔයාලට දැන් තේරෙනවා ඇති Flyway කියන්නේ නිකම්ම නිකම් database tool එකක් නෙවෙයි, ටිකක් බුද්ධිමත්ව පාවිච්චි කළොත් ලොකු headaches ගොඩක් අඩු කරගන්න පුළුවන් tool එකක් කියලා. විශේෂයෙන්ම complex database migrations, rollback scenarios සහ production environments වලදී මේකේ advanced features කොච්චර වැදගත්ද කියලා අපි කතා කළා.
අපි අද සාකච්ඡා කරපු දේවල්:
- Flyway වල basics ටිකක් මතක් කරගත්තා.
- Complex migrations වලදී data transformations සහ transactional behavior එක කොහොමද handle කරන්නේ කියලා බැලුවා.
- Flyway වල rollback නැති වුණාට, fixing forward migrations වලින් ඒක කොහොමද simulate කරන්නේ කියලා practical example එකක් එක්කම ඉගෙන ගත්තා.
- Baseline සහ Repair වගේ advanced commands කොයි වෙලාවටද පාවිච්චි කරන්නේ කියලා දැනගත්තා.
මේ concepts ඔයාලගේ project වලටත් apply කරලා බලන්න. විශේෂයෙන්ම, production ready applications වලදී Flyway වගේ tools අත්යාවශ්යයි. මොකද database schema changes කියන්නේ නිතරම වෙන දෙයක්, ඒ වගේම ඒක වැරදුනොත් project එකට ලොකු බලපෑමක් වෙන්න පුළුවන්. මේකෙන් ඔයාලට පුළුවන් විශ්වාසනීය විදිහට database migrations කරන්න, ඒ වගේම team එකත් එක්ක smoothly වැඩ කරන්න.
මොනවා හරි ප්රශ්න තියෙනවා නම්, comment section එකේ අහන්න! මේ article එකේ මොනවා හරි වැරදීම් තියෙනවා නම්, තව මොනවා ගැනද දැනගන්න කැමති කියලත් කියන්න. ඔයාලගේ අදහස් දැනගන්න මම ගොඩක් කැමතියි. එහෙනම්, තවත් අලුත් ලිපියකින් හමුවෙමු, වැඩේ ගොඩ!


