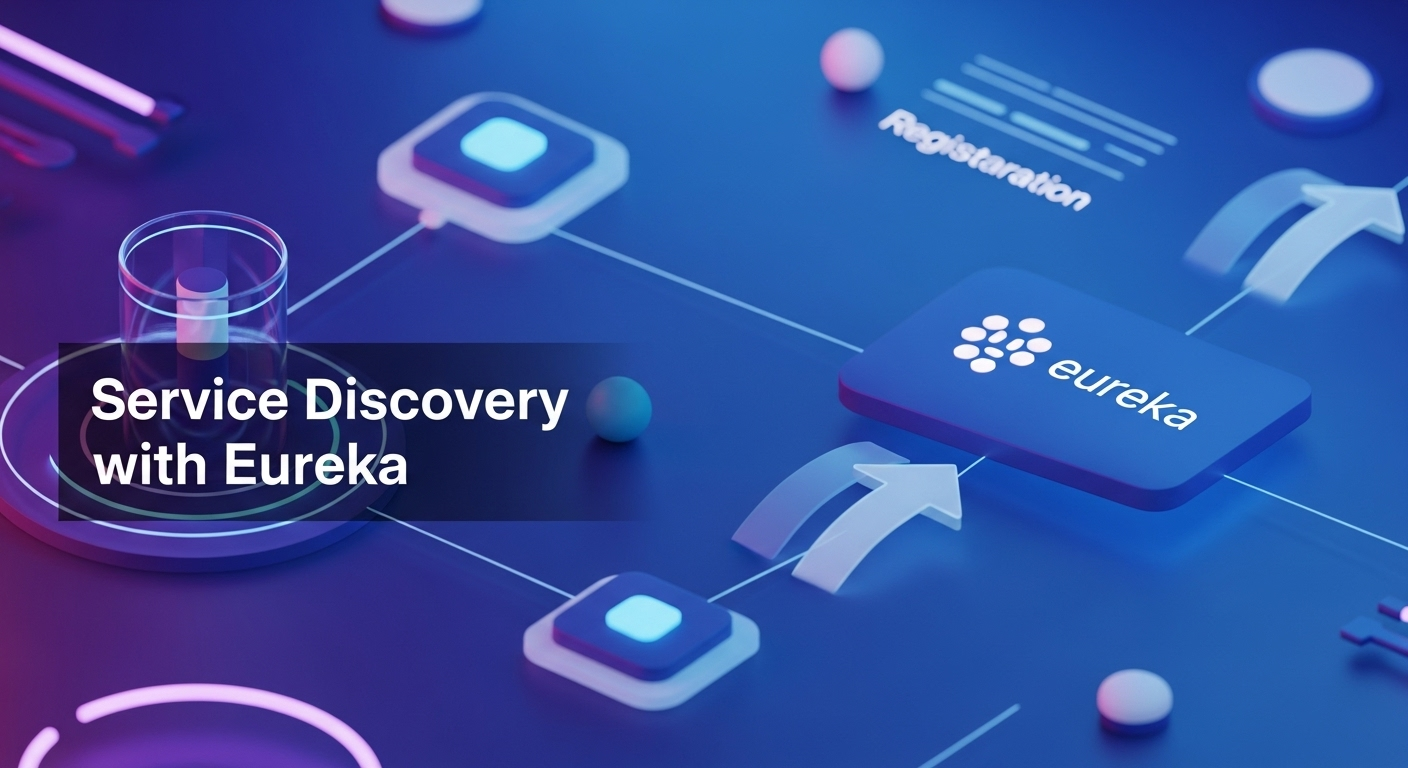
Eureka: Microservices වලට Service Discovery | SC Guide
මචංලා, මේ දවස්වල Microservices ගැන කතා කරනකොට ඔලුව අවුල් වෙලාද? විශේෂයෙන්ම, එක සර්විස් එකක් තව සර්විස් එකක් හොයාගන්නේ කොහොමද කියන ප්රශ්නයට උත්තර හොයනකොට? පොඩි පොඩි සර්විස් ගොඩක් හදාගෙන යනකොට මේක ලොකුම ගැටලුවක් වෙනවා. අද අපි කතා කරන්නේ මේ ප්රශ්නෙට කදිම විසඳුමක් දෙන, Microservices ලෝකේ නැතුවම බැරි ප්ලේයර් කෙනෙක් ගැන – ඒ තමයි Service Discovery කියන Concept එකයි, ඒක Implement කරන්න අපි පාවිච්චි කරන Eureka කියන Tool එකයි!
අපි හිතමු ඔයා ලොකු ඔන්ලයින් ස්ටෝර් එකක් හදනවා කියලා. ඒකේ Products, Orders, Users, Payments වගේ දේවල් වලට වෙන වෙනම Microservices තියෙනවා. දැන් Order Service එකට ඕන වෙනවා Product Service එකෙන් Product Details ගන්න, ඒ වගේම Payment Service එකට කියන්න ඕන වෙනවා Payment එකක් කරන්න කියලා. මේ සර්විස් හැම වෙලාවෙම එකම IP Address එකක, එකම Port එකක නැතුව වෙනස් වෙන්න පුළුවන්. Autoscale වෙනකොට අලුත් instances එනවා, පරණ ඒවා යනවා. එතකොට කොහොමද Order Service එක Product Service එක හොයාගන්නේ? මේක නිකන්, ෆෝන් නම්බර් එකක් නැතුව යාළුවෙක්ව හොයනවා වගේ වැඩක් නේද?
මෙන්න මේ ප්රශ්නෙට තමයි Service Discovery කියන දේ එන්නේ. අද අපි බලමු Service Discovery කියන්නේ මොකක්ද කියලා, ඊටත් වඩා වැදගත් දේ, Netflix Eureka පාවිච්චි කරලා අපේ Microservices කොහොමද මේකට Register කරලා, හොයාගන්නේ කියලා. ලංකාවේ Developers ලාට තේරෙන, සරල විදියට මේක පැහැදිලි කරන්න මම උපරිමයෙන් උත්සාහ කරනවා. Ready ද? එහෙනම් පටන් ගමු!
Service Discovery කියන්නේ මොකක්ද මේ?
සරලවම කිව්වොත්, Service Discovery කියන්නේ Microservices Architecture එකක තියෙන වෙන වෙනම Service Instances එකිනෙකා හොයාගන්න භාවිතා කරන ක්රමවේදයට. අපි දන්නවා Microservices කියන්නේ පොඩි පොඩි සර්විස් ගොඩක් එකතු වෙලා වැඩ කරන සිස්ටම් එකක් කියලා. මේ සර්විස්, Dynamic Environments වල, Cloud Platforms වල run වෙනකොට ඒවගේ IP Addresses, Ports නිතරම වෙනස් වෙන්න පුළුවන්.
හිතන්න, ඔයාගේ System එකේ User Service එකට requests වැඩි වුණාම, ඒකේ තව instances දෙක තුනක් auto-scale වෙනවා. දැන් Order Service එකට මේ අලුතින් ආපු User Service instances ගැන දන්නේ කොහොමද? එහෙම නැතුව, ඔයාගේ Product Service එක update කරද්දි, ඒකේ Product Service instance එකක් crash වුණා කියලා හිතමු. එතකොට Order Service එක දිගටම crash වුණ instance එකට requests යැව්වොත් වැඩේ අවුල් වෙනවා නේද?
Traditional monolithic applications වල මේ ප්රශ්නේ එච්චර ලොකු නැහැ. හැමදේම එකට තියෙන නිසා, එක මොඩියුල් එකක් තව එකක් එක්ක කෙලින්ම කතා කරනවා. ඒත් Microservices වලදී, මේ හැම service එකක්ම වෙන වෙනම deployed, වෙන වෙනම scaled වෙනවා. ඉතින් එක service එකකට තව service එකක් එක්ක කතා කරන්න නම්, ඒකේ current location (IP address and port) දැනගන්න ඕන.
මෙන්න මේකට තමයි Service Discovery කියන Pattern එක එන්නේ. මේකේ ප්රධාන components දෙකක් තියෙනවා:
- Service Registry: මේක තමයි ෆෝන් පොත වගේ. හැම service instance එකක්ම තමන් online ආවම මෙතන register වෙනවා. තමන්ගේ නම, IP Address, Port එක වගේ විස්තර මේ registry එකට දෙනවා. Service instance එකක් shutdown වුණාම, ඒක මේ registry එකෙන් remove වෙනවා.
- Service Discovery Mechanism: Service එකකට තව service එකක් අවශ්ය වුණාම, ඒක කෙලින්ම ඒ service එකේ IP address එක හොය හොයා ඉන්නේ නැතුව, මේ Service Registry එකෙන් අහනවා "Product Service එකේ current location මොකක්ද?" කියලා. Registry එකෙන් ඒකට තියෙන active instances වල addresses දෙනවා.
මේ Service Discovery Implement කරන්න ප්රධාන ක්රම දෙකක් තියෙනවා:
- Client-Side Service Discovery: මෙතනදී Client service එකම (අපේ උදාහරණයේ
Order Serviceඑක) Service Registry එකෙන් අහනවා "Product Service එක කොහෙද තියෙන්නේ?" කියලා. ඊට පස්සේ Registry එකෙන් දෙන addresses වලින් එකක් තෝරගෙන requests යවනවා.Netflix Eurekaවැඩ කරන්නේ මේ විදියට. - Server-Side Service Discovery: මෙතනදී Client service එක කෙලින්ම Registry එක එක්ක කතා කරන්නේ නැහැ. Requests යවන්නේ Load Balancer එකක් වගේ එකකට, ඒක තමයි Registry එකෙන් locations අරගෙන requests redirect කරන්නේ.
AWS ELB(Elastic Load Balancer) වගේ ඒවා මේ විදියට වැඩ කරනවා.
Eureka එතකොට කොහොමද උදව් කරන්නේ?
දැන් අපි Netflix Eureka ගැන කතා කරමු. මේක තමයි Client-Side Service Discovery ක්රමයට හොඳම උදාහරණයක්. Netflix එකේ Microservices manage කරන්න එයාලාම හදපු platform එකේ core components වලින් එකක් තමයි මේ Eureka. Spring Cloud එක්ක මේක Integrate කරන්න පුළුවන් නිසා, අපිටත් අපේ Spring Boot Microservices වලට මේක පහසුවෙන් එකතු කරගන්න පුළුවන්.
Eureka ප්රධාන වශයෙන් කොටස් දෙකකට බෙදෙනවා:
- Eureka Server (Discovery Server): මේක තමයි අපේ Service Registry එක. හැම Microservice එකක්ම තමන් online ආවම මේ Server එකේ Register වෙනවා. ඒ වගේම, හැම තත්පර 30කට වගේ සැරයක්, Register වුණ service instances තමන් තාමත් වැඩ කරනවා කියලා Server එකට 'Heartbeat' එකක් යවනවා. Heartbeat එකක් නැවතුණොත්, Server එක ඒ instance එක registry එකෙන් අයින් කරනවා.
- Eureka Client (Microservice Application): මේවා තමයි අපේ actual Microservices. මේවා
Eureka Serverඑකට Register වෙනවා. ඒ වගේම, තව service එකක් ඕන වුණාම, මේ Client එකමEureka Serverඑකෙන් ඒ service එකේ location එක ඉල්ලනවා. Client එකට මේ locations set එක ලැබුණාම, ඒක Load Balancing Algorithm එකක් (e.g., Round Robin) පාවිච්චි කරලා requests යවනවා.
Eureka Server එකේ තියෙන විශේෂ දෙයක් තමයි Self-Preservation Mode එක. හිතන්න, Network එකේ පොඩි අවුලක් නිසා Eureka Server එකට කිසිම Client එකකින් Heartbeat එකක් එන්නේ නැහැ කියලා. සාමාන්යයෙන් නම්, Server එක හිතනවා හැම Client එකක්ම offline ගියා කියලා, ඒ හැම Client එකක්ම Registry එකෙන් අයින් කරනවා. හැබැයි Self-Preservation Mode එක activated වුණාම, Server එක Client instances remove කරන්නේ නැහැ, මොකද ඒක හිතනවා මේ Network issue එකක් නිසා Heartbeats එන්නේ නැත්තේ කියලා. මේකෙන් Distributed System එකක Resilience එක වැඩි වෙනවා.
දැන් අපි බලමු කොහොමද Eureka Server එකක් හදලා, අපේ Microservice එකක් ඒකේ Register කරන්නේ කියලා. Step-by-Step යමුද?
අපිම කරලා බලමු: Eureka Server එකක් හදමු
හරි, දැන් වැඩේට බහිමු! මුලින්ම අපි Eureka Discovery Server එක හදමු. මේක වෙනම Spring Boot Application එකක් විදියට තමයි හදන්නේ.
Step 1: Spring Initializr එකට යමු
පහසුම විදිය තමයි Spring Initializr එකට ගිහින් අලුත් Spring Boot project එකක් generate කරගන්න එක.
- Project: Maven Project
- Language: Java
- Spring Boot: ඔයාගේ කැමැත්තක් (recommended latest stable version)
- Group:
com.example.eurekaserver - Artifact:
eureka-server - Dependencies: මෙතනදී අපි එකම Dependency එකක් විතරයි add කරන්නේ:
Spring Cloud Eureka Server
Dependencies add කරලා 'Generate' button එක ඔබලා project එක Download කරගන්න. ඊට පස්සේ ඒක ඔයාගේ IDE එකට (IntelliJ IDEA, VS Code වගේ එකකට) import කරගන්න.
Step 2: Main Application Class එක Update කරමු
ඔයාට EurekaServerApplication.java වගේ නමකින් Main class එකක් ලැබිලා ඇති. ඒක මේ විදියට update කරන්න:
package com.example.eurekaserver;

import org.springframework.boot.SpringApplication;
import org.springframework.boot.autoconfigure.SpringBootApplication;
import org.springframework.cloud.netflix.eureka.server.EnableEurekaServer;

@SpringBootApplication
@EnableEurekaServer // <-- මේ Annotation එක අනිවාර්යයි!
public class EurekaServerApplication {

    public static void main(String[] args) {
        SpringApplication.run(EurekaServerApplication.class, args);
    }

}
මෙහිදී වැදගත්ම දේ තමයි @EnableEurekaServer Annotation එක. මේකෙන් තමයි Spring Boot Application එකට කියන්නේ, "ආහ්, ඔයා දැන් Eureka Discovery Server එකක්!" කියලා.
Step 3: application.properties configure කරමු
src/main/resources ෆෝල්ඩර් එකේ තියෙන application.properties (නැත්නම් application.yml) ෆයිල් එක open කරලා මේ වගේ Configurations ටිකක් දාගන්න:
server.port=8761

eureka.client.register-with-eureka=false
eureka.client.fetch-registry=false

# Eureka Server Dashboard එකට නමක් දෙමු
spring.application.name=eureka-server
මේ Properties ටිකෙන් කරන්නේ මොනවද කියලා පොඩ්ඩක් බලමු:
server.port=8761:Eureka Serverඑක සාමාන්යයෙන් run වෙන්නේ default port එකක් විදියට 8761 වල.eureka.client.register-with-eureka=false: මේක වැදගත්.Eureka Serverඑකම තවEureka Serverඑකක Register වෙන්න ඕන නැහැ නේද? ඒ නිසා අපි මේකfalseකරනවා.eureka.client.fetch-registry=false:Eureka Serverඑකට තව Server එකක Registry එක fetch කරන්න ඕන නැහැ. මේකත්falseකරනවා.spring.application.name=eureka-server: මේක නිකන් Server එකට නමක් දෙනවා වගේ.
Step 4: Run කරලා බලමු!
දැන් ඔයාට පුළුවන් මේ Project එක Run කරන්න. EurekaServerApplication එකේ main method එක Run කරන්න. Console එකේ errors නැතුව Run වුණාට පස්සේ, ඔයාගේ Web Browser එකේ http://localhost:8761/ කියලා ගහලා බලන්න.
එතනට ගියාම ඔයාට Eureka Server එකේ Dashboard එක පෙනේවි. ඒකේ Instances currently registered with Eureka කියන තැනට ගියාම කිසිම service එකක් Register වෙලා නැහැ කියලා පෙන්නයි. ඒක සාමාන්යයි, මොකද අපි තාම Client service එකක් හැදුවේ නැහැනේ.
ඒකෙන් පෙන්නන්නේ ඔයාගේ Eureka Server එක successfully run වෙනවා කියන එක! වැඩේ නියමයි නේද?
අපේ Microservice එක Eureka එකට Register කරමු
හරි, දැන් Eureka Server එක Ready. ඊළඟට අපි බලමු අපේ Product Service (හෝ වෙනත් ඕනෑම Microservice එකක්) කොහොමද මේ Eureka Server එකට Register කරන්නේ කියලා.
Step 1: අලුත් Spring Boot Microservice එකක් හදමු
ආයෙත් Spring Initializr එකට යමු.
- Project: Maven Project
- Language: Java
- Spring Boot: Same as before
- Group:
com.example.microservice - Artifact:
product-service(ඔයාට කැමති නමක් දෙන්න පුළුවන්) - Dependencies: මෙතනදී අපි Dependencies දෙකක් add කරනවා:
Spring Web(REST APIs හදන්න)Spring Cloud Eureka Client(Eureka Server එකට Register වෙන්න)
Project එක Download කරලා IDE එකට import කරගන්න.
Step 2: Main Application Class එක Update කරමු
ProductServiceApplication.java වගේ නමකින් Main class එකක් ඔයාට ලැබිලා ඇති. ඒක මේ විදියට update කරන්න:
package com.example.microservice;

import org.springframework.boot.SpringApplication;
import org.springframework.boot.autoconfigure.SpringBootApplication;
import org.springframework.cloud.client.discovery.EnableDiscoveryClient; // <-- මේ Annotation එක!

@SpringBootApplication
@EnableDiscoveryClient // <-- මේකෙන් තමයි Client එක Eureka එකට Register වෙන්නේ
public class ProductServiceApplication {

    public static void main(String[] args) {
        SpringApplication.run(ProductServiceApplication.class, args);
    }

}
@EnableDiscoveryClient Annotation එක තමයි මෙතන ප්රධාන. මේකෙන් Spring Boot Application එකට කියනවා, "ඔයා Discovery Client කෙනෙක්, ඒ නිසා Eureka Server එකක් හොයාගෙන ඒකේ Register වෙන්න!" කියලා. (අලුත්ම Spring Cloud versions වලදී, Spring Cloud Eureka Client dependency එක Project එකට add කරාම EnableDiscoveryClient Annotation එක නැතුවම Client එක auto-configure වෙනවා. හැබැයි clarity එකට මේක දාගෙන ඉන්න එක හොඳයි.)
Step 3: application.properties configure කරමු
src/main/resources ෆෝල්ඩර් එකේ තියෙන application.properties (නැත්නම් application.yml) ෆයිල් එක open කරලා මේ වගේ Configurations ටිකක් දාගන්න:
server.port=8081 # මේ service එක run වෙන port එක

spring.application.name=product-service # Eureka Server එකේ Register වෙන නම

eureka.client.serviceUrl.defaultZone=http://localhost:8761/eureka # Eureka Server එකේ URL එක
මේ Properties ටිකෙන් කරන්නේ මොනවද කියලා බලමු:
server.port=8081: මේක තමයි අපේ Microservice එක run වෙන port එක.Eureka Serverඑක 8761 වල run වෙන නිසා, මේක වෙනස් port එකක තියන්න ඕන.spring.application.name=product-service: මේක තමයිEureka Serverඑකේ අපේ service එක Register වෙන නම. Client applications මේ නම පාවිච්චි කරලා තමයි මේ service එක හොයාගන්නේ. නම පැහැදිලිව දෙන්න.eureka.client.serviceUrl.defaultZone=http://localhost:8761/eureka: මේකෙන් කියන්නේEureka Serverඑක කොහෙද තියෙන්නේ කියලා. අපි කලින් හදපුEureka Serverඑකේ URL එක මෙතන දෙනවා.
Step 4: Test REST Controller එකක් හදමු (Optional but Recommended)
අපේ Product Service එක වැඩ කරනවාද කියලා බලන්න පොඩි REST Controller එකක් හදමු. src/main/java/com/example/microservice ෆෝල්ඩර් එකේ ProductController.java කියල File එකක් හදලා මේ code එක දාගන්න:
package com.example.microservice;

import org.springframework.web.bind.annotation.GetMapping;
import org.springframework.web.bind.annotation.RequestMapping;
import org.springframework.web.bind.annotation.RestController;

@RestController
@RequestMapping("/products")
public class ProductController {

    @GetMapping("/hello")
    public String helloProducts() {
        return "Hello from Product Service!";
    }

    @GetMapping("/{id}")
    public String getProductById(String id) {
        return "Product ID: " + id; // Simple placeholder
    }
}
Step 5: Run කරලා බලමු!
දැන් Project එක Run කරන්න. ProductServiceApplication එකේ main method එක Run කරන්න. Console එකේ errors නැතුව Run වුණාට පස්සේ, ඔයාගේ Web Browser එකේ ආයෙත් http://localhost:8761/ කියන Eureka Server Dashboard එකට යන්න.
දැන් ඔයාට Instances currently registered with Eureka කියන තැනට ගියාම PRODUCT-SERVICE කියන නමින් ඔයාගේ service එක Register වෙලා තියෙනවා පෙනේවි. ඒකේ Status එක UP කියලා තියෙන්න ඕන.
ඒ වගේම ඔයාට පුළුවන් Browser එකේ http://localhost:8081/products/hello කියලා ගහලා Product Service එක වැඩ කරනවාද කියලා බලන්න.
දැන් ඔයාගේ Microservice එක successfully Eureka Server එකේ Register වෙලා, Discovery Network එකේ කොටසක් වෙලා ඉවරයි! දැන් වෙන Microservices වලට පුළුවන් මේ PRODUCT-SERVICE එක Eureka Server එකෙන් හොයාගෙන requests යවන්න.
නියමයි නේද? මේක තමයි Service Discovery වල Power එක.
වාසි සහ අභියෝග
කොයිදේත් වගේ Eureka පාවිච්චි කරනකොටත් වාසි වගේම පොඩි පොඩි අභියෝග ටිකකුත් තියෙනවා. ඒවා ගැනත් පොඩ්ඩක් කතා කරලා ඉමු.
වාසි (Advantages):
- Dynamic Service Location: Services වල IP addresses, Ports වෙනස් වුණත් ප්රශ්නයක් නැහැ.
Eurekaඑක ඒවා auto-update කරනවා. - Scalability: Service instances වැඩි කරද්දී (Scale Up) හෝ අඩු කරද්දී (Scale Down)
Eurekaඑකේ Registry එක auto-update වෙනවා. ඒ නිසා අපිට manual adjustments කරන්න ඕන නැහැ. - Resilience:
Heartbeatmechanism එකයි,Self-Preservation Modeඑකයි නිසා Network failures වුණත් System එක stable තියාගන්න පුළුවන්. - Simpler Client Configuration: Client Services වලට
Eureka Serverඑකේ URL එක විතරක් දැනගෙන හිටියම ඇති. අනිත් services වල URLs Hardcode කරන්න ඕන නැහැ. - Decoupling: Services අතර තියෙන Tight Coupling එක අඩු කරනවා. Services එකිනෙකා ගැන දැනගෙන ඉන්න ඕන නැහැ,
Eurekaඑකෙන් අහලා විස්තර ගන්න පුළුවන්.
අභියෝග (Challenges):
- Single Point of Failure (If not Clustered): ඔයා එක
Eureka Serverඑකක් විතරක් පාවිච්චි කරනවා නම්, ඒ Server එක වැටුණොත් ඔයාගේ මුළු Service Discovery Mechanism එකම වැටෙනවා. මේකට විසඳුම තමයිEureka Serversකිහිපයක් Cluster එකක් විදියට පාවිච්චි කරන එක. - Network Latency: Service Discovery request එකක්
Eureka Serverඑකට ගිහින් එන්න පොඩි Latency එකක් ඇතිවෙන්න පුළුවන්. හැබැයි මේක ගොඩක් වෙලාවට negligible. - Client-Side Load Balancing:
Eurekaකියන්නේ Registry එකක් විතරයි. Load Balancing එක කරන්න ඕන Client application එකේ.Spring Cloud LoadBalancerවගේ Libraries පාවිච්චි කරලා මේක Implement කරන්න වෙනවා. (ඒකත් තව දවසක කතා කරමු!) - Complexity: පොඩි Project එකකට
Eurekaවගේ එකක් add කරන එක පොඩි Overkill එකක් වෙන්න පුළුවන්. හැබැයි Microservices ගොඩක් තියෙන Large-scale Systems වලට නම් නැතුවම බැරි දෙයක්.
මේ අභියෝග තියෙනවා වුණත්, Microservices Architecture එකක Eureka වගේ Service Discovery Solution එකක් නැතුව System එක Maintain කරන එක නම් හෙන අමාරු වැඩක්.
නිගමනය
ඉතින්, මේක තමයි Service Discovery කියන Concept එකයි, Netflix Eureka එකත් එක්ක ඒක Implement කරන විදියයි ගැන විස්තරේ. අද අපි Eureka Server එකක් හදාගත්තා, අපේ Microservice එකක් ඒකේ Register කළා. ඒ වගේම, Eureka පාවිච්චි කිරීමේ වාසි සහ අභියෝග ගැනත් පොඩි අවබෝධයක් ගත්තා.
දැන් ඔයාලට පුළුවන් මේක ඔයාලගේ Project වලට Implement කරන්න පටන් ගන්න. මතක තියාගන්න, Microservices වලදී Services අතර තියෙන Dependability එක අඩු කරලා, System එක Robust කරන්න Service Discovery අත්යාවශ්යයි. Eureka කියන්නේ ඒකට කදිම විසඳුමක්.
ඔයාලත් මේක Try කරලා බලන්න. මොනවා හරි ප්රශ්න තියෙනවා නම්, මේකේ අඩුපාඩු මොනවා හරි තියෙනවා නම්, නැත්නම් ඔයාලගේ අත්දැකීම් බෙදාගන්න ඕන නම්, Comment Section එකේ අනිවාර්යයෙන්ම දාන්න. අපි ඒ ගැන කතා කරමු.
තව මෙවැනි Technical Articles එක්ක ආයෙත් හම්බවෙමු! Happy Coding, මචංලා!


