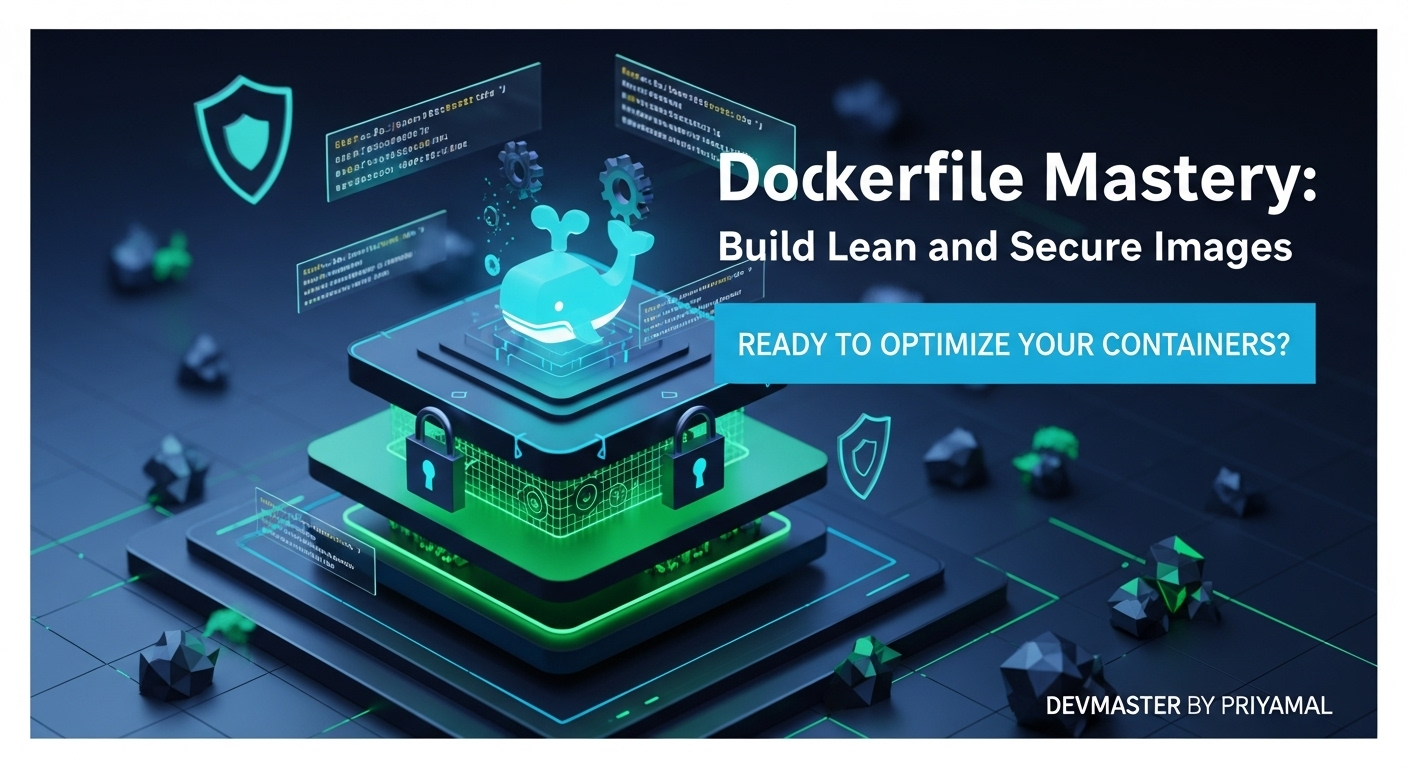
Dockerfile Mastery | Lean & Secure Docker Images | Sinhala Guide

Dockerfile Mastery | Lean & Secure Docker Images | Sinhala Guide

නමෝ බුද්ධාය! අද අපි කතා කරන්න යන්නේ නූතන Software Engineering ලෝකයේ නැතුවම බැරි තාක්ෂණයක් ගැන – ඒ තමයි Docker. විශේෂයෙන්ම, අපි Dockerfiles වලට ගැඹුරින් කිඳා බහිනවා. “Dockerfile Mastery” කියන්නේ නිකම්ම නිකම් පොඩි නමක් නෙවෙයි, මේකෙන් අපි බලාපොරොත්තු වෙන්නේ ඔයාලට Docker images හදන්න, ඒවා optimize කරන්න, ආරක්ෂිතව පවත්වාගෙන යන්න අවශ්‍ය සියලුම දැනුම ලබා දෙන එකයි.

ඔයාලා Developer කෙනෙක්ද? DevOps Engineer කෙනෙක්ද? නැත්නම් තාක්ෂණයට ආස කෙනෙක්ද? කවුරු වුණත්, Dockerfiles හරියට ලියන්න පුළුවන් නම්, ඒක ඔයාලගේ වෘත්තීය ගමනට ලොකු වාසියක් වෙනවා. අපි code deploy කරන විදිය, application distribute කරන විදිය, scalability maintain කරන විදිය මේ හැමදේම Docker නිසා ගොඩක් පහසු වෙලා තියෙනවා. ඉතින්, අපේ මේ Sinhala guide එකෙන් අපි බලමු Dockerfiles කියන්නේ මොනවද, ඒවායේ තියෙන වැදගත් directives මොනවද, multi-stage builds වගේ advanced concepts මොනවද, සහ images ආරක්ෂිතව තියාගන්නේ කොහොමද කියලා.

මේ tutorial එක අවසානයේදී, ඔයාලට පුළුවන් වෙයි තමන්ගේම production-ready Docker images විශ්වාසයෙන් යුතුව හදන්න. එහෙනම්, අපි පටන් ගමුද?

Dockerfile වල මූලිකාංග: ඔබේ පළමු Image එක ගොඩනගමු

Dockerfile එකක් කියන්නේ, අපිට ඕන කරන Docker image එක හදන්න අවශ්‍ය පියවර ටික පිළිවෙලට ලියපු text file එකක්. හරියට ගෙයක් හදන්න plan එකක් වගේ. මේ plan එකට අනුව තමයි Docker engine එක අපේ image එක ගොඩනගන්නේ.

FROM: Base Image එක තෝරා ගැනීම

ඕනෑම Dockerfile එකක් පටන් ගන්නේ FROM instruction එකෙන්. මේකෙන් කියන්නේ අපේ image එක හදන්න පාවිච්චි කරන base image එක මොකක්ද කියලා. Base image එක කියන්නේ, අපිට අවශ්‍ය OS එකක් (Ubuntu, Alpine), programming language runtime එකක් (Node.js, Python), නැත්නම් වෙනත් application එකක් (Nginx) තියෙන පුංචි image එකක්.

FROM node:18-alpine

මේකෙන් කියන්නේ අපේ application එකට Node.js version 18 සහ Alpine Linux මත පදනම් වූ image එකක් base image එක විදියට ගන්න කියලා. Alpine කියන්නේ ගොඩක් පොඩි image එකක්, ඒක image size එක අඩු කරගන්න හොඳයි.

RUN: Commands execute කිරීම

RUN instruction එක පාවිච්චි කරන්නේ Docker image build වෙන වෙලාවේදී commands execute කරන්න. මේවා සාමාන්‍යයෙන් software install කරන්න, dependencies install කරන්න, files හදන්න වගේ දේවල් වලට පාවිච්චි කරනවා.

RUN apk add --no-cache curl  # Alpine Linux වලට curl install කරනවා
RUN npm install                # Node.js project එකක dependencies install කරනවා

RUN commands එකින් එක execute වෙද්දී, Docker අලුත් layer එකක් හදනවා. මේ layers තමයි Docker image එක හදන්නේ. ඒ නිසා, RUN commands optimize කරන එක ගොඩක් වැදගත්.

CMD vs ENTRYPOINT: Default Commands Define කිරීම

මේ දෙකම පාවිච්චි කරන්නේ container එකක් run කරන වෙලාවේ execute වෙන default command එක define කරන්න. හැබැයි මේ දෙක අතර පොඩි වෙනසක් තියෙනවා:

  • CMD: Container එක run කරද්දී default command එකක් දෙනවා. අපි docker run <image> <command> කියලා වෙනත් command එකක් දුන්නොත්, CMD එක override වෙනවා. Dockerfile එකක තියෙන්න පුළුවන් එක CMD instruction එකයි.
  • ENTRYPOINT: Container එක run කරද්දී execute වෙන executable එක define කරනවා. CMD එක ENTRYPOINT එකට arguments විදියට දෙන්න පුළුවන්. ENTRYPOINT එක override කරන්න ටිකක් අමාරුයි (docker run --entrypoint <new-entrypoint> <image>).

ගොඩක් වෙලාවට අපි ENTRYPOINT එක application එකේ main executable එකට පාවිච්චි කරලා, CMD එක default arguments වලට පාවිච්චි කරනවා.

# CMD example
CMD ["npm", "start"]

# ENTRYPOINT with CMD example
ENTRYPOINT ["node"]
CMD ["server.js"]

දෙවෙනි උදාහරණයේදී, docker run <image> කියල දුන්නොත් node server.js execute වෙනවා. docker run <image> test.js කියල දුන්නොත් node test.js execute වෙනවා.

COPY vs ADD: Files Image එකට එකතු කිරීම

මේ දෙකම අපේ host machine එකේ තියෙන files, image එක ඇතුලට copy කරන්න පාවිච්චි කරනවා.

  • COPY: Files සහ directories host machine එකේ ඉඳන් image එකට copy කරනවා. මේක ටිකක් සරලයි සහ විනිවිදභාවයෙන් වැඩ කරනවා.
  • ADD: COPY වගේම වැඩ කරනවා, ඒත් මේකට විශේෂ හැකියාවන් දෙකක් තියෙනවා:ඒ නිසා, security සහ predictability වලට COPY පාවිච්චි කරන එක තමයි ගොඩක් වෙලාවට recommend කරන්නේ. ADD පාවිච්චි කරන්නේ tar files extract කරන්න වගේ විශේෂ අවස්ථා වලදී විතරයි.
    1. Remote URLs වලින් files download කරන්න පුළුවන්.
    2. Tar archives (.tar, .tar.gz, .tgz) automatically extract කරන්න පුළුවන්.
# COPY example
COPY package*.json ./
COPY . .

# ADD example (not recommended for general use)
ADD https://example.com/archive.tar.gz /tmp/
ADD app.tar.gz /app/

ප්‍රායෝගික උදාහරණයක්: සරල Node.js Dockerfile එකක්

අපි දැන් මේ ඉගෙන ගත්ත දේවල් වලින් සරල Node.js application එකක් Dockerize කරමු. හිතන්න අපිට මේ වගේ app.js file එකක් තියෙනවා කියලා:

// app.js
const express = require('express');
const app = express();
const port = 3000;

app.get('/', (req, res) => {
  res.send('Hello from Docker! 👋');
});

app.listen(port, () => {
  console.log(`App listening at http://localhost:${port}`);
});

ඒ වගේම package.json file එකක් තියෙනවා:

// package.json
{
  "name": "docker-node-app",
  "version": "1.0.0",
  "description": "A simple Node.js app for Docker",
  "main": "app.js",
  "scripts": {
    "start": "node app.js"
  },
  "dependencies": {
    "express": "^4.18.2"
  }
}

මේකට Dockerfile එක මෙහෙම ලියන්න පුළුවන්:

# Use an official Node.js runtime as a base image
FROM node:18-alpine

# Set the working directory inside the container
WORKDIR /usr/src/app

# Copy package.json and package-lock.json (if exists) to the working directory
# This step helps with caching layers, as dependencies change less frequently than app code
COPY package*.json ./

# Install application dependencies
RUN npm install

# Copy the rest of the application code
COPY . .

# Expose the port the app runs on
EXPOSE 3000

# Define the command to run the application
CMD ["npm", "start"]

මේ Dockerfile එක build කරන්න, project folder එකේ ඉඳන් මේ command එක දෙන්න:

docker build -t my-node-app .

දැන් container එක run කරන්න:

docker run -p 80:3000 my-node-app

ඔයාලට දැන් web browser එකේ http://localhost/ ටයිප් කරලා "Hello from Docker! 👋" කියලා බලන්න පුළුවන්. නියමයි නේද!

Dockerfile Optimization සහ Best Practices: Lean Images හදමු

Docker images වල size එක අඩු කරගන්න එක සහ build process එක වේගවත් කරගන්න එක ගොඩක් වැදගත්. මේකෙන් deployment වේගවත් වෙනවා වගේම, network bandwidth එකත් අඩු වෙනවා, security attack surface එකත් අඩු වෙනවා.

.dockerignore: අනවශ්‍ය Files Ignore කිරීම

ඔයාලා COPY . . වගේ command එකක් පාවිච්චි කරනවා නම්, project එකේ තියෙන හැම file එකක්ම image එකට copy වෙනවා. මේකෙන් image size එක වැඩි වෙන්න පුළුවන්. .dockerignore file එක හරියට .gitignore වගේ. මේකෙන් අපිට Docker build context එකට යවන්න ඕන නැති files specify කරන්න පුළුවන්.

උදාහරණයක් විදියට, node_modules folder එක, .git folder එක, build artifacts වගේ දේවල් image එකට copy කරන්න ඕන නැහැ. මේවා .dockerignore එකට දාන්න පුළුවන්.

# .dockerignore example
node_modules
npm-debug.log
.git
.gitignore
Dockerfile
.dockerignore
build
dist

මේකෙන් Docker build context එකේ size එක අඩු වෙනවා වගේම, image size එකත් අඩු වෙනවා.

Caching Layers: Build Time එක අඩු කරගමු

අපි කලින් කතා කළා වගේ, Dockerfile එකේ හැම instruction එකක්ම අලුත් layer එකක් හදනවා. Docker මේ layers cache කරනවා. ඊළඟ build එකේදී, Docker එක instruction එකකට කලින් build එකේ තිබ්බ cache එකක් තියෙනවද කියලා බලනවා. තිබ්බොත්, ඒ layer එක ආයේ build කරන්නේ නැතුව cache එකෙන් ගන්නවා. මේකෙන් build time එක ගොඩක් අඩු වෙනවා.

මේ caching එකෙන් උපරිම ප්‍රයෝජන ගන්න නම්, Dockerfile එකේ නිතර වෙනස් නොවන commands (dependencies install කරන එක වගේ) උඩින්ම තියන්න ඕන. නිතර වෙනස් වන commands (application code copy කරන එක වගේ) යටින් තියන්න ඕන.

අපි කලින් දුන්න Node.js example එකේදී COPY package*.json ./ කරලා npm install කරන්නේ ඊට පස්සේ. ඒ කියන්නේ, අපේ package.json එක වෙනස් නොවුණොත්, npm install command එකේ layer එක cache එකෙන් ගන්නවා. මේකෙන් අපේ build time එක ගොඩක් අඩු වෙනවා.

Multi-stage Builds: Image Size එක තවත් අඩු කරගමු

මේක Dockerfile optimization වල තියෙන සුපිරිම trick එකක්! Multi-stage builds පාවිච්චි කරලා අපිට Docker image එකක final size එක ගොඩක් අඩු කරගන්න පුළුවන්. මේකෙන් වෙන්නේ, අපි build process එකට අවශ්‍ය dependencies (compilers, build tools, dev libraries) ටික මුලින්ම පාවිච්චි කරලා, final image එකට අවශ්‍ය production artifacts විතරක් copy කරන එකයි.

උදාහරණයක් විදියට, React application එකක් build කරන්න Node.js runtime එක සම්පූර්ණයෙන්ම ඕන. හැබැයි build කරලා ඉවර වුණාට පස්සේ, application එක serve කරන්න Nginx වගේ lightweight web server එකක් නැත්නම් සරල static file server එකක් විතරක් ඇති.

ප්‍රායෝගික උදාහරණයක්: React Application එකක් සඳහා Multi-stage Build එකක්

අපි හිතමු අපිට React app එකක් තියෙනවා කියලා. ඒක build කරලා, Nginx එකක් හරහා serve කරමු.

# Stage 1: Build the React application
FROM node:18-alpine AS builder

WORKDIR /app

# Copy package.json and install dependencies
COPY package*.json ./
RUN npm install

# Copy the rest of the application code
COPY . .

# Build the React application
# This will create a 'build' folder with static files
RUN npm run build

# Stage 2: Serve the application with Nginx
FROM nginx:alpine

# Copy Nginx configuration (optional, for custom configs)
# If you have a custom nginx.conf, create it in your project root
# COPY nginx.conf /etc/nginx/nginx.conf

# Remove the default Nginx index.html and put our React app's build files
COPY --from=builder /app/build /usr/share/nginx/html

# Expose port 80 for Nginx
EXPOSE 80

# Command to run Nginx
CMD ["nginx", "-g", "daemon off;"]

මේ Dockerfile එකේ වෙන්නේ මොකක්ද?

  1. මුලින්ම, node:18-alpine image එක පාවිච්චි කරලා React app එක build කරනවා. මේ stage එකට builder කියලා නමක් දීලා තියෙනවා.
  2. npm install කරලා, npm run build කරලා production-ready static files ටික හදනවා. මේ stage එකේදී Node.js runtime එක, npm packages වගේ ගොඩක් දේවල් තියෙනවා, ඒක ලොකු image එකක්.
  3. දෙවෙනි stage එක පටන් ගන්නේ nginx:alpine කියන පුංචි image එකෙන්.
  4. COPY --from=builder /app/build /usr/share/nginx/html කියන command එකෙන් අපි කරන්නේ, පළවෙනි stage එකේ (builder) හැදූ /app/build folder එකේ තියෙන static files ටික, දෙවෙනි stage එකේ Nginx web server එක serve කරන /usr/share/nginx/html folder එකට copy කරන එකයි.
  5. මේකෙන් වෙන්නේ final image එකට Node.js runtime එකේ හෝ build tools වල කිසිම දෙයක් copy වෙන්නේ නැති එක. අපිට අවශ්‍ය Nginx සහ අපේ React app එකේ static files විතරයි. මේකෙන් final image size එක ගොඩක් අඩු වෙනවා.

මේක build කරන්න කලින් වගේම:

docker build -t my-react-app .

Run කරන්න:

docker run -p 80:80 my-react-app

දැන් ඔයාලගේ React app එක http://localhost/ එකෙන් බලන්න පුළුවන්!

Dockerfile Security සහ Advanced Topics: ආරක්ෂිතව වැඩ කරමු

Containers පාවිච්චි කරනවා කියන්නේ security ගැන හිතන්නේ නැතුව ඉන්න පුළුවන් කියන එක නෙවෙයි. ආරක්ෂිත Docker images හදන එක ගොඩක් වැදගත්.

Running as Non-Root User: Least Privilege Principle එක

ගොඩක් Docker images default විදියට root user විදියට commands execute කරනවා. හැබැයි මේක security risk එකක්. Container එකෙන් එලියට පැනලා (container escape) host machine එකට attack කරන්න පුළුවන් අවස්ථා තියෙන්න පුළුවන්. ඒ නිසා, application එක run කරන්න root access ඕන නැත්නම්, non-root user කෙනෙක් විදියට run කරන එක තමයි හොඳම practice එක.

මේකට USER instruction එක පාවිච්චි කරන්න පුළුවන්:

FROM node:18-alpine

# Create a non-root user
RUN addgroup --system appgroup && adduser --system --ingroup appgroup appuser

WORKDIR /usr/src/app

COPY package*.json ./
RUN npm install
COPY . .

# Change the user to 'appuser'
USER appuser

EXPOSE 3000
CMD ["npm", "start"]

මේකෙන් වෙන්නේ npm start command එක appuser කියන non-root user කෙනෙක් විදියට execute වෙන එකයි. node:alpine වගේ images වලට default non-root user කෙනෙක් ඉන්න පුළුවන්, එහෙම නැත්නම් මේ වගේ අලුත් user කෙනෙක් හදාගන්න පුළුවන්.

Vulnerability Scanning: Images වල ආරක්ෂාව තහවුරු කරමු

අපි පාවිච්චි කරන base images වල, අපි install කරන dependencies වල security vulnerabilities (දුර්වලතා) තියෙන්න පුළුවන්. මේවා detect කරන්න image scanners පාවිච්චි කරන්න පුළුවන්.

  • Trivy: මේක open-source tool එකක්. Image layers scan කරලා, OS packages, programming language dependencies වල තියෙන vulnerabilities identify කරනවා.
  • Docker Scout: Docker Desktop එක්ක එන tool එකක්.
  • Snyk, Aqua Security: වගේ commercial tools තියෙනවා.

උදාහරණයක් විදියට Trivy පාවිච්චි කරන විදිය:

trivy image my-node-app:latest

මේකෙන් image එකේ තියෙන vulnerabilities report එකක් ලැබෙනවා. මේවා analyze කරලා අවශ්‍ය විදියට fix කරන්න පුළුවන් (e.g., base image එක update කිරීම, dependency versions update කිරීම).

Environment Variables (ENV), Ports (EXPOSE), Volumes (VOLUME)

  • ENV: Environment variables define කරන්න පාවිච්චි කරනවා. මේවා application එකට runtime එකේදී අවශ්‍ය settings provide කරන්න පාවිච්චි කරනවා. (e.g., ENV NODE_ENV=production).
  • EXPOSE: Container එක run කරන port එක describe කරනවා. මේක documentation purpose එකට වගේම, Docker network settings වලටත් වැදගත්. (e.g., EXPOSE 80).
  • VOLUME: Container එකේ data persistence කරන්න පාවිච්චි කරනවා. Container එක නැති වුණත්, volume එකේ data ටික තියෙනවා. (e.g., VOLUME /data).

Health Checks (HEALTHCHECK): Container එක ඇත්තටම ජීවත්ව ඉන්නවද?

Kubernetes වගේ orchestrators වලදී container එකක් alive ද කියලා බලන්න health checks ගොඩක් වැදගත්. HEALTHCHECK instruction එකෙන් container එකක් ඇතුලේ command එකක් execute කරලා, ඒ command එකේ exit code එක මත container එකේ health status එක define කරන්න පුළුවන්.

HEALTHCHECK --interval=30s --timeout=10s --retries=3 \
  CMD curl --fail http://localhost:3000 || exit 1

මේකෙන් කියන්නේ, හැම තත්පර 30කටම සැරයක් http://localhost:3000 එකට curl request එකක් යවන්න කියලා. තත්පර 10ක් ඇතුලත response එකක් නොලැබුණොත්, නැත්නම් error එකක් ආවොත්, ඒක fail. තුන් පාරක් fail වුණොත් container එක unhealthy කියලා mark කරනවා.

ප්‍රායෝගික Tip: Hadolint සමග Dockerfile Linting

අපි code ලියද්දී ESLint වගේ linters පාවිච්චි කරනවා වගේම, Dockerfiles වලටත් linters තියෙනවා. Hadolint කියන්නේ හොඳම Dockerfile linter එකක්. මේකෙන් Dockerfile best practices follow කරනවද, common errors තියෙනවද කියලා බලලා අපිට warnings සහ errors දෙනවා.

ඔයාලගේ CI/CD pipeline එකට Hadolint එකතු කරගන්න එක ගොඩක් හොඳ practice එකක්. මේකෙන් clean, efficient, secure Dockerfiles ලියන්න පුළුවන් වෙනවා.

hadolint Dockerfile

මේ command එක දුන්නාම ඔයාලගේ Dockerfile එක scan කරලා suggestions දෙනවා.

අවසන් වශයෙන්: Dockerfile Mastery වෙත ගමන් කරමු!

ඉතින් යාලුවනේ, අපි මේ tutorial එකෙන් Dockerfiles වල මූලිකාංග වලින් පටන් අරන්, optimization techniques (multi-stage builds, .dockerignore), සහ security best practices (non-root users, vulnerability scanning) දක්වා ගොඩක් දේවල් කතා කළා.

මේ දැනුමෙන් ඔයාලට පුළුවන් lean, efficient, සහ secure Docker images හදන්න. මේක ඔයාලගේ application deployments වලට ගොඩක් වැදගත් වෙනවා. මතක තියාගන්න, හොඳ Dockerfile එකක් කියන්නේ හොඳ software delivery pipeline එකක පදනමයි.

මේ ඉගෙන ගත්ත දේවල් තමන්ගේ project වලට apply කරන්න. පොඩි project එකකින් පටන් අරන්, අත්හදා බලන්න. ප්‍රශ්න ආවොත්, Google කරන්න, Docker documentation එක බලන්න, Stack Overflow වගේ තැන්වල අහන්න.

මේ ලිපිය ගැන ඔයාලගේ අදහස්, ප්‍රශ්න, නැත්නම් මේකෙන් ඔයාලා ඉගෙන ගත්තු අලුත් දෙයක් පහත comments section එකේ දාන්න. අපි කතා කරමු! 💬

ඔයාලගේ DevOps ගමනට සුබ පතනවා! ජය වේවා! 🙏